PayPalProNew in 5.13+
Accepting payments on your site with PayPal is now supported. Setup is simpler than Stripe, though PayPal offers fewer configuration options.
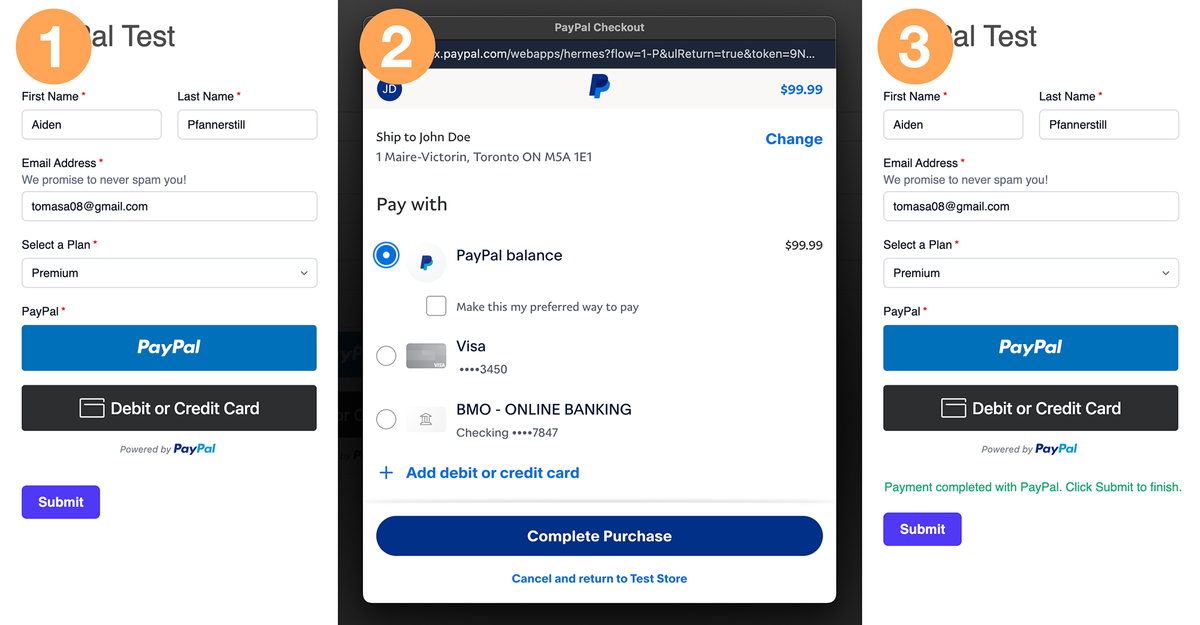
Payment Flow
- The customer fills out the form and selects either the PayPal or Debit or Credit Card button.
- If PayPal is selected, a popup appears where the customer can log into their PayPal account and pay using PayPal funds or linked accounts.
- Once payment is complete, the popup closes and the customer is returned to the Freeform form. They must then click the Submit button to finalize the form submission.
Compatibility
Uses a private app on v1 of the REST API.
Endpoints
Maps data to PayPal with the Popup Payment Flow via the Orders endpoint.
Does your project require something else? Contact Us
Setup Instructions
This guide assumes you already have a PayPal account.
Prepare Freeform
- Click on the PayPal integration in your Freeform control panel.
- Leave this page open.
Set Up PayPal
- Open another browser tab and log into your PayPal account.
- On the top menu, click Developers.
- On the next page, click Apps & Credentials.
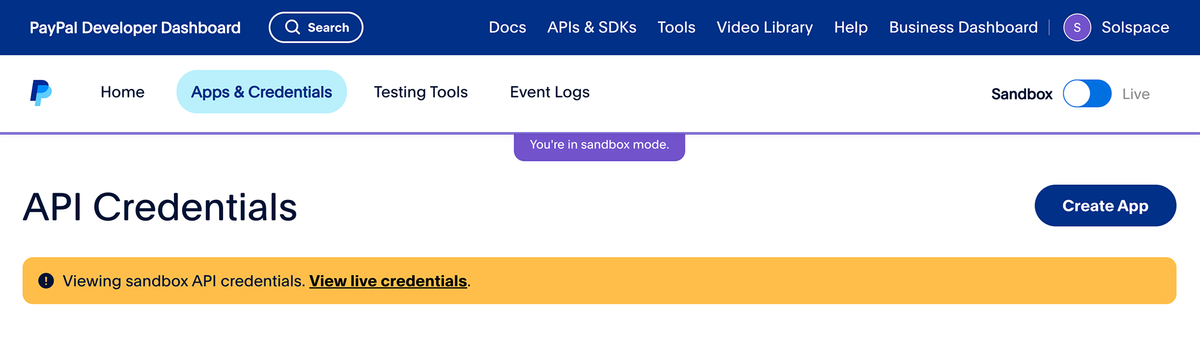
- Click the Create App button on the right.
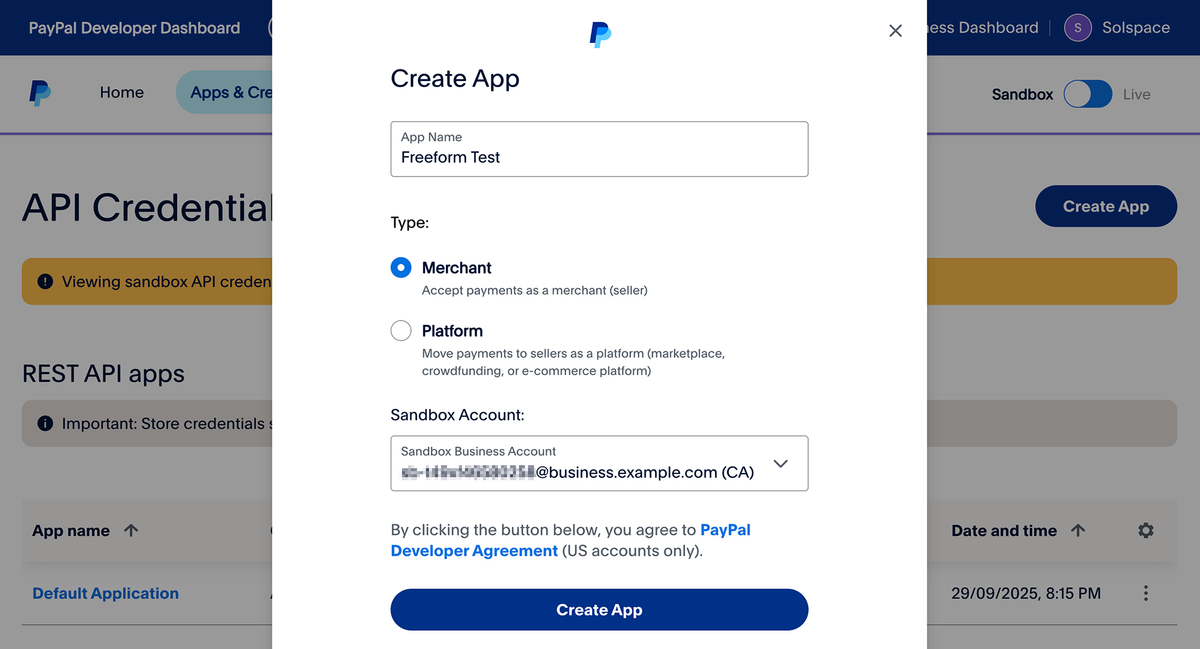
- Provide a name for the app.
- Choose Merchant for the type.
- Select a Sandbox Account.
- Click the Create App button.
- Once you're taken to the app's page, copy the Client ID and Secret Key 1 tokens.
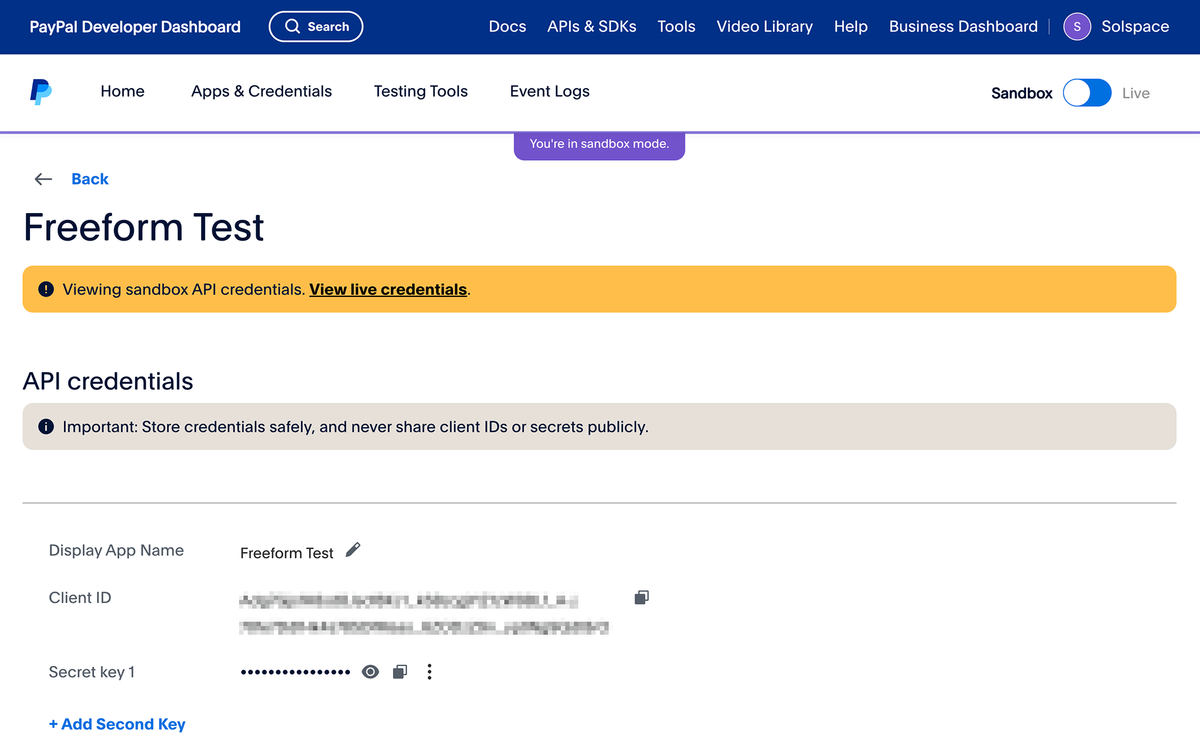
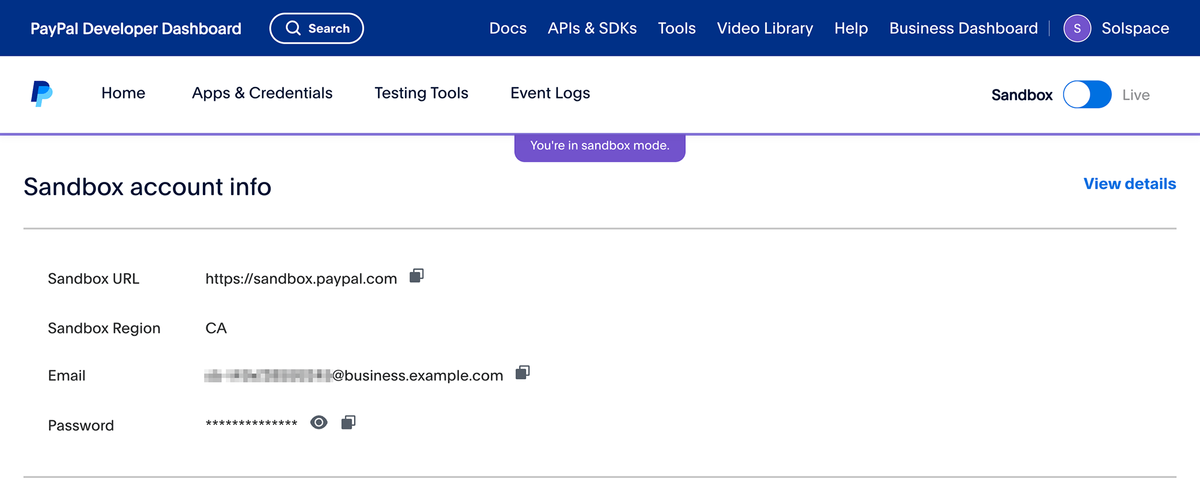
- Scroll down the page a little but and copy the Sandbox account Email and Password. You'll need these later for Sandbox testing.
Complete the Connection
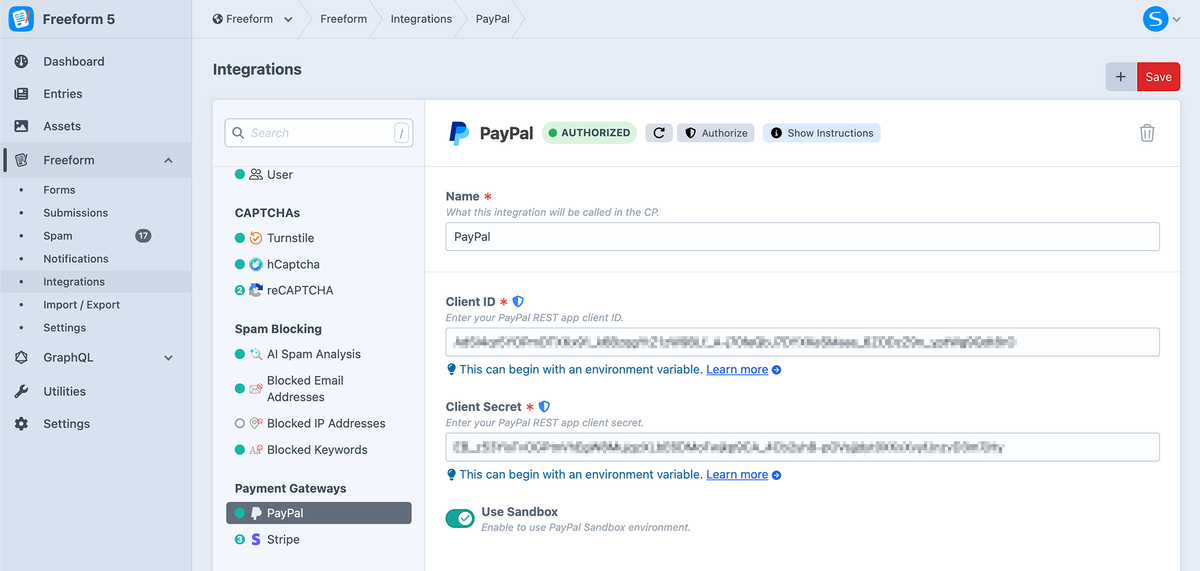
- Switch back to the PayPal integration inside Freeform, and paste the PayPal tokens into the Client ID and Client Secret settings.
- If you plan on testing the integration in sandbox mode (recommended), enable the Use Sandbox setting.
- Click the Save button.
- After the integration is saved, you should see an Authorize button at the top of the page.
- Click Authorize.
- If successful, the flag at the top will turn green and display Authorized.
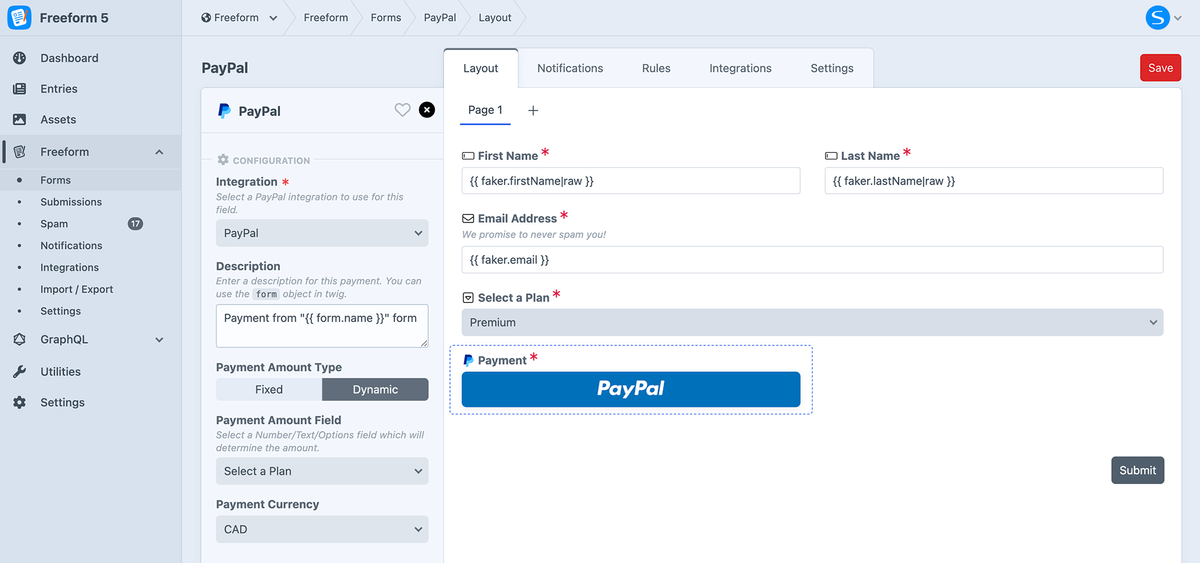
Configure the Form
To use this integration on your form(s), configure each form individually:
- Open the form in the form builder.
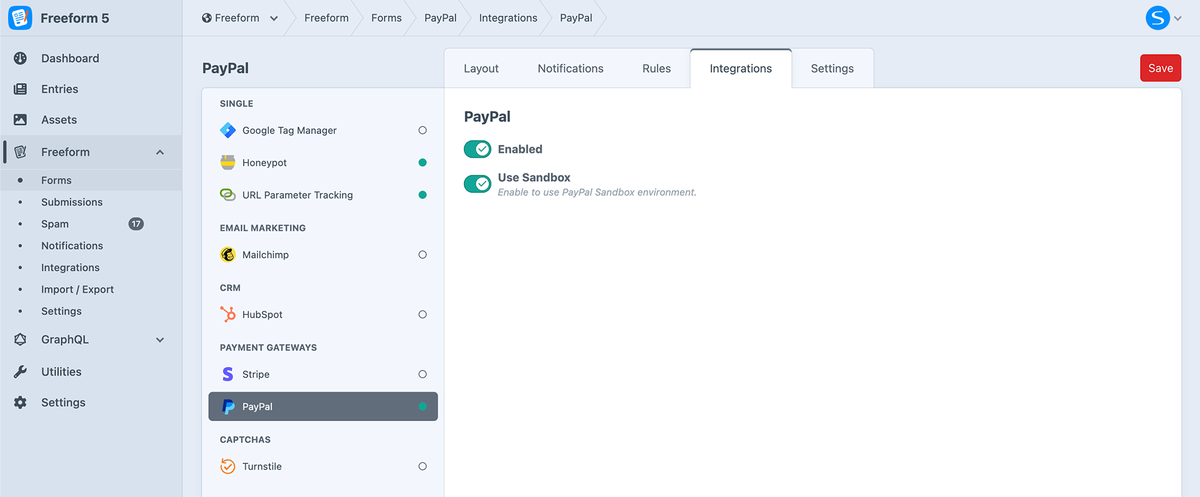
- Click the Integrations tab.
- Click PayPal in the list of available integrations.
- Toggle the Enable setting ON.
- Add a PayPal field to your form layout and configure as needed.
- Save the form.
Sandbox Testing
Testing PayPal button
Testing the PayPal button will require that you have a test PayPal account configured so you can log into it.
Go to the PayPal Developer area. Click on Testing Tools and then Sandbox Accounts.

A list of test accounts will be displayed to use for testing.
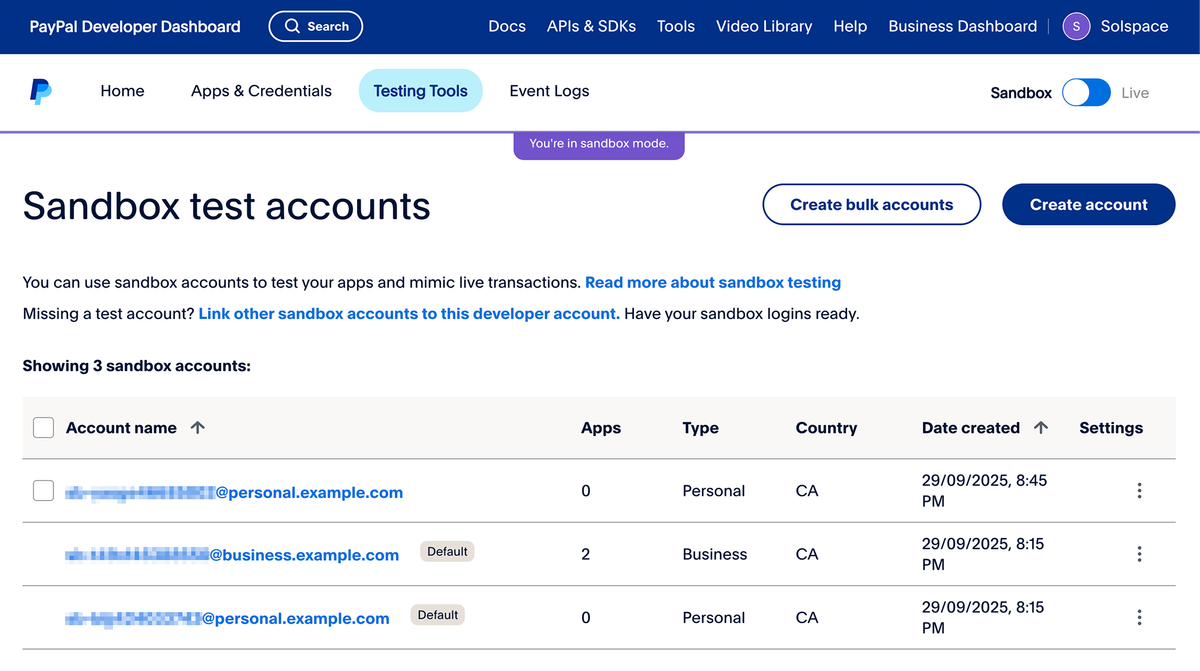
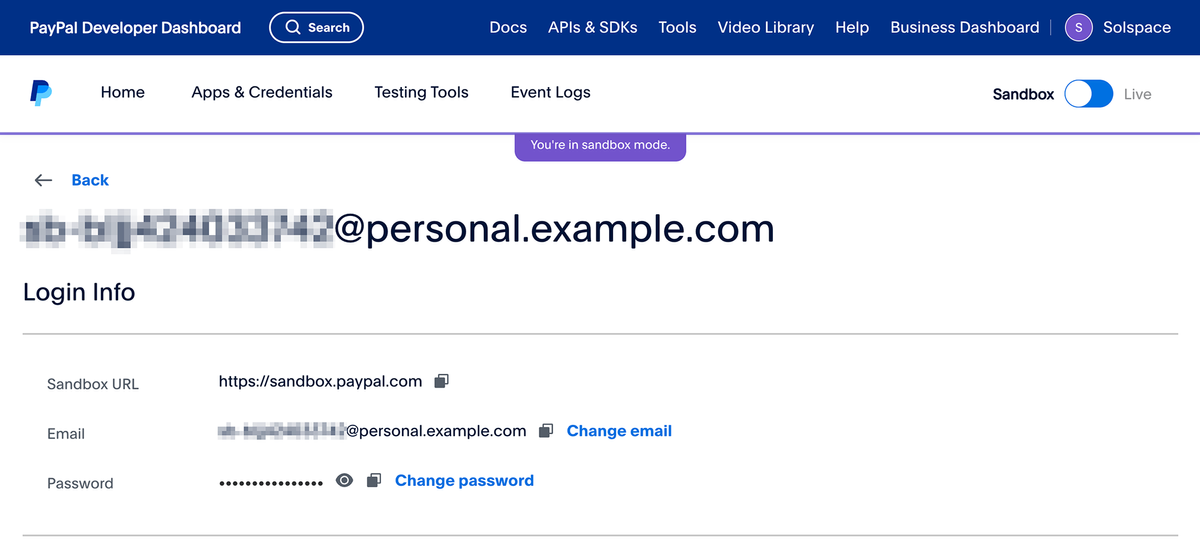
Click on one of the Personal test account types to reveal/copy the email and password login.
- Copy the email address and password.
- This will be used for PayPal testing on your site.
Switch back to your Craft site and open your form on the front end.
- Click the PayPal button. A popup will load.
- Log into PayPal with the Personal test account credentials you copied earlier.
- Complete the transaction.
Testing Debit or Credit Card button
Testing Debit or Credit Card button is a little more straight-forward.
- Click the Debit or Credit Card button. A series of form fields will load directly on the page.
- Use PayPal's credit card generator to create test credit card details.
- Complete the transaction.
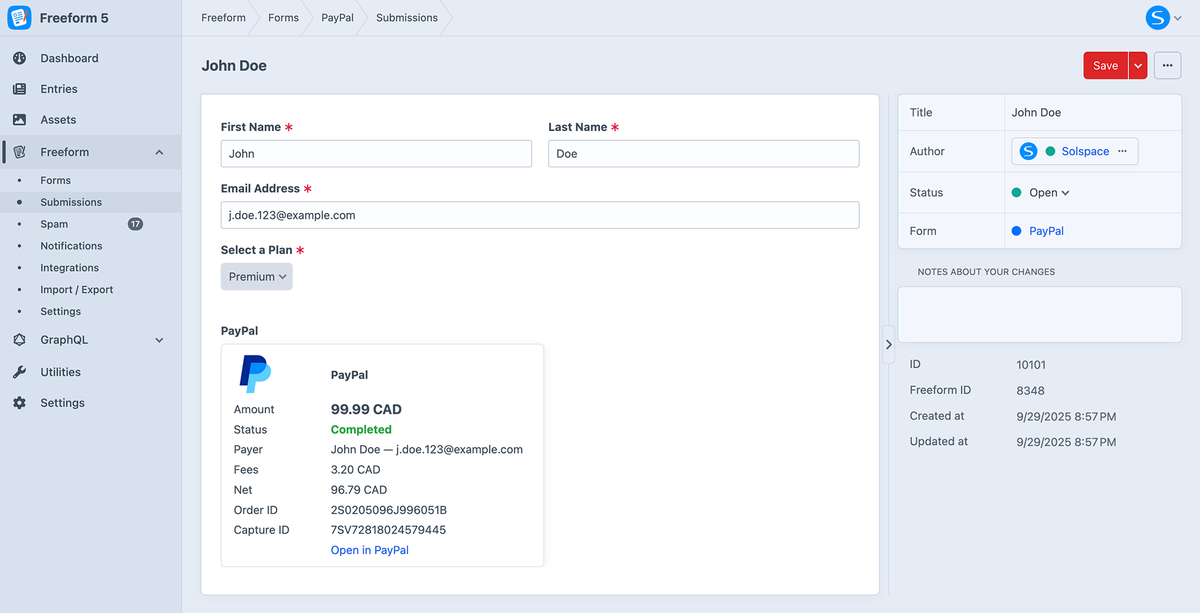
Payment Info in Submissions
To view PayPal payment information, you can click on any Freeform submission in the control panel:
Sandbox Area
Visit the PayPal Sandbox site and log in with the Sandbox Email and Password account credentials you saved earlier to view Sandbox transactions.