ElementsProRevised in 5.0+
Freeform allows you to connect and map Freeform submission data to other Craft Elements.
Overview
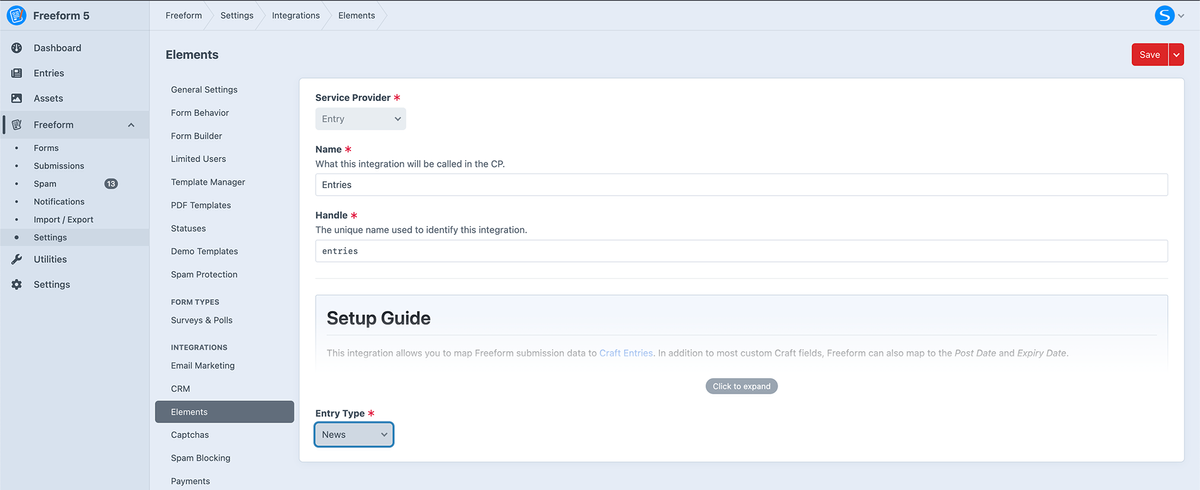
Freeform includes the ability to map submission data to create and edit other Craft elements, including Craft Entries, Craft Users and Calendar Events. Since Freeform already includes various other functionality such as spam protection, integrations, email notifications, Stripe payments and much more, this allows you to quickly create very powerful forms.
To use this feature, you set up integration(s) inside the Freeform settings area, and then configure them individually for each form you wish to use them on.
Map Twig code or TextNew in 5.0+
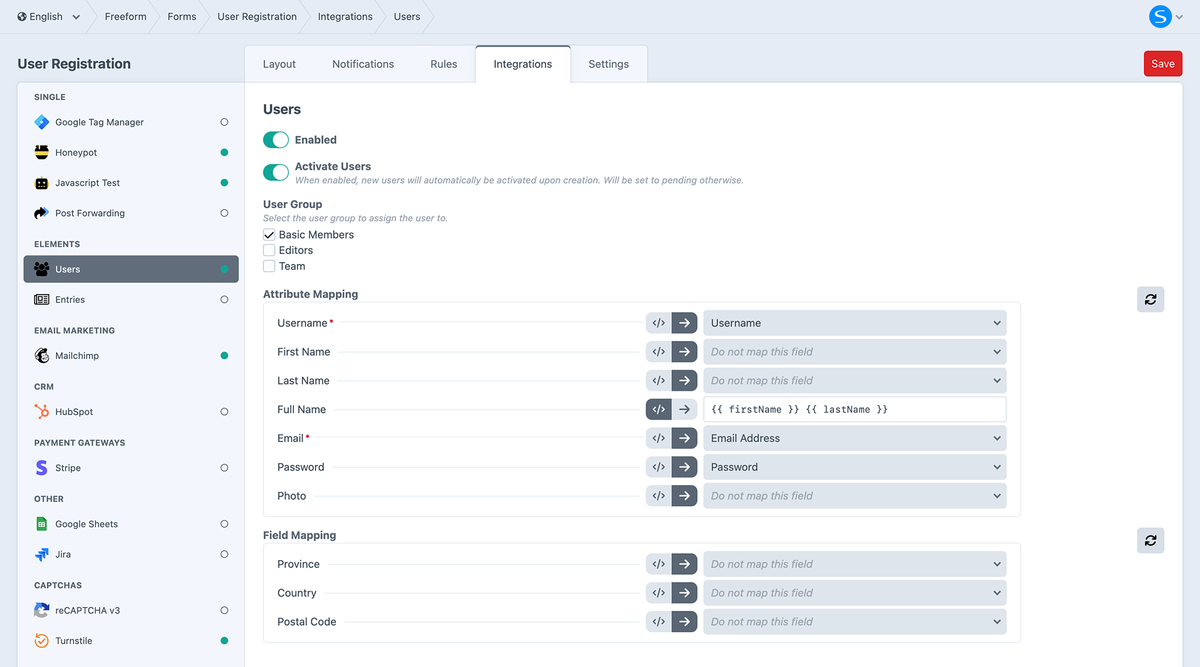
The configuration inside the form builder is very flexible and allows you to map a Freeform field or enter a value such as Twig code or hardcode a value. For example, if you have an element that contains a single field for customer name, e.g. Full Name, but your form contains two separate fields, e.g. First Name and Last Name, in the input fields you could specify a value of:
{{ firstName }} {{ lastname }}
For fields and settings that contain a boolean value, such as Enabled, you can map a boolean value such as true/false, yes/no, 1/0, etc.
Additionally, you can map from the Submission object and Form object. So things like Freeform submission ID, submission token, submission title, form ID, form handle and form name are all possible:
{{ submisson.id }}
{{ form.handle }}
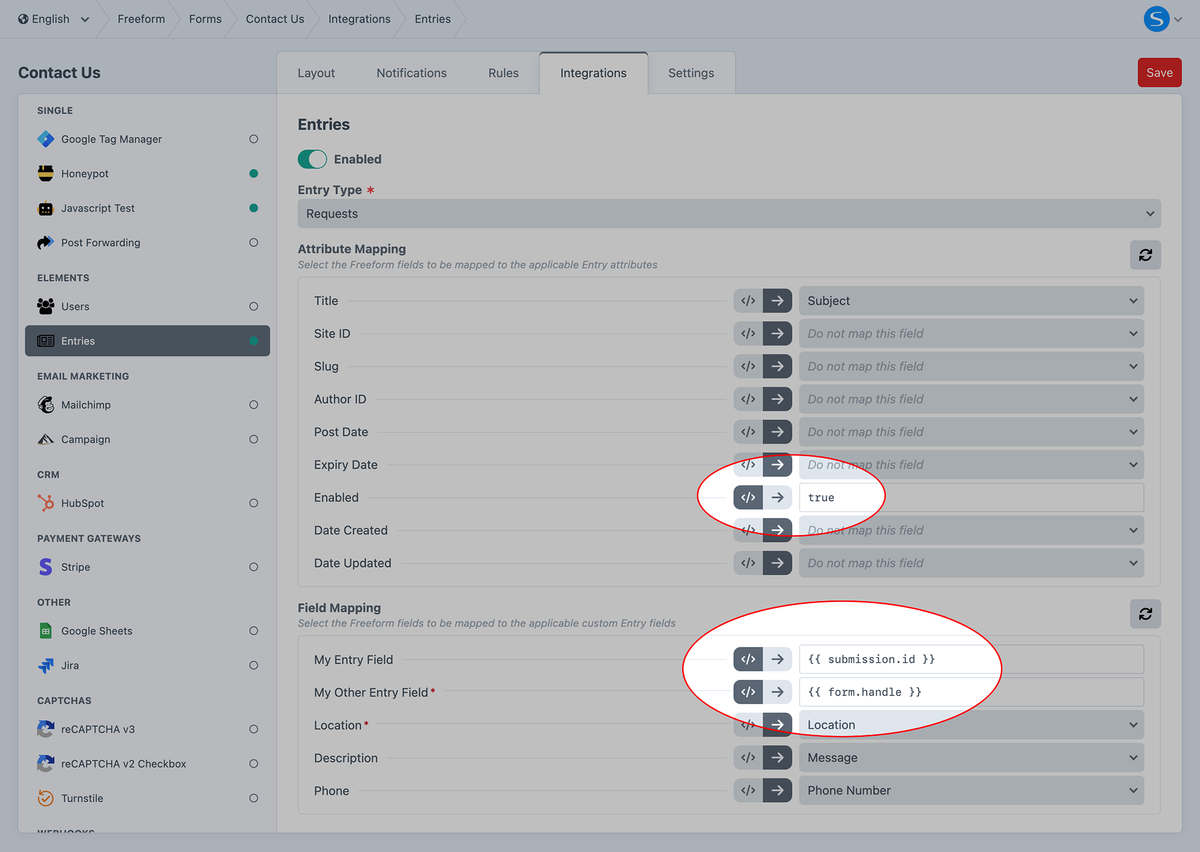
Craft Entries
This integration allows you to map Freeform submission data to Craft Entries. In addition to most custom Craft fields, Freeform can also map to the Post Date and Expiry Date.
Craft Users
This integration allows you to map Freeform submission data to Craft User, essentially creating a powerful User Registration form.
This feature requires a Craft Pro license in order to work, as Users are a Craft Pro feature.
Calendar Events
This integration supports mapping to Solspace Calendar Events, providing you have the Calendar plugin installed. This works similarly to the Craft Entries integration, but also allows you to specify Start Date (and Time), End Date (and Time) and if the event is All Day or not. Advanced settings like repeat rules are currently not available.
Mapping Guidelines
While most traditional fields that are similar to each other should be able to correctly map to each other, there are some obvious limitations with field mapping as Freeform does not have anything like a Matrix field, etc.
- Freeform Checkbox fields can be mapped to Craft's Checkbox field (with just 1 option) as well as the Lightswitch field. Just make sure the value and casing in Freeform matches.
- Craft Date/Time fields should be mapped to with the following format:
Y-m-d H:i:s(akaYYYY-MM-DD HH:MM:SSor justYYYY-MM-DDfor Freeform Date & Time fields using Date only). - Freeform Table fields cannot be mapped to other Elements, nor can Freeform fields be mapped to Table fields in other elements.
- Freeform File Upload fields can be mapped to regular Craft Assets fields, as well as the Users Photo field.
- When mapping to Element Relation fields, ensure that you're passing the element ID as the option value.
- When mapping to sections with autogenerated titles, make sure to set the fields you're using to map to Craft fields that populate the title field to be required on Freeform's end. Otherwise the submission likely won't generate the Craft Entry if data for the title is missing.
- Freeform attempts to route Element-based errors to the mapped fields. In some cases you might see more than 1 error for a Freeform field because of this. Some examples:
- If the field that is mapped to the Entry Title field is empty, validation will mention that "a title is required", etc. Entry Slug errors are suppressed for Freeform errors so as not to confuse users.
- If the fields that are mapped to essential fields like username, email and password are empty, validation will mention that "Email cannot be blank", etc.
- If using multipage forms, any element fields that are not mapped to on the current page will be validated at the end of the form instead.Improved in 5.5.2+
- If the submission is blocked or flagged as spam, there's currently no way to retroactively map submission data to the element. The best option for avoiding this would be using Captchas instead of Keyword Blocking, etc.
Email Notification Templates
When using the Elements integration, you can use the element object to display data from the newly created Craft Element such as ID, title, username, etc.
For example (but not limited to):
element.idwill return the ID of the newly created Elementelement.titlewill return the title of the newly created Craft Entryelement.usernamewill return the username of the newly created Craft Userelement.cpEditUrlwill return the edit URL in the control panel for the newly created Element.
If you have more than one element integration for the form, you can use either:
{% for item in element %}{{ element[0].id }},{{ element[1].id }}, etc
Examples
Basic Example
A basic example of when just one element integration exists for the form:
{% if element is defined %}
  <ul>
    <li>{{ element.id }}</li>
    <li>{{ element.title }}</li>
    <li>{{ element.cpEditUrl }}</li>
  </ul>
{% else %}
  No element data
{% endif %}
More than one Element integration
An example of when two element integrations are configured for the form. In this case, the first element connection is a User element ([0]) and the second is an Entry element ([1]):
{% if element is defined %}
  <ul>
    <li>User ID: {{ element[0].id }}</li>
    <li>Username: {{ element[0].username }}</li>
    <li>Entry ID: {{ element[1].id }}</li>
    <li>Entry Title: {{ element[1].title }}</li>
  </ul>
{% else %}
  No element data
{% endif %}
Iterating over multiple Element integrations
A better, more reliable approach to handle multiple element integrations configured for the form would be to iterate over element.
If you are working with multiple types of elements, you may need to access certain properties differently:
{% if item.title|length %}will work with a safe property liketitle.{% if item['username'] is defined and item['username'] %}is necessary when trying to access a User element-specific property likeusername.{{ item.className }}will display the element type. This will generate a value likecraft\elements\Entry.- If you wish to further clean that up and just get base name like
UserorEntry, you can use Twig's string filters:{{ item.className|split('\\')|last }}.
- If you wish to further clean that up and just get base name like
{% if element is defined %}
  <ul>
  {% for item in element %}
    <li>{{ item.id }}</li>
    <li>{{ item.className|split('\\')|last }}</li>
    {% if item.title|length %}
      <li>{{ item.title }}</li>
    {% endif %}
    {% if item['username'] is defined and item['username'] %}
      <li>{{ item['username'] }}</li>
    {% endif %}
  {% endfor %}
  </ul>
{% else %}
  No element data
{% endif %}
Editing Elements
Please be aware that the Element Editing feature opens up a wide variety of possibilities, including ones that could pose a risk to your data and User accounts. When used cautiously and correctly, this feature is secure and is of no risk. Completely read the documentation below, and always carefully think through your flow and test it thoroughly. When in doubt, do not hesitate to contact Solspace support for clarity about the approach you're taking and if there may be any issues or risks with it.
Overview
Freeform allows you to edit/update existing Craft elements (Entries, Users and Calendar Events currently) by adding one extra step - including the elementId parameter in your form. It works by feeding a Freeform form an element ID.
If you already have a Freeform form to handle creating Craft elements (e.g. User Registration), it's very likely you'll need to create a new form (or duplicate an existing form as a starting point) for the form to update Craft elements (e.g. Edit Profile). When you create a new form, be sure to to set up an Element integration along with field mapping, and then in your template, add the elementId parameter to your form.
Important Notes
- Element editing does not offer any authentication to verify the current user is the author of Craft Entries and Calendar Events. We urge you to always wrap these forms in a check to make sure the user is a logged in Admin only (or specific checks on certain user groups).
- User account element editing is restricted to the following logic:
- Logged in users can only modify their own account.
- Logged in Admins can modify any account.
- Logged in users / groups with the Edit users Craft permission may modify other user accounts.
- There are currently some limitations with User account editing:
- Users cannot be asked to enter their current password to update their profile.
- Users currently can update their email address, but there will currently be no additional validation from Craft (such as having the user verify their email address, etc).
A future version may address this. - Users may see redundant error messages for fields like Email Address, as some of Craft's validation will be show up in addition to Freeform validation.
- If you have users / groups with the Edit users Craft permission but do not want them editing users on the front end, you'll need to use template conditionals to prevent it (in the event you provide a dynamic way of doing so for Admins, e.g. URI segments).
- For self-serve "profile update" forms, you should be using something like
elementId: currentUser.id(see docs example below). - Users currently cannot have their user group(s) changed when they are updated through a Freeform form with Elements integration.
A future version may address extra settings and handling to accomodate user group changes.
Examples
Here are some examples of what this might look like for you...
Allow the currently logged in user to update their own User profile
{% if currentUser %}
    <h2>Update Your Profile</h2>
    {{ freeform.form("editCraftUsers").render({
        elementId: currentUser.id
    }) }}
{% endif %}
Display a list of Craft Entries and link them to an Edit form
{% set segment2 = craft.app.request.segment(2) %}

{# SAFETY FIRST - LOGGED IN ADMINS ONLY #}
{% if (currentUser) and (currentUser.admin) %}

    <h2>Craft Entries</h2>
    {% set entries = craft.entries()
        .section('mySection')
        .limit(4)
    %}
    <ul>
    {% for entry in entries.all() %}
        <li>
            <a href="{{ siteUrl }}edit-entry/{{ entry.id }}/">{{ entry.title }}</a>
        </li>
    {% endfor %}
    </ul>

    {% if segment2 %}
        <hr />
        {{ freeform.form("editCraftEntries").render({
            elementId: segment2
        }) }}
    {% endif %}

{% endif %}
You could also use a conditional like this to perform a check on users assigned to a specific group:
{% if currentUser.isInGroup('editors') %}{% endif %}