MollieProNew in 5.13+
Accepting payments on your site with Mollie is now supported. Setup is simpler than Stripe, though Mollie offers fewer configuration options.
Compatibility
- Uses Mollie Payments on
v2of the REST API. - Supports one-time payments.
- A publicly accessible site is required to fully test or use Mollie.
How It Works
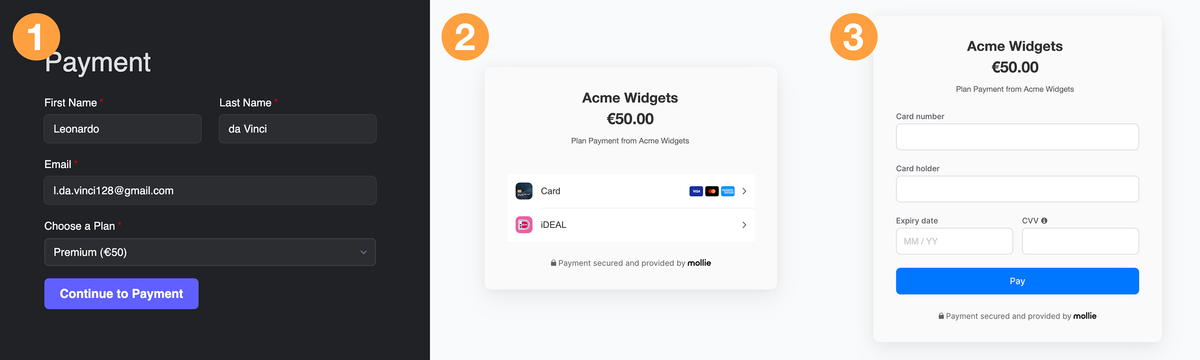
- Frontend: no Mollie field is presented to the user when viewing the form. When the user submits the form, the page redirects to a Mollie-hosted page to accept the payment.
- Backend: Freeform creates a Mollie payment and returns the user to the configured success/failure URL.
- Submission: After the payment is completed and the form submission is saved, Freeform links the payment to the submission so it appears in the control panel.
Does your project require something else? Contact Us
Setup Instructions
This guide assumes you already have a Mollie account.
1
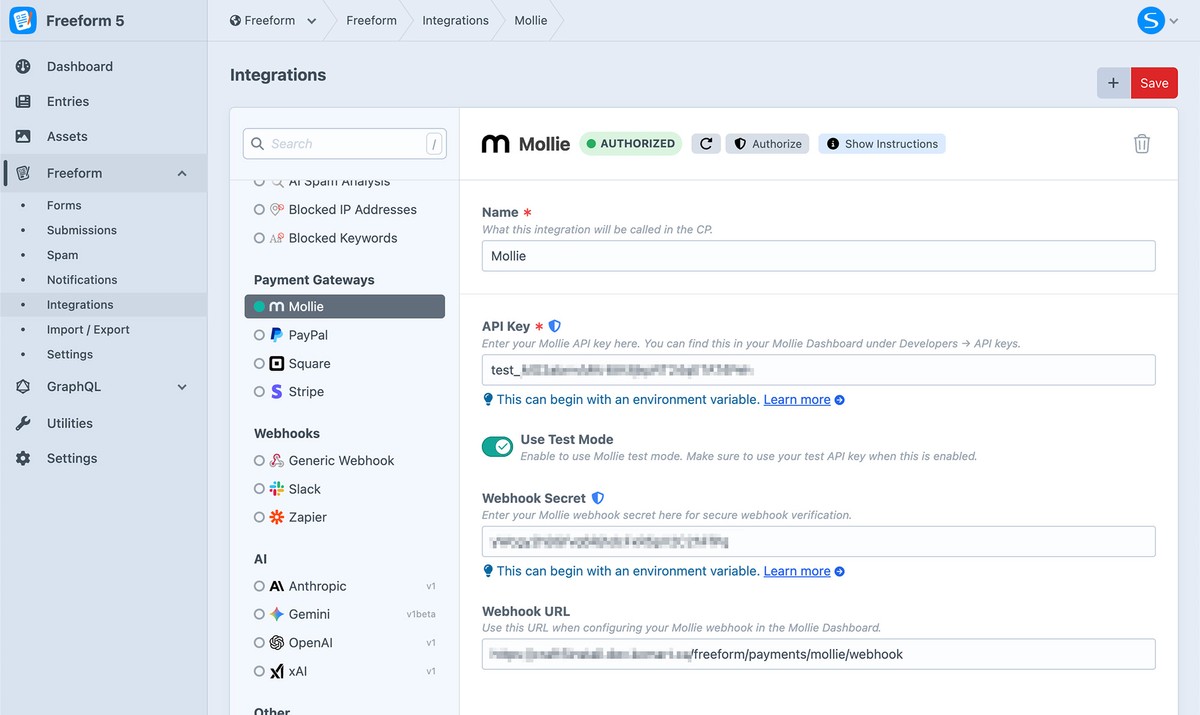
Prepare Freeform
- Click on the Mollie integration in your Freeform control panel.
- Copy the value inside the Webhook URL setting.
- Leave this page open.
2
Set Up Mollie
Open another browser tab and log into your Mollie account:
- In the top menu, click on the Browse menu and then click Developers.
- On the API Keys tab:
- Copy the Test API Key on the page.
- On Webhooks tab:
- Click the Create webhook button.
- On next page, paste in your Webhook URL from Freeform into the Webhook URL setting.
- Fill out rest of settings as necessary.
- For Payload style, choose Snapshot.
- For Event types, choose Payment Link API.
- Click the Create button at the bottom of the page.
- A modal window will load with a Secret Token.
- Copy that token and close the modal.
3
Complete the Connection
- Switch back to the Mollie integration inside Freeform.
- Paste the Mollie Test API Key into the API Key setting in Freeform.
- Paste the Mollie Webhook Secret token into the Webhook Secret setting in Freeform.
- If you plan on testing the integration in test mode (recommended), enable the Use Test Mode setting.
- Click the Save button.
- After the integration is saved, you should see an Authorize button at the top of the page.
- Click Authorize.
- If successful, the flag at the top will turn green and display Authorized.
4
Configure the Form
To use this integration on your form(s), configure each form individually:
- Open the form in the form builder.
- Click the Integrations tab.
- Click Mollie in the list of available integrations.
- Toggle the Enable setting ON.
- Add a Mollie field to your form layout and configure as needed.
- Save the form.
5
Testing
- Open your form on the front end.
- Fill out the form as usual.
- To create test payments, refer to Mollie's Testing Payments docs for test card numbers.
- Complete the transaction.