


Creating User Registration Forms Pro
Freeform allows you to easily create and manage beautiful User registration forms in only minutes! Using the Elements integration, you can enhance your forms with 1-click to enable AJAX, set conditional field logic to show and hide fields, confirm emails and passwords, add Captchas and send custom email notifications! Pair with Payments and you can even accept one time or recurring subscription payments for membership! Leave the heavy lifting to Freeform!
Instructions
TIP
This feature requires a Craft Pro license in order to work, as Users are a Craft Pro feature.
- Go to the Elements integration area in the Freeform settings (Freeform → Settings → Elements).
- Click on the New Integration button at the top right.
- Select User for the Service Provider setting.
- Provide a name for the integration, e.g.
User Registration. - Configure the default settings (these can be overrided for each form inside the form builder):
- User Group - select the user group to assign new users to.
- Active - toggle whether the new user account should be active or not.
- Send Activation Email - whether to send an activation email to the user (if Active is toggled off).
- Save the integration.
- Create a new form in Freeform. We'll call it
User Registration. - Add the fields to the form layout. You can set things up however you like, but keep in mind that some fields are required. A common registration form might have the following (but not limited to):
- First Name
- Last Name
- Username
- Email Address
- Confirm Email Address
- Use the Confirm field type to set this up.
- Password
- Use the Password field type for this. It will NOT save any password data in the Freeform database tables.
- Confirm Password
- Use the Confirm field type to set this up.
- Photo
- Use a Freeform File Upload field type to set this to map to the User Photo.
- A checkbox to agree to terms and conditions
- Click on the Integrations tab in the form builder.
- Find your User element integration in the list on the left and click on it.
- Toggle ON the Enabled setting.
- The default settings will show. If you need to override any of these, you can do so here:
- User Group - select the user group to assign new users to.
WARNING
All user groups (including ones with access to CP) will show here. Use extreme caution if allowing users to self-register for accounts that can access the Craft control panel!
- Active - toggle whether the new user account should be active or not.
- Send Activation Email - whether to send an activation email to the user (if Active is toggled off).
- If you'd like new users created from Freeform submissions to not yet be activated (and receive the Craft User Activation email) when submitted, toggle on the Active setting. If you'd like to manually approve registrations (please see warning below) and suppress the email notification to users, toggle off the Send Activation Email setting.
DANGER
When using a manual Admin approving approach, it's still possible for a Pending user to circumvent this process if a Forgot Password form is available to them, as Craft currently does not have a concept of Admin approval only, and allows users to verify their account either through an email notification or using a Forgot Password form.
- If you wish to have users automatically logged in upon success, please be sure to use the
'autoLoginAfterAccountActivation' => true,config item in your Craft config file, and toggle on the Active setting.
- If you'd like new users created from Freeform submissions to not yet be activated (and receive the Craft User Activation email) when submitted, toggle on the Active setting. If you'd like to manually approve registrations (please see warning below) and suppress the email notification to users, toggle off the Send Activation Email setting.
- User Group - select the user group to assign new users to.
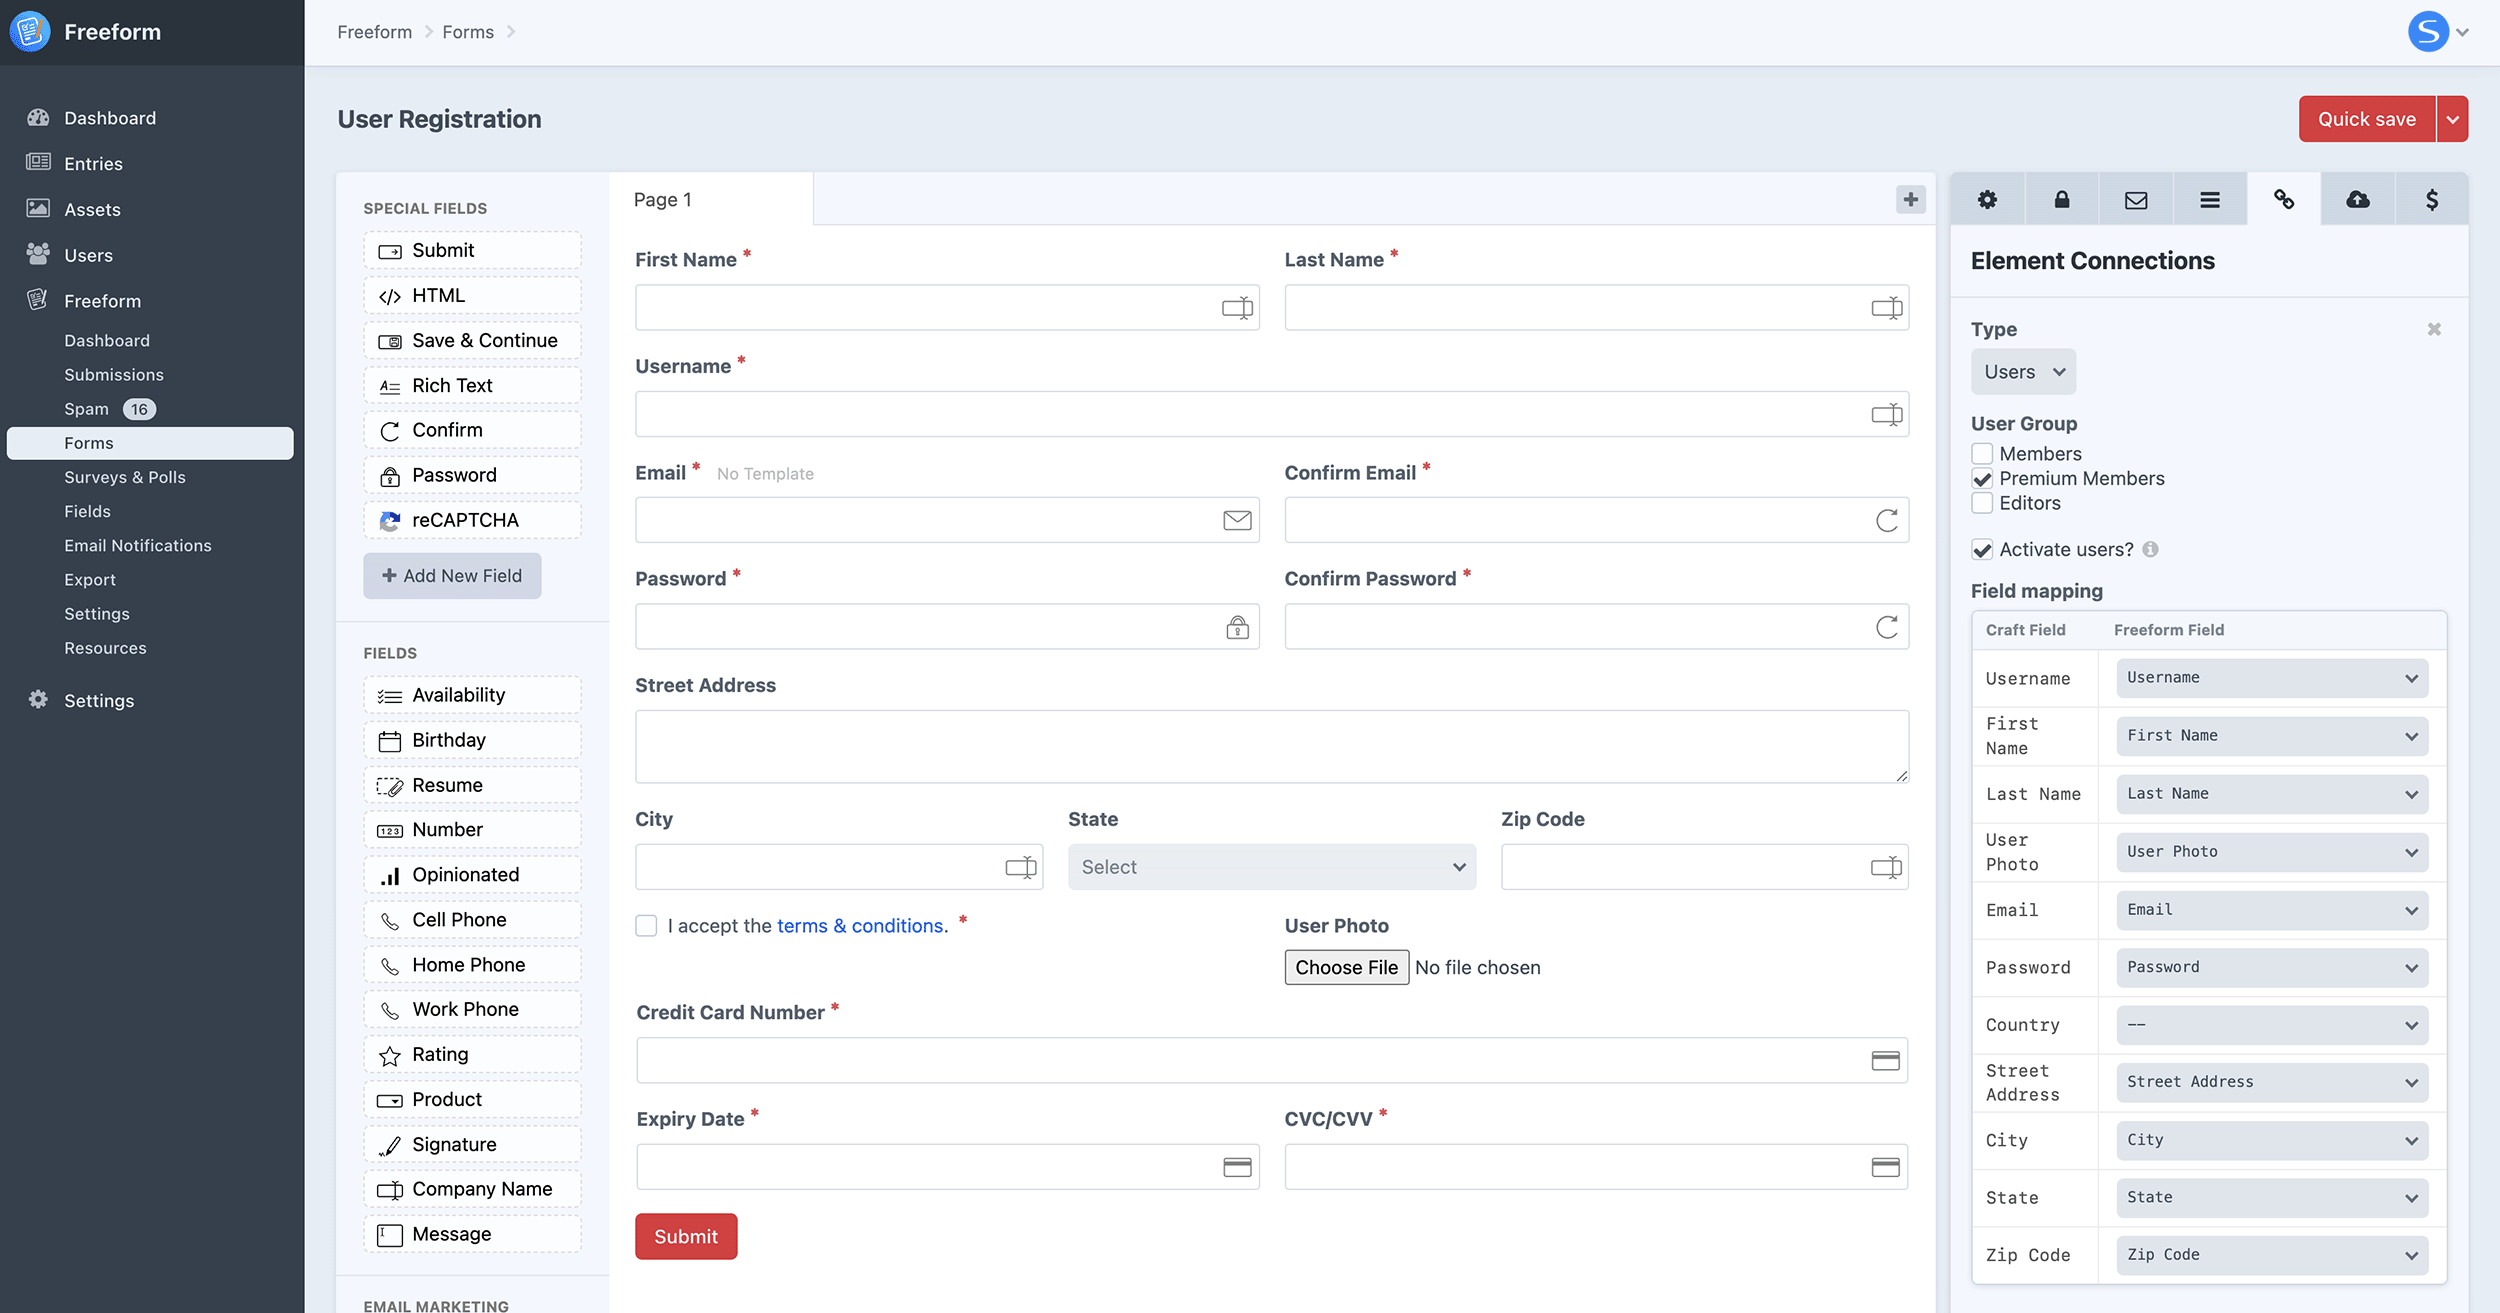
- In the Attribute Mapping table, map your Freeform fields to the core Craft User fields.
- In the Field Mapping table, map your Freeform fields to your custom Craft User fields.
TIP
There are some obvious limitations with field mapping, as Freeform does not have anything like a Matrix or Table field, etc. Most traditional fields that are similar to each other should be able to correctly map to each other however.
Once that's all finished, you'll have something that looks like the screenshots above. Check out your form in the Freeform demo templates and see if everything works correctly.
TIP
Important Notes
- Freeform submissions can map to sections with autogenerated titles. Just make sure to set the fields you're using to map to Craft fields that populate the title field to be required on Freeform's end, otherwise the submission likely won't generate the Craft Entry if data for the title is missing.
- Freeform attempts to route User-based errors to the mapped fields. In some cases you might see more than 1 error for a Freeform field because of this. The fields that are mapped to essential fields like username, email and password will mention that "Email cannot be blank", etc.
- While multipage forms do appear to map correctly to users, you may see some slightly unusual behavior. For example, if you have your Password field placed in the second page, when submitting from the first page to the second page, the second page will highlight the field mapped to the Password field highlighted with an error. The whole process still works, but there's that visual issue.
- If the submission is blocked or flagged as spam, there's currently no way to retroactively map submission data to Users. The best option for avoiding this would be using Captchas.