A newer version of
Freeform
is available.
Try Freeform 5 now →
Constant Contact Integration Pro
This documentation page assumes you have read over the Email Marketing Integration Overview page. If you have not yet read it, please do so now. We assume that you have a Constant Contact account already, along with mailing list(s) already created. This integration requires that you have Freeform Pro. If you currently have Freeform Lite, you can purchase an upgrade to Freeform Pro.
TIP
In early 2022, Constant Contact announced changes to their API service. This is a change that breaks existing integrations, and requires an update to Freeform in order to fix the connection. For existing Constant Contact users (set up before 3.13.4), please see the special update instructions.
Compatibility
The Constant Contact integration includes support for mapping to most standard fields and custom fields.
Duplicate Check & Update
If a duplicate email address is found in Constant Contact, the profile data will be updated with the latest information submitted.
Setup Instructions
- Go to the Email Marketing section in Freeform Settings (Freeform > Settings > Email Marketing).
- Click the New Email Marketing Integration at the top right.
- Select Constant Contact from the Service Provider select dropdown.
- Enter a name and handle for the integration.
- In the Redirect URI field, a URL will be automatically populated for you. Do not change or adjust this.
- Copy the URL in the Redirect URI field to your clipboard.
- Leave this page open.
- Open up a new browser tab and go to Constant Contact's API My Applications website.
- Log into your Constant Contact account there.
- Go to the My Applications page (click at top nav menu).
- Click on the New Application button at top right.
- Enter a name for the application in the modal window that pops up, and click Save. Leave the other 2 settings as they are defaulted.
- On the next page, paste the value you copied from Freeform's Redirect URI field into the Constant Contact Redirect URI field.
- Fill out the rest of the form if you like, and then click the Save button at the top right.
- On the My Applications list page, click on your newly created application.
- Copy the
API Keyvalue from Constant Contact. - Click the Generate Secret button beside the API Key field, and then copy the
App Secretvalue from Constant Contact.
- Go back to your Craft/Freeform browser tab.
- Paste the
API Keyvalue from Constant Contact into the the API Key field in Freeform. - Paste the
App Secretvalue from Constant Contact into the the App Secret field in Freeform. - At the top right corner of Freeform page, click Save button.
- You will then be presented a Constant Contact OAuth confirmation page.
- If not already logged in, enter in your Constant Contact login details and click Log In button.
- Once logged in, you'll be presented an OAuth form, asking if you want to allow access. Click Allow button.
- You should now be returned to the Freeform Email Marketing setting page.
- Confirm that there is a green circle with Authorized in the middle of the page.
2022 Update Instructions
In early 2022, Constant Contact announced changes to their API service. This is a change that breaks existing integrations, and requires an update to Freeform in order to fix the connection. On March 4, 2022, we released Freeform 3.13.4 to address this. For any existing users of this integration (set up before 3.13.4), please follow the below instructions to upgrade your connection:
- Update to Freeform 3.13.4 or greater.
- Go to the Email Marketing section in Freeform Settings (Freeform > Settings > Email Marketing) and click on the existing Constant Contact integration you have configured.
- Open up a new browser tab and go to Constant Contact's API My Applications website.
- Log into your Constant Contact account there.
- Go to the My Applications page (click at top nav menu).
- In the list of your application(s), it likely will appear under an Outdated Applications list.
- Click on the Copy button for that application, and a copy of the integration application will be created.
- Open up that application and ensure that Constant Contact's Redirect URI field contains the valid URL from Freeform's Redirect URI field.
- If not, you can copy and paste that in here now and click the Save button at the top right.
- Go back to your your Craft/Freeform browser tab.
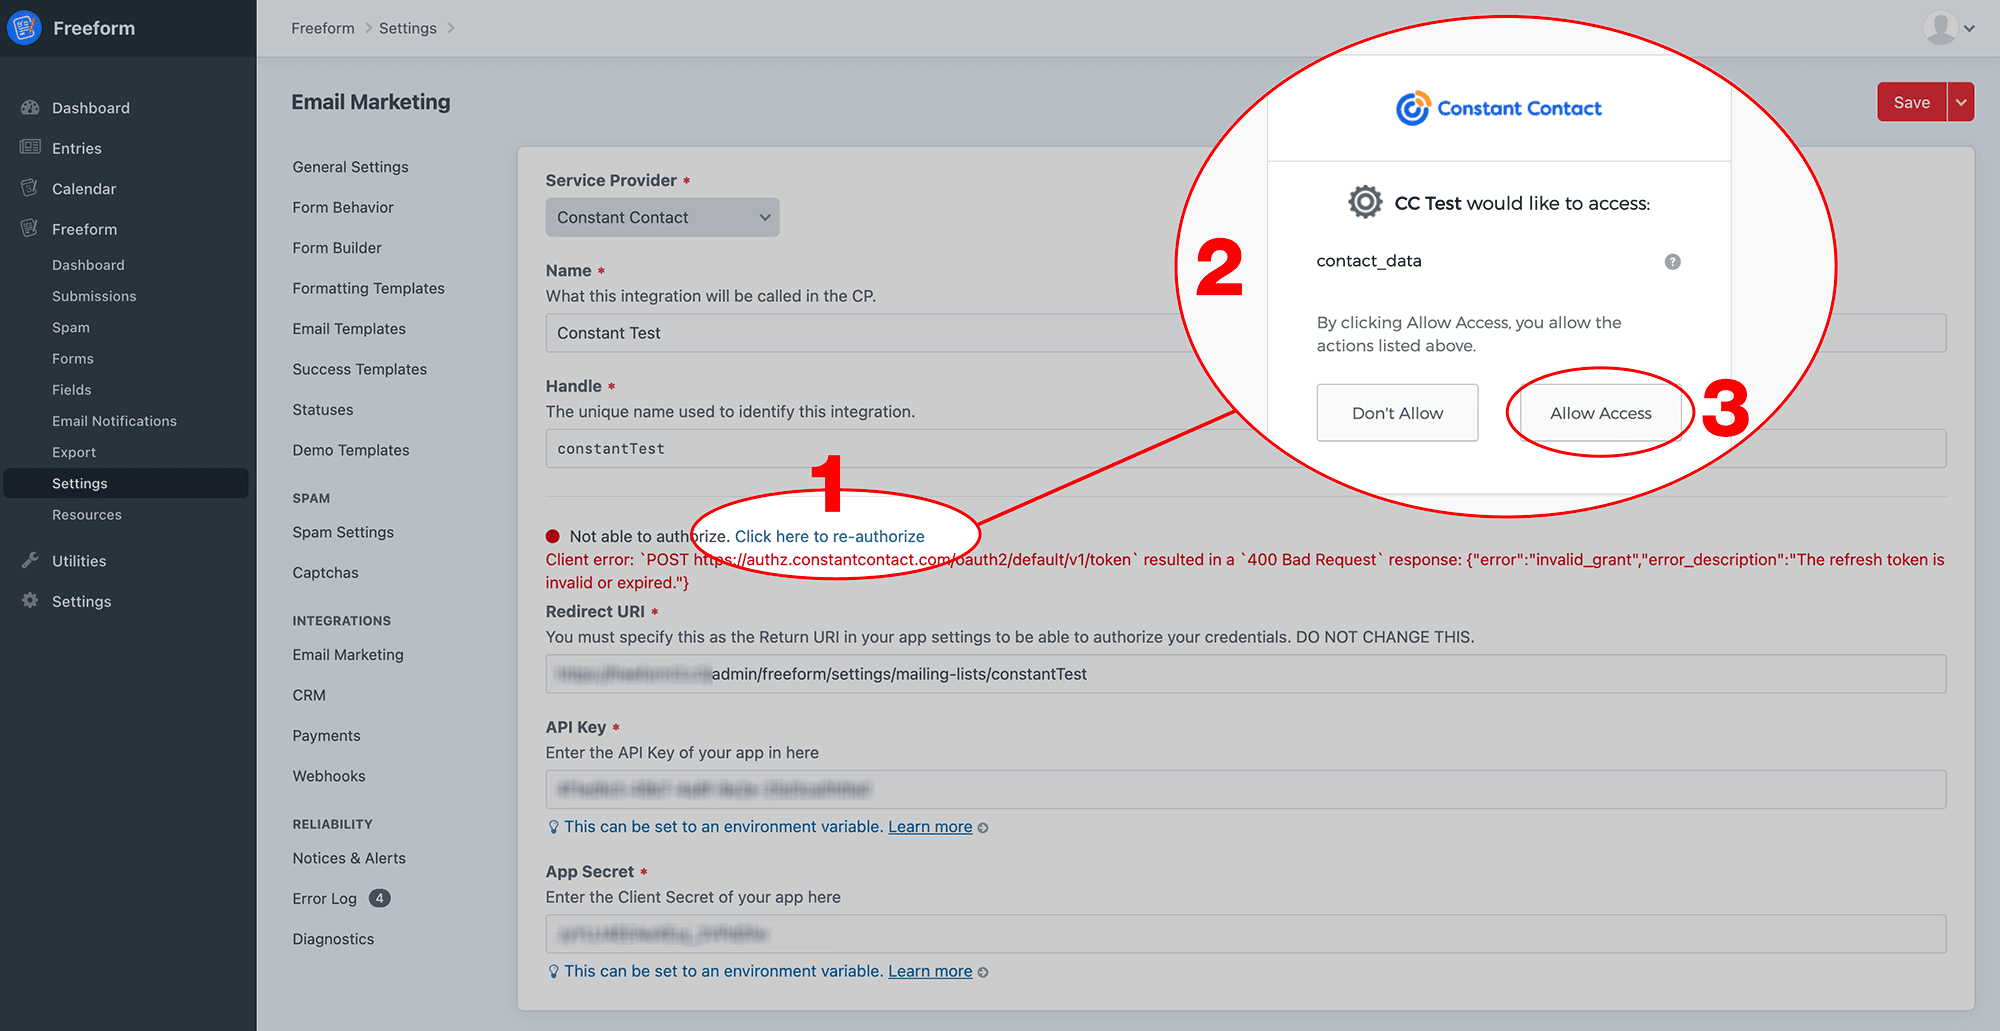
- Inside that settings page, click on the Click here to re-authorize link.
- You will then be presented a Constant Contact OAuth confirmation page. Click on the Allow Access button.
- You should then be returned to the Freeform Email Marketing setting page.
- Confirm that there is a green circle with Authorized in the middle of the page.
- We recommend you test out your form to ensure things are still working smoothly.