User Guides
Getting Started
This guide provides a brief overview of Freeform's features, with links to more information.
Introduction
Freeform is a plugin that provides an intuitive interface for admins and clients to build and manage simple or complex forms. The form builder feature allows users to see a live preview of the forms they're building, making it easy to customize and modify. Freeform is designed to be user-friendly and allows users to access almost everything they need without navigating to other areas in the control panel. Despite its simplicity, Freeform is also powerful and flexible - offering a range of features, settings, and options to meet different requirements.
Forms
Each form is built inside the intuitive form builder. This is where you can design the form layout, configure which fields are required, set up integrations, email notifications, conditional rules, validation and more. Freeform also allows for multi-page forms and has built-in spam protection options.
The form builder is a workspace divided into 5 sections:
- Layout
- Notifications
- This is where you configure email notifications for the form. Freeform allows you to set up 6 different kinds of email notifications, including at template level with the dynamicNotification parameter in your Form query.
- Rules
- This is where you can configure fields to show or hide based on the contents/selection of other fields, and even skip pages or submit the form based on the contents/selection of fields on a previous page.
- Integrations
- This is where you can configure various types of integrations for your form. It will only show integrations that have been configured/set up in the Freeform Settings area.
- Settings
- This is where you configure all settings and behaviors for the form.
Fields
Freeform uses its own set of field types. The form builder will display all available field types for the form (will differ between editions of Freeform). These can then be added to forms indefinitely.
Email Notifications
Email notification templates are global and can be reused for multiple forms, saving you time when managing many forms. Email templates can be managed within the control panel (saved to the database) or as template files. All notification templates can be created and customized at Freeform → Notifications (or if using files, you can edit them in your favorite editor, etc).
Freeform allows you to send email notifications upon submittal of a form 6 different ways, each with its content/template:
- Admin
- Specify the email address(es) you'd like to be notified of the successful submission of the form.
- Conditional
- Specify the email address(es) you'd like to be notified of the successful submission of the form.
- User Select
- Allow the user to choose from a predefined list of options to be emailed via select dropdown/radios/checkboxes field.
- Template-based
- At the template level with the
dynamicNotificationparameter in the Form query.
- At the template level with the
- Email Fields
- To the user submitting the form, with the email addresses specified/selected in the Email field type.
- User-Defined
- To a user-defined email address (e.g. Tell-a-Friend form), with the email addresses specified/selected in the Email field type.
Formatting Templates
Freeform attempts to do all the heavy lifting when it comes to templating. Our looping templating approach allows you to automate all or almost all of your form formatting. This can be achieved by using ready-made options or custom-building your own formatting templates.
Forms can be generated on the front-end templates two different ways:
- By assigning one of the predefined formatting templates (stored as a standard Twig template in the craft/templates directory) inside the form builder and using the Form query render() method. This approach is very portable / DRY and works similarly to an include. Then simply insert 1 line of code in the template you want your form to load in:
{{ freeform.form("yourFormHandle").render() }}1 - By coding the formatting directly within the template you want the form to appear in, using the Form query. We recommend the first approach, but this option is technically available if your project requires it.
Integrations
Freeform supports various popular integrations so you can do more with your forms, such as accepting payments, subscribing users to email marketing lists, and capturing data in CRMs, etc.
Templating
We strived to make things as flexible as possible while also coming up with templating that can automate much of the handling of parsing your forms. Freeform figures out as much of this as possible for you. This can be achieved by building formatting templates for your forms.
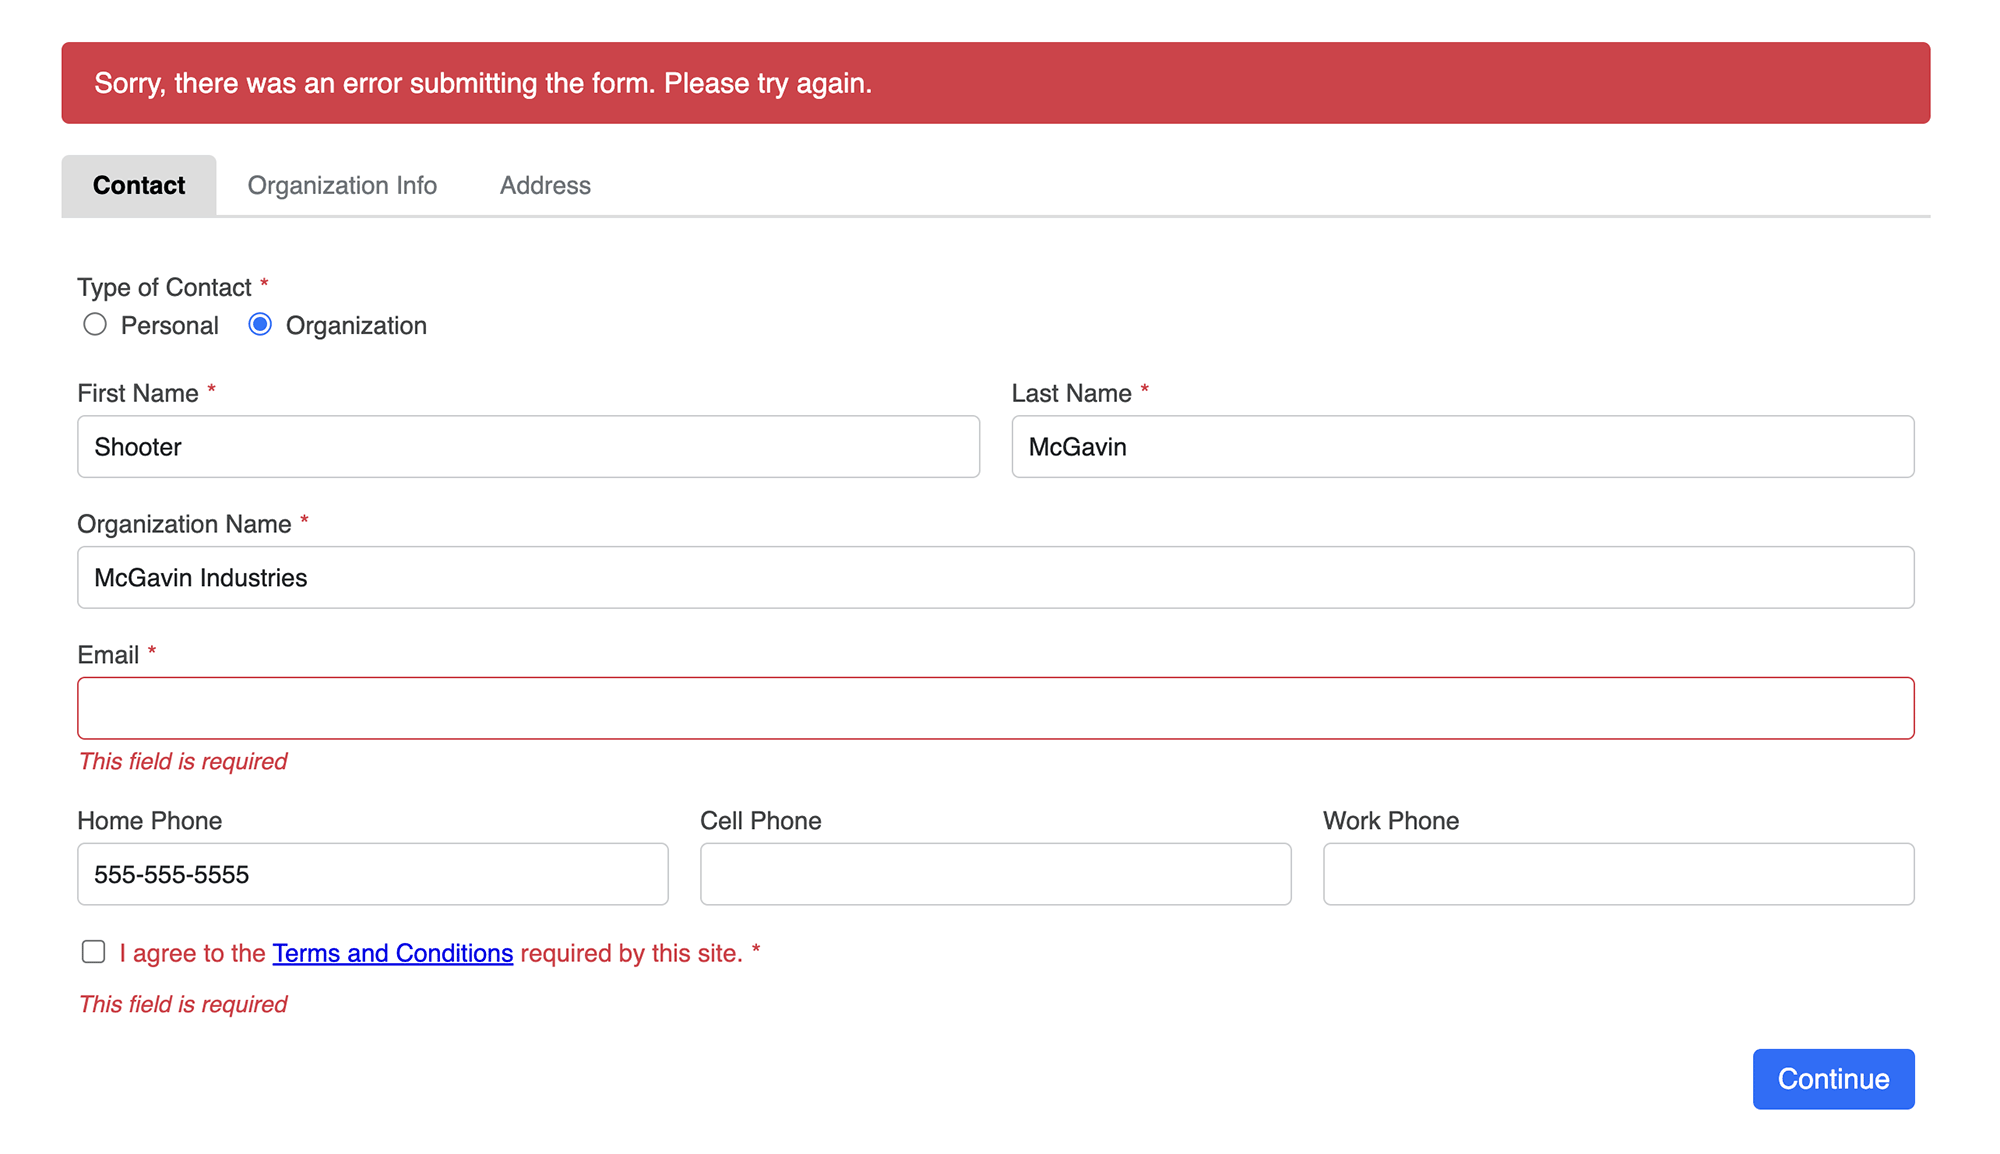
User Guide:
Quick troubleshooting the most commonly reported issues with your form's appearance, behavior, or submission of the form on the front end.
Form Query
To display a form inside a page, add a Form template query to the template. This will automatically use the formatting template assigned to the form inside the form builder.
{{ freeform.form("myFormHandle").render() }}
To add some overrides to the form at the template level, such as setting some classes or even inserting values dynamically from the page, your code might look something like this:
{{ freeform.form("myFormHandle", {
    attributes: {
        novalidate: true,
        row: {
            class: "row",
        },
    },
    fields: {
        "@global": {
            attributes: {
                input: { class: "input-class" },
                label: { class: "label-class" },
            },
        },
        "@dropdown": {
            attributes: {
                input: { "+class": "select fullwidth" },
            },
        },
        "@checkboxes, @multiple-select": {
            instructions: "Select all that apply.",
        },
        ":required": {
            attributes: {
                label: { "+class": "form-required" },
            },
        },
        "myFieldHandle": {
            value: "John Doe",
            label: "First Name",
            instructions: "This is a test",
            attributes: {
                container: {
                    "data-my-input-container": true,
                },
                input: {
                    id: "my-special-id",
                    "+class": "my-special-class",
                },
            },
        },
    },
}).render() }}
2
3
4
5
6
7
8
9
10
11
12
13
14
15
16
17
18
19
20
21
22
23
24
25
26
27
28
29
30
31
32
33
34
35
36
37
38
39
40
41
42
43
Formatting Templates
Freeform includes a large number of example formatting templates to choose from. You can use these as a starting point and adjust them to suit your needs or create your own from scratch.
A couple of good starting points would be these plug-and-play examples that are neatly styled basic templates that don't require any frameworks or toolkits, etc:
TIP
When experiencing issues with custom formatting templates, always consider switching to one of the sample ones (such as Basic Light) and see if your form works correctly. Often the issue can be detected and resolved by comparing your template/approach with what is used in a sample template.
Demo Templates
Freeform includes a complete set of demo templates. These demo templates give you a fully functioning area on your website with just a few clicks! Furthermore, it allows you to see real-world examples of the template code in action, which will help you get acquainted with Freeform more quickly.
TIP
When experiencing issues with your regular templates, always consider returning to the demo templates and see if your form works correctly there. Often the problem can be detected and resolved by comparing your template/approach with what is used in the demo templates.
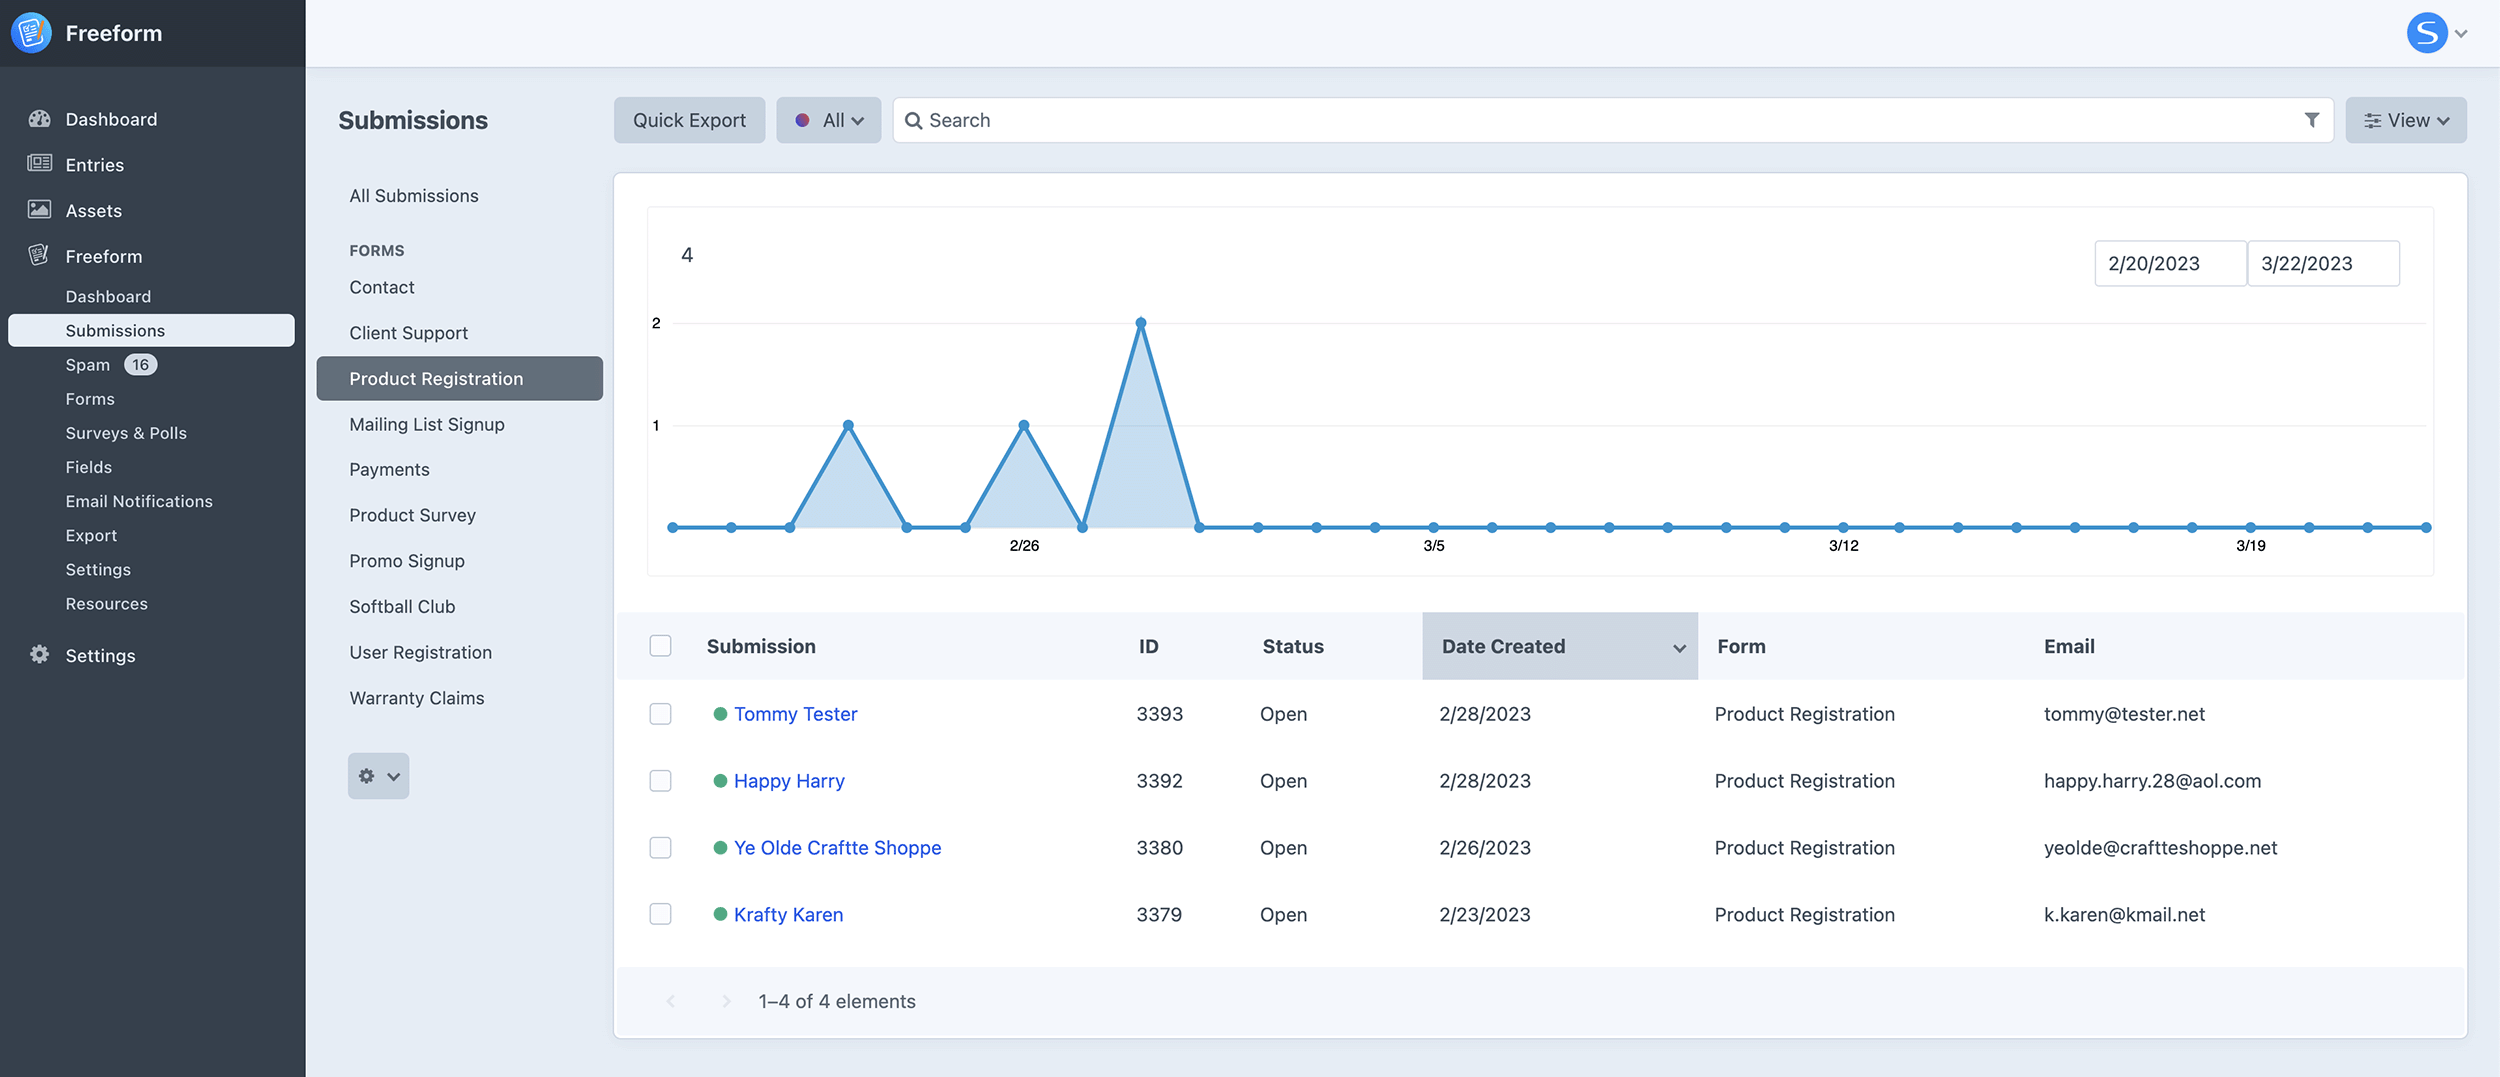
Submissions
Similar to Craft Entries, every time a user submits a form, we refer to those as submissions. Freeform submissions can be viewed and edited in the control panel and the front end in templates as a list and individually. Within the control panel, you can filter the view by form (or show across all forms), search into submissions, adjust which field columns are shown, and click into any of the submissions to edit them.
Submissions Query
To display submissions inside a page, add a Submissions template query to the template.
Display a simple list of submissions:
{% set submissions = freeform.submissions({
    orderBy: "firstName ASC, lastName DESC",
    status: ["pending", "closed"],
}) %}

<ul>
{% for submission in submissions %}
    <li>{{ submission.title }} - {{ submission.firstName }}</li>
{% endfor %}
</ul>
2
3
4
5
6
7
8
9
10
To display a single submission, your template code might look something like this (see Submission object for more info):
{% set submissionId = craft.app.request.segment(5) %}
{% set submission = freeform.submissions({id: submissionId}).one() %}

{% if submission %}

    {% set form = submission.form %}

    <h3>{{ form.name }} - {{ submission.title }}</h3>

    <table class="table">
        {% for field in submission %}
        <tr>
            <th style="width: 20%">{{ field.label ? field.label : "no-label" }}</th>
            <td>
            {% set fieldValue = submission[field.handle].value %}
            {% if fieldValue is iterable %}
                <ul>
                {% for value in fieldValue %}
                    <li>{{ value }}</li>
                {% endfor %}
                </ul>
            {% else %}
                {{ fieldValue }}
            {% endif %}
            </td>
        </tr>
        {% endfor %}
    </table>

{% else %}

    <div class="alert">
        <p>Sorry, no submission was found.</p>
    </div>

{% endif %}
2
3
4
5
6
7
8
9
10
11
12
13
14
15
16
17
18
19
20
21
22
23
24
25
26
27
28
29
30
31
32
33
34
35
36