


This document is for an older version of
Freeform
.
View latest version →
Overview
Spam Protection
Freeform includes a variety of robust spam control features to make managing forms easier.
Freeform Honeypot
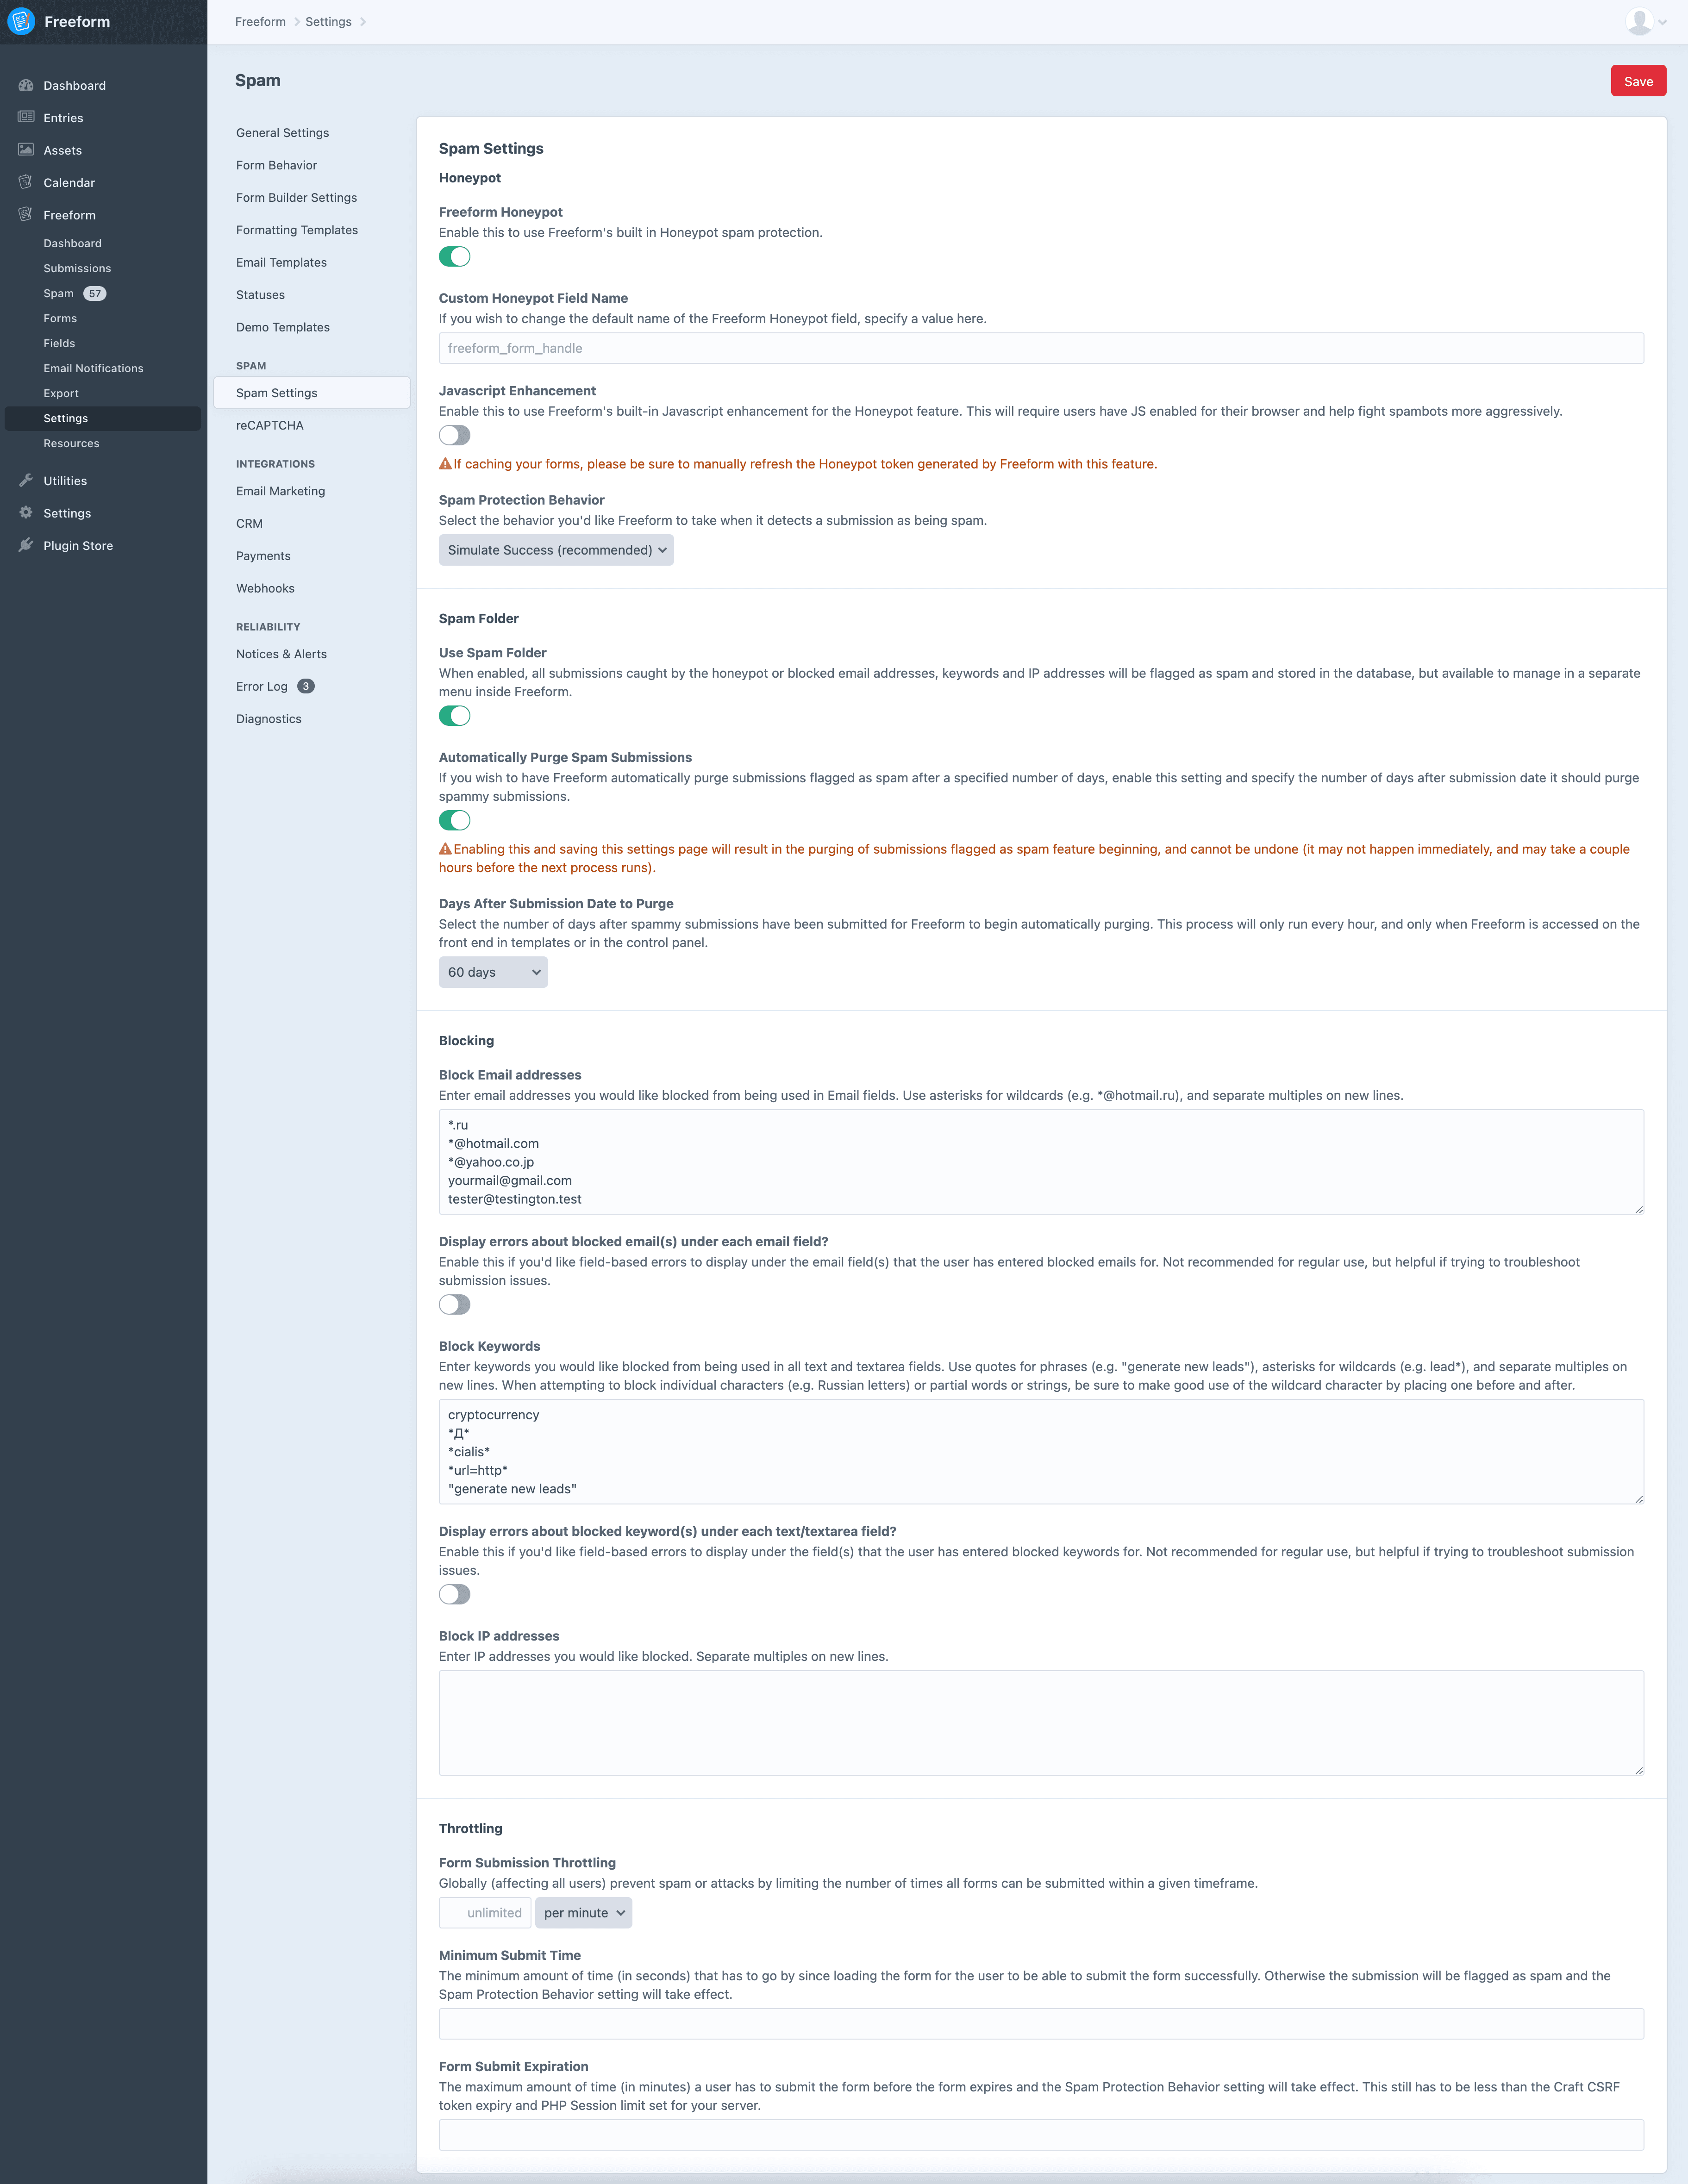
Freeform includes its own Honeypot spam protection feature. This is enabled by default, but can be disabled in the Spam Settings. If enabled, you can specify the behavior Freeform takes when a spammy submission is detected with the Spam Protection Behavior setting:
- Simulate Success (recommended)
- If you have the Spam Folder feature enabled, spammy submissions will go through to the Spam Folder in the Freeform control panel.
- An error is not displayed so as not to give away the spam controls.
- Display Errors (for debugging)
- Useful for troubleshooting if you're experiencing some issues with submissions being flagged as spam.
Javascript Enhancement
The Freeform Honeypot also comes with the optional Javascript Enhancement setting. When you enable this, it will require users have javascript enabled for their browser and help fight spambots more aggressively.
WARNING
The Javascript Enhancement is not necessary for quality spam protection. If you do use it, please be aware that it may complicate your setup if you're using a JS framework like Vue to render the form/page, or template caching, etc. In cases like these, you'll need to manually refresh the honeypot token in order for it to work correctly. See information below about how JS enhancement works.
How it Works
- Each time a form is loaded, it stores a unique honeypot per session, which has a timestamp, unique name and unique hash value.
- Both name and hash must match to successfully submit the form or advance to the next page.
- A user is allowed 100 honeypot values per user session (highly unnecessary but in case your site has a form in a common place like a footer, etc it'll help prevent unwanted blocking of legitimate users).
- Honeypots are stored in the session for 3 hours, and then are removed.
- Because this uses the session, this limit is also dependent on the server configuration for session.gc_maxlifetime() in
php.ini. Typically the default might be1440seconds (24 minutes), but it's possible the default has been altered to something else.
- Because this uses the session, this limit is also dependent on the server configuration for session.gc_maxlifetime() in
- When the form opens, the value is wrong by default, and then javascript swaps in the correct value.
- If the submission fails the honeypot test, it will then match the behavior of the Spam Protection Behavior setting.
- The honeypot is not a hidden field, but is positioned absolutely with height
0and width0, so the field is not visible. - This spam protection method requires javascript be enabled for the user's browser, otherwise it will fail.
- Freeform will automatically insert javascript in the footer of the page. If you prefer to have this load inside the
<form></form>tags (for purposes of caching, etc), you can control this with the Freeform Javascript Insertion Location setting.
- Freeform will automatically insert javascript in the footer of the page. If you prefer to have this load inside the
The Honeypot can also be manually rendered as follows:
{% set form = craft.freeform.form("formHandle") %}
{% set honeypot = craft.freeform.honeypot(form) %}
{{ honeypot.name }}
{{ honeypot.hash }}
2
3
4
TIP
To disable the Freeform Honeypot per form at template level, add the disableHoneypot: true parameter to the freeform.form function. 3.12+
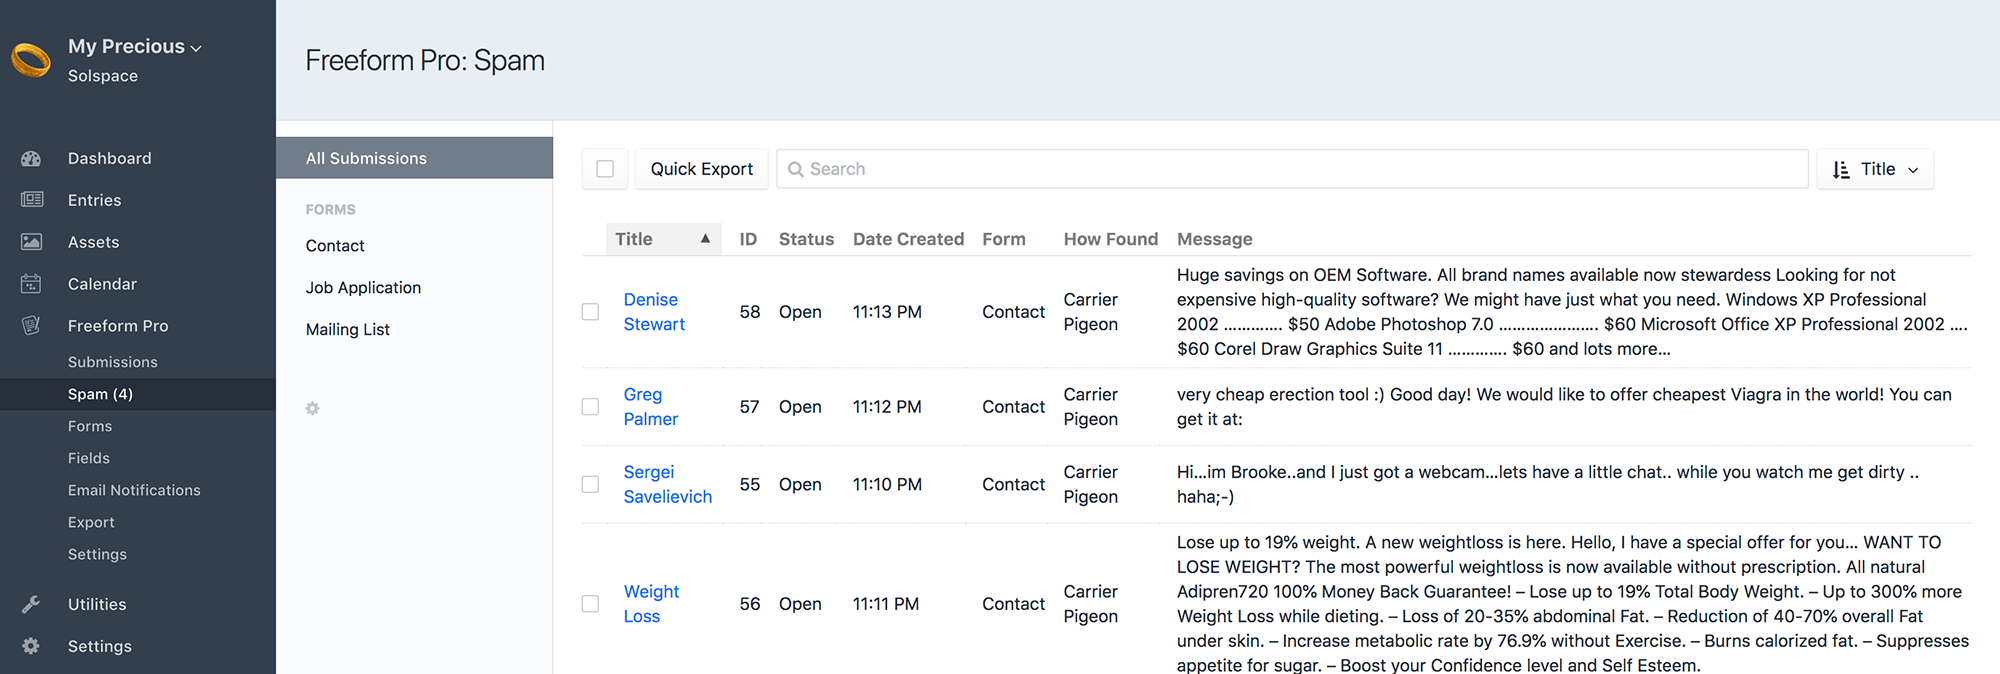
Spam Folder
When the Use Spam Folder setting is enabled, all submissions caught by the Javascript Honeypot or blocked email addresses, keywords and IP addresses will be flagged as spam and stored in the database, but available to manage in a separate menu inside Freeform. When paired with Captchas and its Failure Behavior setting set to Send to Freeform Spam Folder, failed submissions will also end up in the Spam Folder.
TIP
Enabling the Spam Folder feature will not retroactively bring back any previously blocked spam submissions. Any submissions that have been blocked in the past (without Spam Folder setting on) are never recorded in the database.
- Email notifications and API integrations will all be suppressed, but queued.
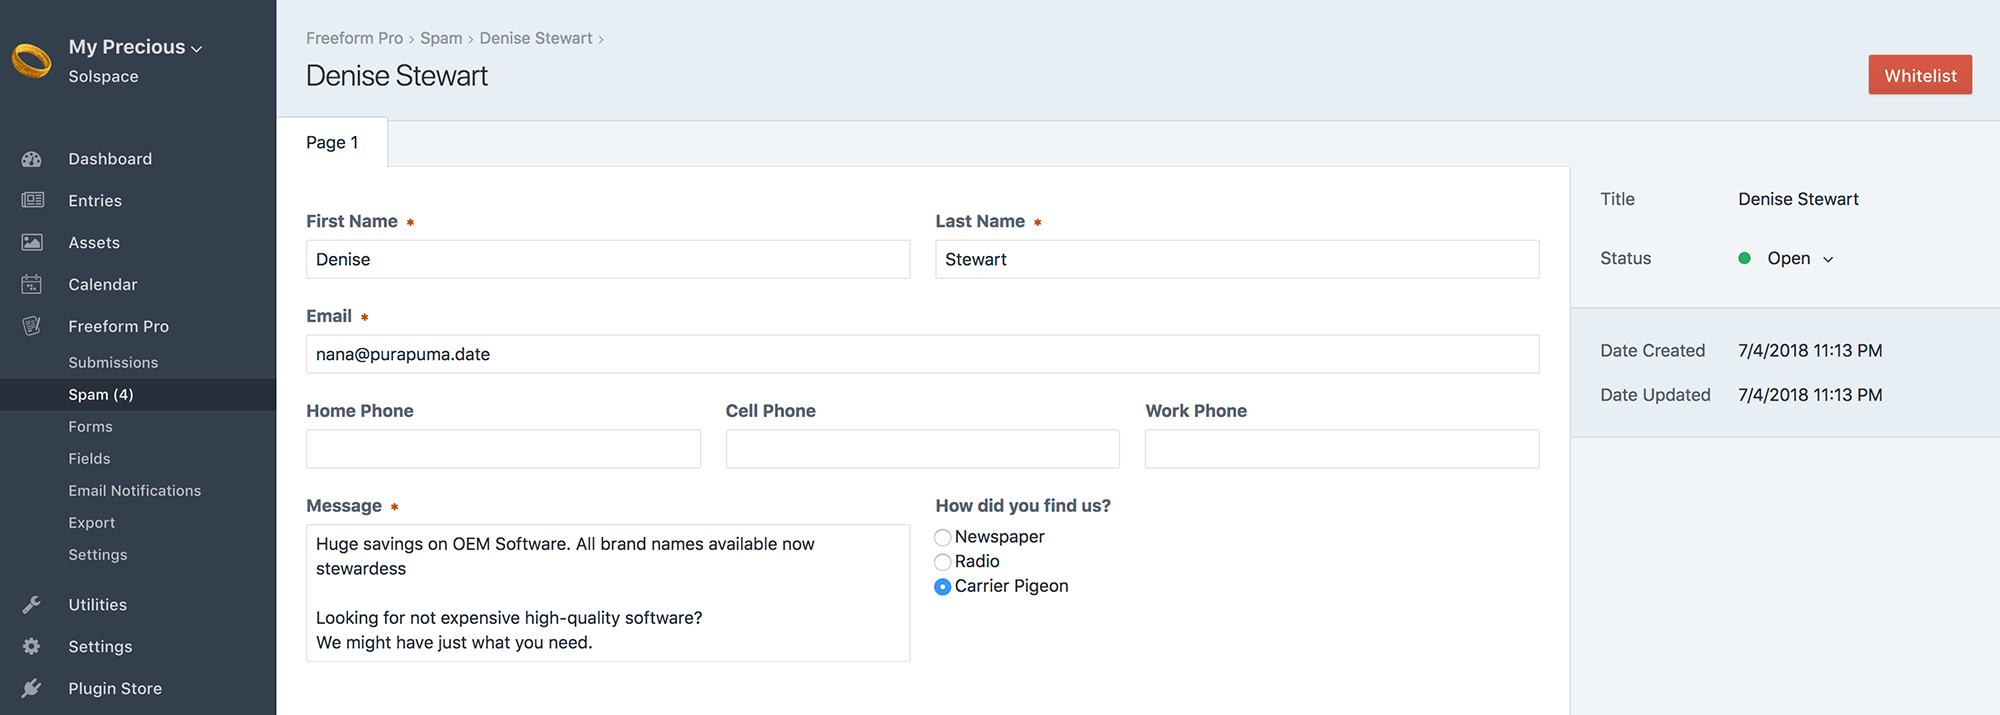
- When viewing the Spam Folder in the Freeform control panel, you have the ability to delete or approve/allow each submission.
- Allowing spammy submissions will retroactively fire off email notifications and any API integration data as well.
- The Spam Folder can be set to have older spammy submissions automatically purged after a period of time. To enable this, enable the Automatically Purge Spam Submissions setting and specify the number of days after submission date it should purge them.
WARNING
Enabling this and saving this settings page will begin the purging of submissions flagged as spam, and cannot be undone.
Spam Reasons 3.6.3+
Whenever a submission is flagged by Freeform as spam, it will save the reason(s) why, which will help you understand why the submission failed and also help you troubleshoot potential configuration errors and issues. The detailed spam reason(s) are available inside the submission detail page in the right side column. The reason(s) summary is displayed as a column inside the index listing view of the Freeform Spam Folder. Further to this, you can filter these submissions by the reason they were marked as spam.
Spam Blocking
Freeform gives you the ability to block multiple email addresses, keywords and IP addresses. Separate multiples on new lines, and use * for wildcard (except on IP addresses). To block phrases, use quotes (e.g. "generate new leads").
TIP
When attempting to block individual characters (e.g. Russian letters) or partial words or strings, be sure to make good use of the wildcard * character! E.g.: *й*, *Д*, *url=http*, etc.
- If the submission fails, it will then match the behavior of the Spam Protection Behavior setting.
- If you have the Spam Folder feature enabled, spammy submissions will go through to the Spam Folder in the Freeform control panel.
- You have the option to display errors for fields using a blocked email address or keyword, but we recommend only using this for troubleshooting purposes.
Throttling
If your site is being attacked by spammers or you're concerned about it, you can enable the Form Submission Throttling setting. This will globally (affecting all users) prevent spam or attacks by limiting the number of times all forms can be submitted within a given timeframe.
WARNING
This feature is intended for extreme conditions, such as preventing your site from going down if attacked by a spammer. It should NOT be used as a 'fine-tuning' spam measure, as it applies to ALL users. For example, if you set it to '1 per minute', once one user submits any form, any other user will not be able to submit a form within that timeframe. A more realistic value for smaller websites is something like 50 per minute. Use extreme caution for larger and more active sites.
Captchas
Freeform currently supports the following Captcha services:
- reCAPTCHA v2 Checkbox
- reCAPTCHA v2 Invisible Pro
- reCAPTCHA v3 Pro
- hCaptcha Checkbox Pro 3.12.9+
- hCaptcha Invisible Pro 3.12.9+
Overview
Here's an overview of how each one of these works:
- reCAPTCHA v2 Checkbox is likely the reCAPTCHA you may be most familiar with seeing on the internet. In this case, once configured for your site, you drag and drop a special Captcha field into the form layout for the forms you wish to have it enabled for. All users submitting your form must check off the reCAPTCHA checkbox, and in some cases, users will be presented the puzzle to solve to submit the form successfully.
- This is available in the Lite and Pro editions of Freeform.
- reCAPTCHA v2 Invisible is similar to reCAPTCHA v2 Checkbox, but it will not be visible to the user filling out the form, aside from a small reCAPTCHA logo in the bottom right corner of the page. Most users will not even know it's automatically validating them, but like the reCAPTCHA v2 Checkbox described above, some users will be presented a modal on the page with the puzzle to solve when they click the submit button.
- This automatically applies to every form unless you uncheck the "Enable Captchas" checkbox in the form settings in the form builder or disabled at template level.
- This is only available in the Pro edition of Freeform.
- reCAPTCHA v3 is never visible to the user filling out the form, aside from a small reCAPTCHA logo in the bottom right corner of the page, and users are never presented any puzzle to solve, etc. Instead, users are automatically validated by Google based on a score assigned to them. You have control over that score threshold inside Freeform settings. We suggest starting with something like
0.5and see how that goes (where a0.0score means that it's almost certain a bot and a1.0score means it's a user). If the user does not pass this threshold, the submission will follow the behavior you set out for it in the settings (send to spam folder / reject it entirely / show an error to the user, etc). The user has no ability to validate themselves like in reCAPTCHA v2.- This automatically applies to every form unless you uncheck the "Enable Captchas" checkbox in the form settings in the form builder or disabled at template level.
- This is only available in the Pro edition of Freeform.
- hCaptcha Checkbox is based off of reCAPTCHA and works very similarly. Once configured for your site, you drag and drop a special Captcha field into the form layout for the forms you wish to have it enabled for. All users submitting your form must check off the hCaptcha checkbox, and in some cases, users will be presented the puzzle to solve to submit the form successfully. 3.12.9+
- This is available in the Pro editions of Freeform.
- hCaptcha Invisible is similar to hCaptcha Checkbox, but it will not be visible to the user filling out the form. Most users will not even know it's automatically validating them, but like the hCaptcha Checkbox described above, some users will be presented a modal on the page with the puzzle to solve when they click the submit button. 3.12.9+
- This automatically applies to every form unless you uncheck the "Enable Captchas" checkbox in the form settings in the form builder or disabled at template level.
- This is only available in the Pro edition of Freeform.
In all cases of Captchas, unless you're doing something very radical, you will not need to do anything inside your templates to account for it. Freeform will handle all of this automatically.
TIP
reCAPTCHA v2 Invisible and reCAPTCHA v3 will automatically load a reCAPTCHA icon in the bottom right corner of your site containing the form. This is required by Google's terms of service. There are CSS workarounds if you wish to locate the icon to the left side of the browser page, etc.
reCAPTCHA v2 Checkbox & hCaptcha Checkbox Notes
To add a Checkbox Captcha to your forms, open up each form in the Form Builder and drag over the Captcha special field anywhere you like into your form layout.
Checkbox Captcha fields will render automatically like the rest of your fields in your form, but if you're building a form manually, you'd call it using the special recaptcha handle name: 3.10+
{% set form = craft.freeform.form("myForm") %}
{% set captcha = form.get("recaptcha") %}

{{ captcha.renderInput }}
2
3
4
For versions prior to Freeform 3.10, you'd call it using the Hash value for the Captcha Checkbox field in Property Editor of the form builder:
{% set form = craft.freeform.form("myForm") %}
{% set captcha = form.get("JDGnlp8vB") %}

{{ captcha.renderInput }}
2
3
4
reCAPTCHA v2 Invisible Notes
To disable reCAPTCHA v2 Invisible and v3 per form at template level, add the disableRecaptcha: true parameter to the freeform.form function. 3.9.0+
If you're loading an entire form via AJAX, you'll need to load the reCAPTCHA JS yourself, since it's considered insecure otherwise and the browser blocks it. You should add this script tag anywhere on your page, preferably the footer:
<script type="text/javascript" src="https://www.google.com/recaptcha/api.js?render=explicit"></script>
reCAPTCHA v3 Notes
To set the action of reCAPTCHA v3, add recaptchaAction: "myaction" to your form.renderTag, like this:
{{ form.renderTag({ recaptchaAction: "myaction" }) }}
Hiding the reCAPTCHA floating badge (v2 Invisible / v3)
If you'd like to hide the reCAPTCHA floating badge (bottom right), you are allowed to do so as along as you provide reference to reCAPTCHA in the user flow. Quote and example from the Google reCAPTCHA docs:
You are allowed to hide the badge as long as you include the reCAPTCHA branding visibly in the user flow. Please include the following text:
This site is protected by reCAPTCHA and the Google
<a href="https://policies.google.com/privacy">Privacy Policy</a> and <a href="https://policies.google.com/terms">Terms of Service</a> apply.
1
2Note: if you choose to hide the badge, please use:
.grecaptcha-badge { visibility: hidden; }1
Only load Captcha scripts once the user interacts with the form
If you'd like to have the associated Captcha scripts load only once a user begins filling out the form, enable the corresponding setting inside the Captchas settings page. If you'd like your forms to be ready to go at page load, disable this setting.