This document is for an older version of
Freeform
.
View latest version →
Overview
Exporting
Freeform includes a variety of options for exporting:
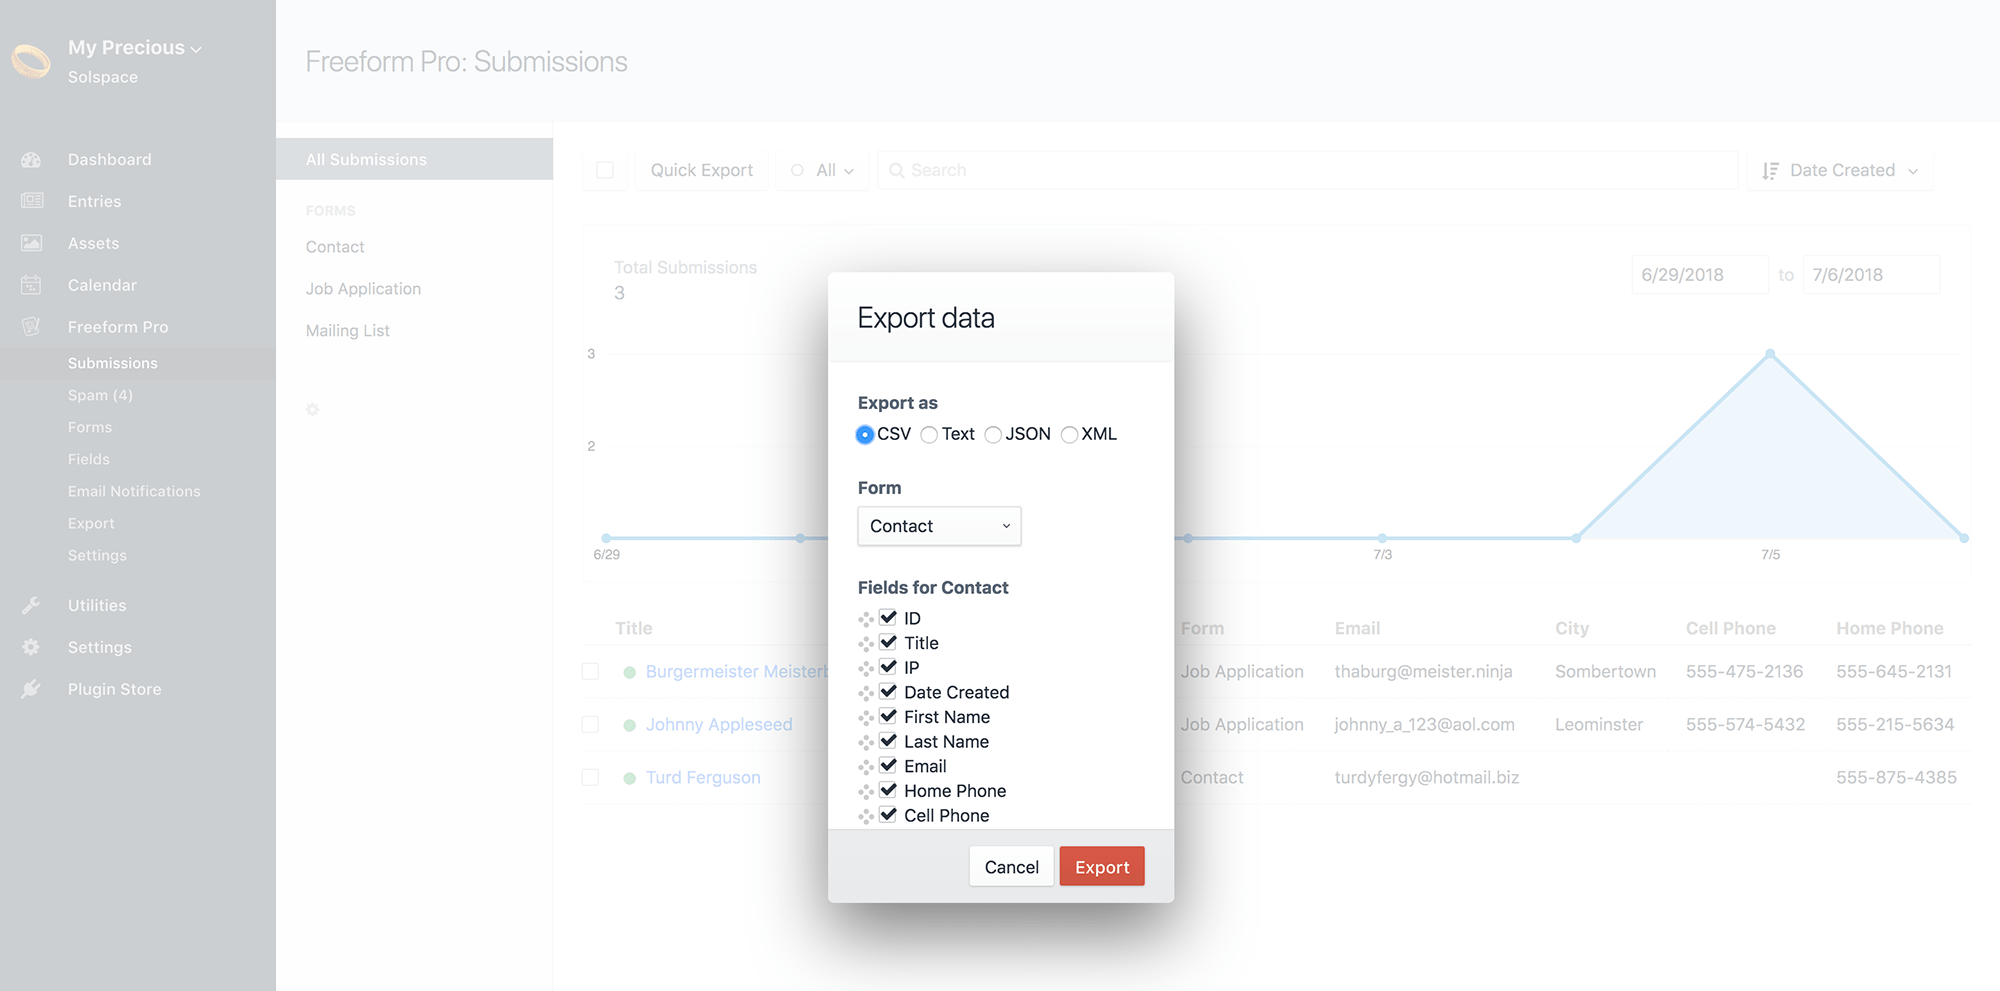
Quick Export Pro
Freeform Pro's Quick Export feature displays inside the Submissions page of the Freeform control panel. Clicking the Quick Export button at the top of the page allows you to export all submissions for a given form, in your choice of Excel, CSV, JSON, XML or Text. You can then exclude whichever fields you don't want exported.
File Upload fields will export as a complete URL to the file if a public URL is specified for the Asset. If not, it will just export as the file name only (e.g. my-precious.gif).
Export from Dashboard 3.9.0+
Freeform includes a simple Export dropdown for each form inside the Freeform control panel dashboard. Clicking the Export... dropdown and selecting the file type will generate a complete export of all submissions for that form.
Options available are:
- Excel Pro
- CSV
- JSON Pro
- XML Pro
- Text Pro
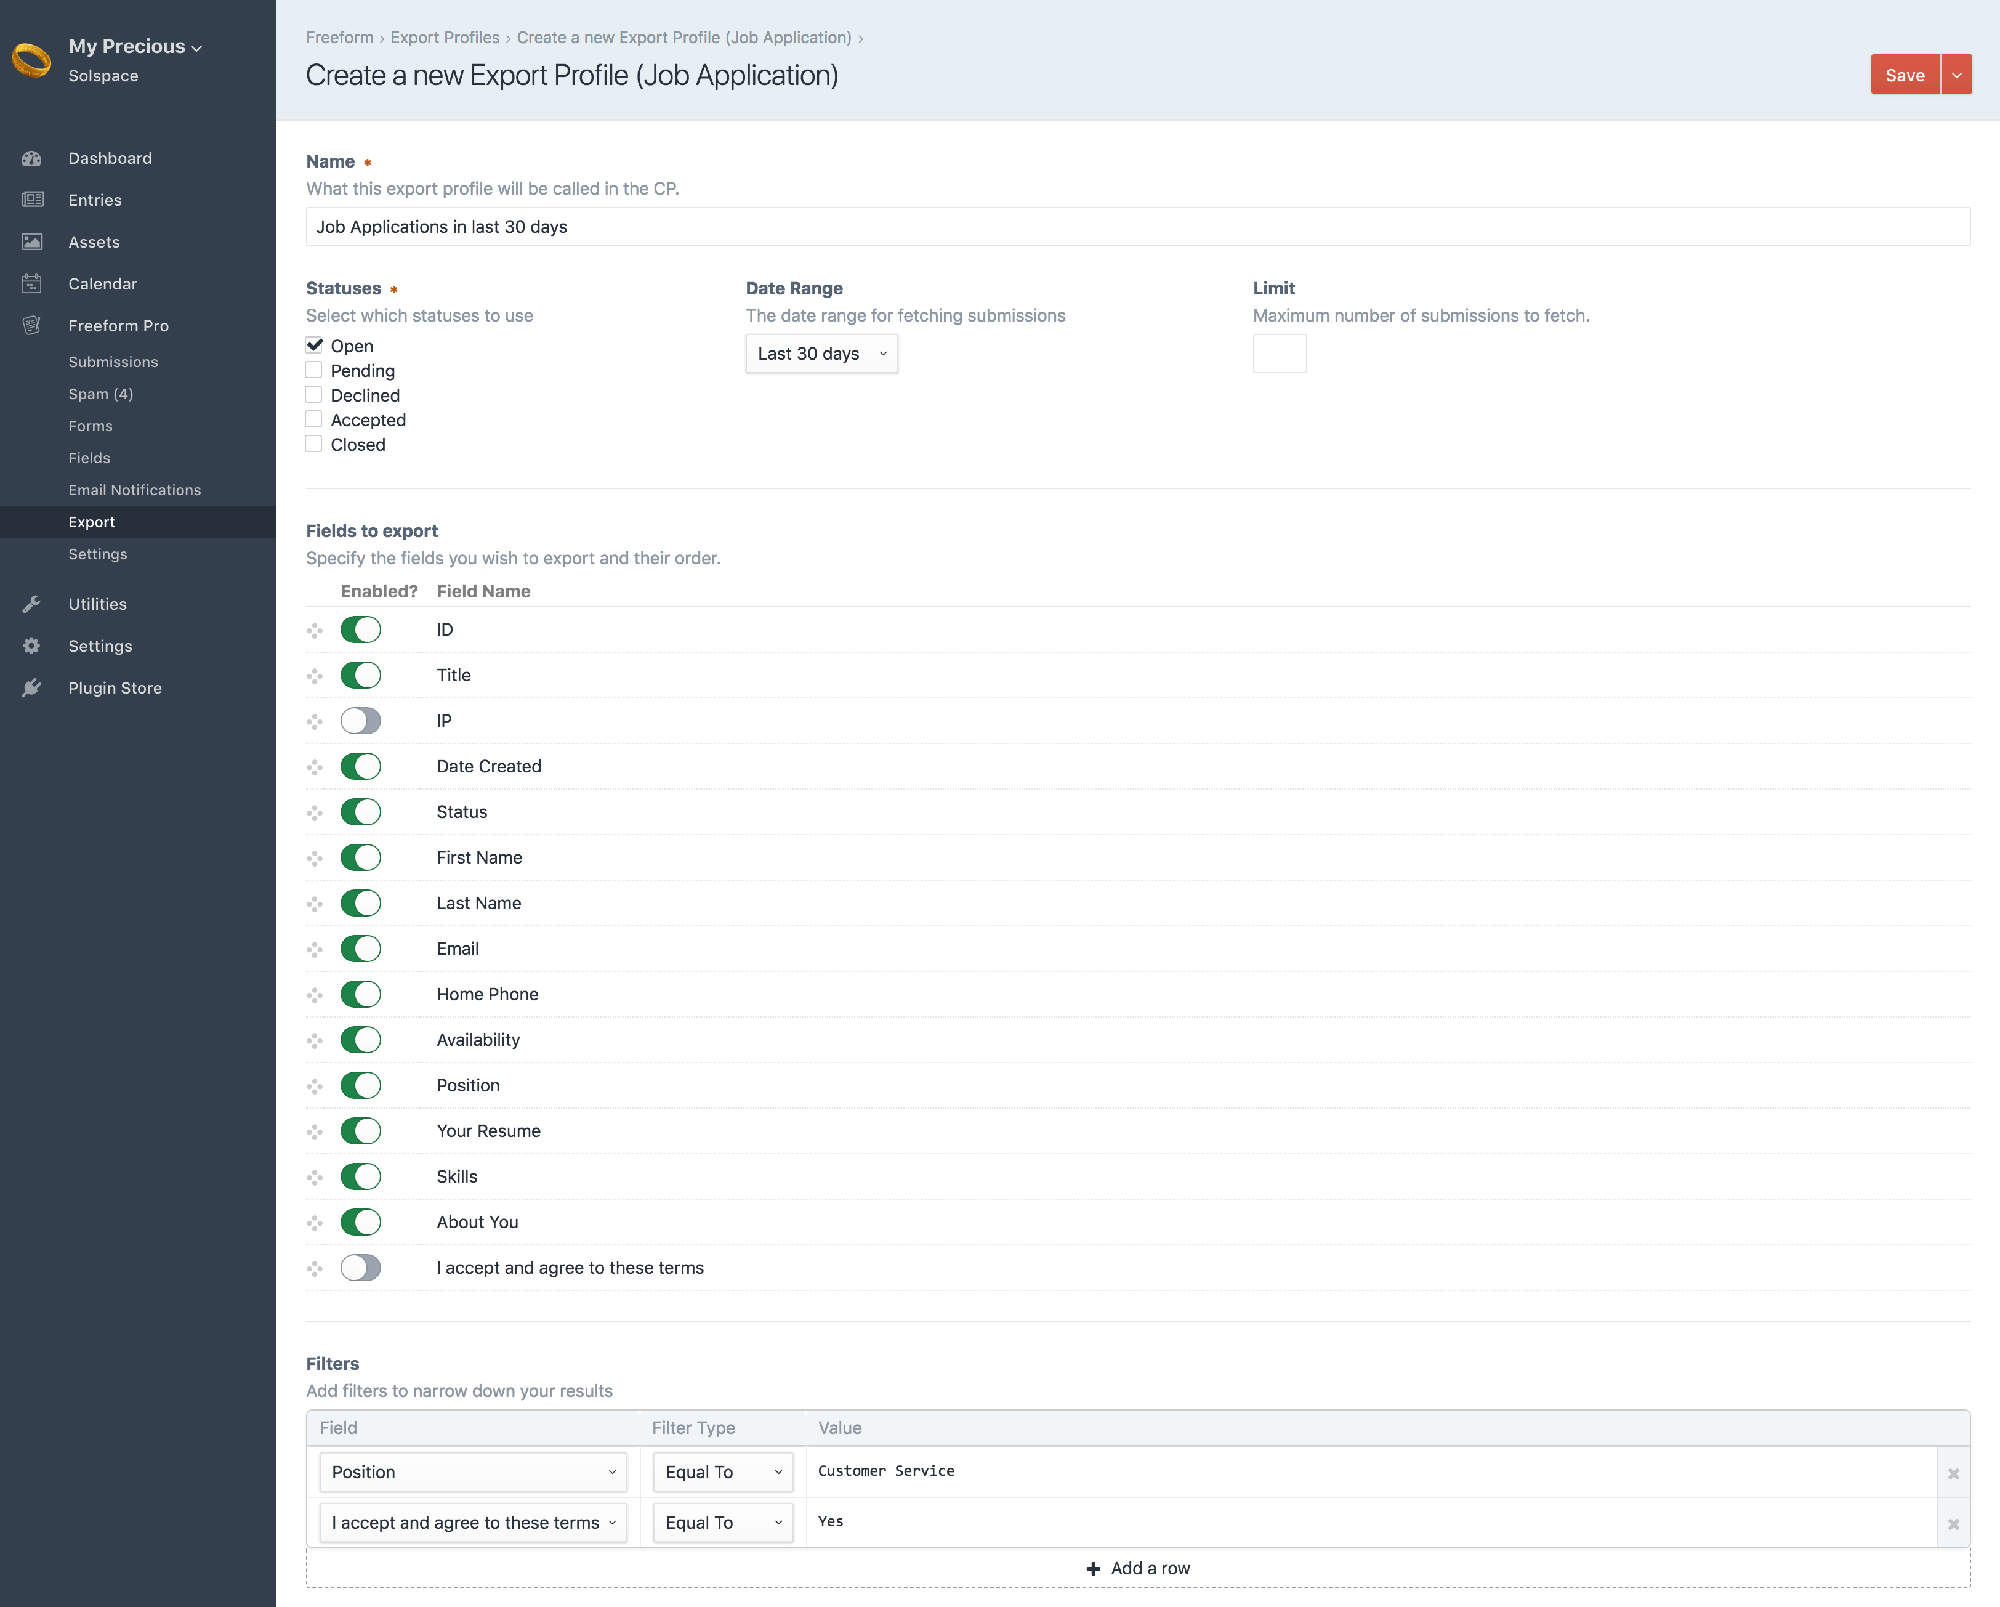
Export Profiles Pro
Freeform Pro's Export Profiles feature allows admins to create more complex pre-defined export profiles that can be run by any user with proper permissions at any time. Options for export profiles are as follows:
- Name
- Create an intuitive name of the profile that is easy for your clients / administrators to figure out.
- Statuses
- Select which statuses, if any, to filter the results by.
- Date Range
- Select a date range, if any, you want the results limited by. Current options are:
- None
- Custom Range 3.9.0+
- Range Start (an exact date (e.g.
2020-09-01) or use something relative like15 days ago. Default istoday. - Range End (an exact date (e.g.
2020-09-30) or use something relative like15 days ago. Default istoday.
- Range Start (an exact date (e.g.
- Presets
- Today
- Yesterday
- Last 7 days
- Last 30 days
- Last 365 days
- Select a date range, if any, you want the results limited by. Current options are:
- Limit
- Maximum number of submissions the export should generate.
- Fields to Export
- Select the fields you'd like to be included and rearrange their order.
- Filters
- Add filters to narrow down your results.
- Select a field name and check if it's Equal to / Not equal to / Like a value specified.
- Specify as many filters as you wish.
TIP
When searching on fields that contain an array of values (such as Checkbox Group fields, etc), the data will be stored into the database like ["whatever","else"], so doing a search on whatever will never return any results. In this case, you'll need to use the following syntax: %"whatever"%.
File Upload fields will export as a complete URL to the file if a public URL is specified for the Asset. If not, it will just export as the file name only (e.g. my-precious.gif).
Once export profile(s) exist, users with proper permissions can export submissions in their choice of Excel, CSV, JSON, XML or Text.

Export Email Notifications Pro 3.13.10+
To be used in conjunction with Export Profiles, you can automate email notifications containing export files to be generated and sent to email address(es) of your choice.
- Name
- What this export notification will be called in the control panel.
- Export Profile
- Choose the Export Profile to use for this notification.
- File Type
- Choose the export file type to use for this notification:
- CSV
- Excel
- JSON
- XML
- Text
- Choose the export file type to use for this notification:
- Frequency
- Specify how often and which days (if applicable) you'd like to receive the email notifications. The chosen date will attempt to send a notification in the morning (around 6am):
- Daily
- Weekly on Sundays
- Weekly on Mondays
- Weekly on Tuesdays
- Weekly on Wednesdays
- Weekly on Thursdays
- Weekly on Fridays
- Weekly on Saturdays
- Specify how often and which days (if applicable) you'd like to receive the email notifications. The chosen date will attempt to send a notification in the morning (around 6am):
- Emails to Notify
- Enter the email address(es) that should be notified. If more than one, enter each one on a new line.
- File Name
- The file name to be generated for the export. You can use the
form,profileanddateobjects as a Twig template here to name your file. The extension will be added automatically. E.g. to generate a filename ofsome-form-handle-2022-01-01.csv, use:{{ form.handle }}-{{ date.toDateString }}1
- The file name to be generated for the export. You can use the
- Email Subject
- The subject line for the email notification.
- Email Message
- The plain text content of the email notification.
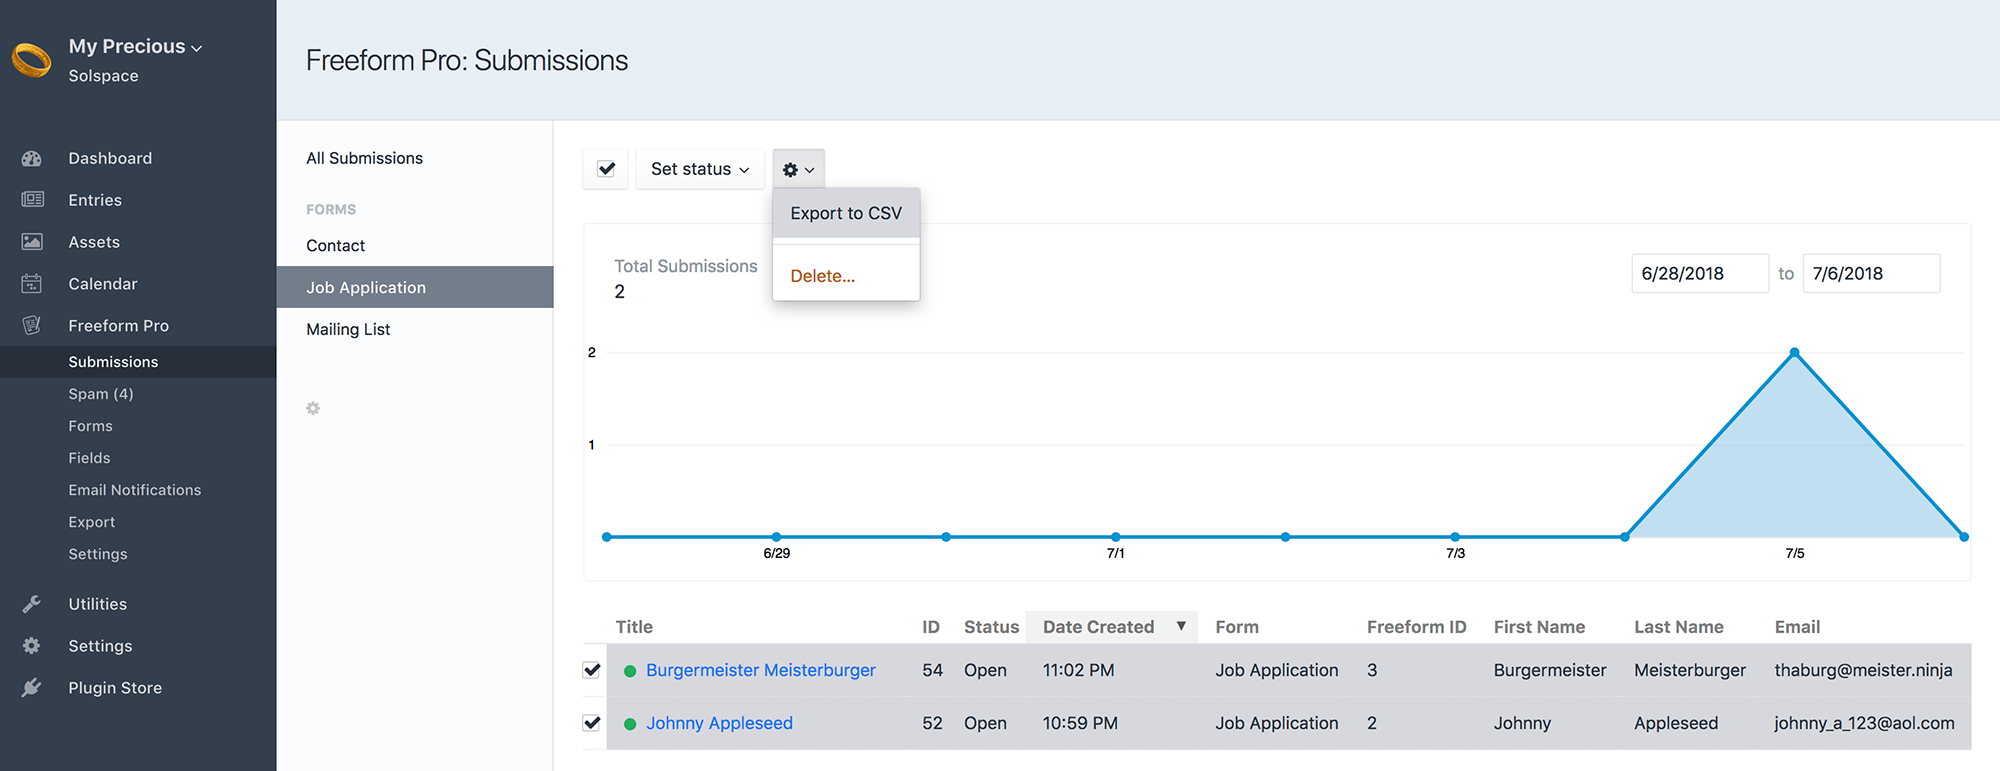
Lite CSV Export
The Lite version of Freeform includes CSV exporting functionality.
TIP
The Lite edition CSV export is currently limited by pagination. If you have more than 1 page of submission data, selecting the "Select All" checkbox at the top will only select the entire page's results, not results beyond the page currently being viewed. If you have a large number of submissions and need to export them all in a more robust manner, consider switching to the Pro edition for more export options.
To export a selection of your Freeform submissions:
- Select a Form name from the left sub navigation menu
- You currently cannot export while in All Submissions view)
- Select the submissions you wish to export (or click select all checkbox at top).
- In the settings cog icon button at the top, click it and select Export to CSV.
File Upload fields will export as a complete URL to the file if a public URL is specified for the Asset. If not, it will just export as the file name only (e.g. my-precious.gif).
For more advanced and flexible exporting options, consider upgrading to Freeform Pro.