


This document is for an older version of
Freeform
.
View latest version →
Overview
Email Notifications
Freeform allows you to send email notifications upon submittal of a form. They are global and can be reused for multiple forms, saving you time when you are managing many forms.
TIP
Be sure to configure the Email Alert feature. It allows you to automatically send an email notification alerting the email address(es) specified when an email notification cannot be delivered.
User Guide:
Email notifications may not work as expected when using Sendmail on your local dev environment. Check out our Mailtrap setup guide.
- Types of Email Notifications
- Managing Email Templates
- Examples
- Basic Automated Email Body
- Manual Email Body
- Basic Notification Template File
- Include a Text-only version
- Only Parse Fields with Data
- Include HTML and Rich Text Blocks
- Using Submission object
- Using Layouts
- Including File Upload Data
- Including Email Marketing Selection Data
- Passing Freeform data to another Template Function
- Show textarea line breaks in Email Notifications
- Show all Admin Recipients that received the Email Notification
- Resending Email Notifications
- Send Additional Notification
Types of Email Notifications
Freeform allows you to send email notifications 5 different ways (all of them each being able to have their own notification templates, etc):
- Admin Notifications
- Dynamic Recipients
- Dynamic Template Notifications
- User/Submitter Notifications
- User Defined
Admin Notifications
Email notifications can be sent to one or more admin email addresses. To setup:
- In the form builder for the form, click on the Admin Notifications (envelope icon) tab at the top right.
- Select or add a new email template.
- Specify admin email address(es) in the text area below. Separated multiples by line breaks only.
Additionally, you can use Twig code inside the Admin Recipients textarea field, which allows you to perform conditional checks on fields that would send an email notification to a different email address, etc.
For example, you could use something like this:
{% if myRadioField == "option1" %}
bigbob@acmewidgets.net
{% elseif myRadioField  == "option2" %}
fuzzypants@acmewidgets.net
{% else %}
hotsauce@acmewidgets.net
{% endif %}
2
3
4
5
6
7
OR
{{ firstName == 'Bob' ? 'some@email.com' : 'other@email.com' }}
Dynamic Recipients
Email notifications can be sent to one or more pre-defined admin email addresses that are selected by the user filling out the form using the Dynamic Recipients field. For example, you might have a select dropdown field that contains different departments for the user to address the email to. To setup:
- In the field editor (Freeform -> Fields) or the form builder (Add New Field button at left), create a new field of the Dynamic Recipient field type.
- In the form builder for the form, drag that field into field layout.
- Click on the field inside the field layout and look for the Email Template setting in the property editor (right column).
- Select or add a new email template.
- Choose how you wish to display the field (e.g. Select, Radios, Checkboxes).
- Specify email addresses (and corresponding labels) for each option you wish to make available for users to select.
- You can specify more than 1 email address per option - just separate multiples with comma (
,with no spaces). - Email addresses will NOT be rendered in the front end form, but rather a corresponding ID value will show up.
- You can specify more than 1 email address per option - just separate multiples with comma (
WARNING
You currently cannot specify more than 1 option with the same email address. It will appear to display somewhat correctly, but you'll notice some odd behaviors when the user submits the form. The only workaround for this currently is to create email address aliases for each duplicate option.
Dynamic Template Notifications
Email notifications can be setup dynamically at template level using the dynamicNotification parameter in your template. This allows you to hard code values or dynamically pass a value from another element such as a Craft Entry. To setup:
- In your Twig template, add the following parameter to your freeform.form function:
dynamicNotification: { recipients: ["admin@example.com", "support@example.com"], template: "test.html" }- For Twig file based templates, specify the full file name including file extension (e.g.
my-template.html) fortemplate. - For Database entry based templates, specify the handle for
template.
- For Twig file based templates, specify the full file name including file extension (e.g.
User/Submitter Notifications
Email notifications can be sent to the user submitting the form using the Email field type. This is often used to send an email confirmation for the user. To setup:
- In the field editor (Freeform -> Fields) or the form builder (Add New Field button at left), create a new field of the Email field type.
- In the form builder for the form, drag that field into field layout.
- Click on the field inside the field layout and look for the Email Template setting in the property editor (right column).
- Select or add a new email template.
When the form submitter enters their email address in this field, Freeform will use that email address to send the email notification to.
User Defined
Email notifications can be sent to email addresses of the submitters choosing using the Email field type. This would be commonly used for "tell-a-friend" type forms, or forms to send out any other type of invites. The user submitting the form would enter email address(es) in the form and Freeform can send an email notification to them. This essentially works the same way as User/Submitter Notifications. Just be careful as this could be abused by spammers. To set up:
- In the field editor (Freeform -> Fields) or the form builder (Add New Field button at left), create a new field of the Email field type.
- In the form builder for the form, drag that field into field layout.
- Click on the field inside the field layout and look for the Email Template setting in the property editor (right column).
- Select or add a new email template.
To allow sending of email notifications to more than 1 email address (e.g. in the case of a "tell-a-friend" type form), you will need to add multiple input fields, each with the input name email[]. This approach would require that you code this part manually however.
WARNING
This feature could be abused by spammers.
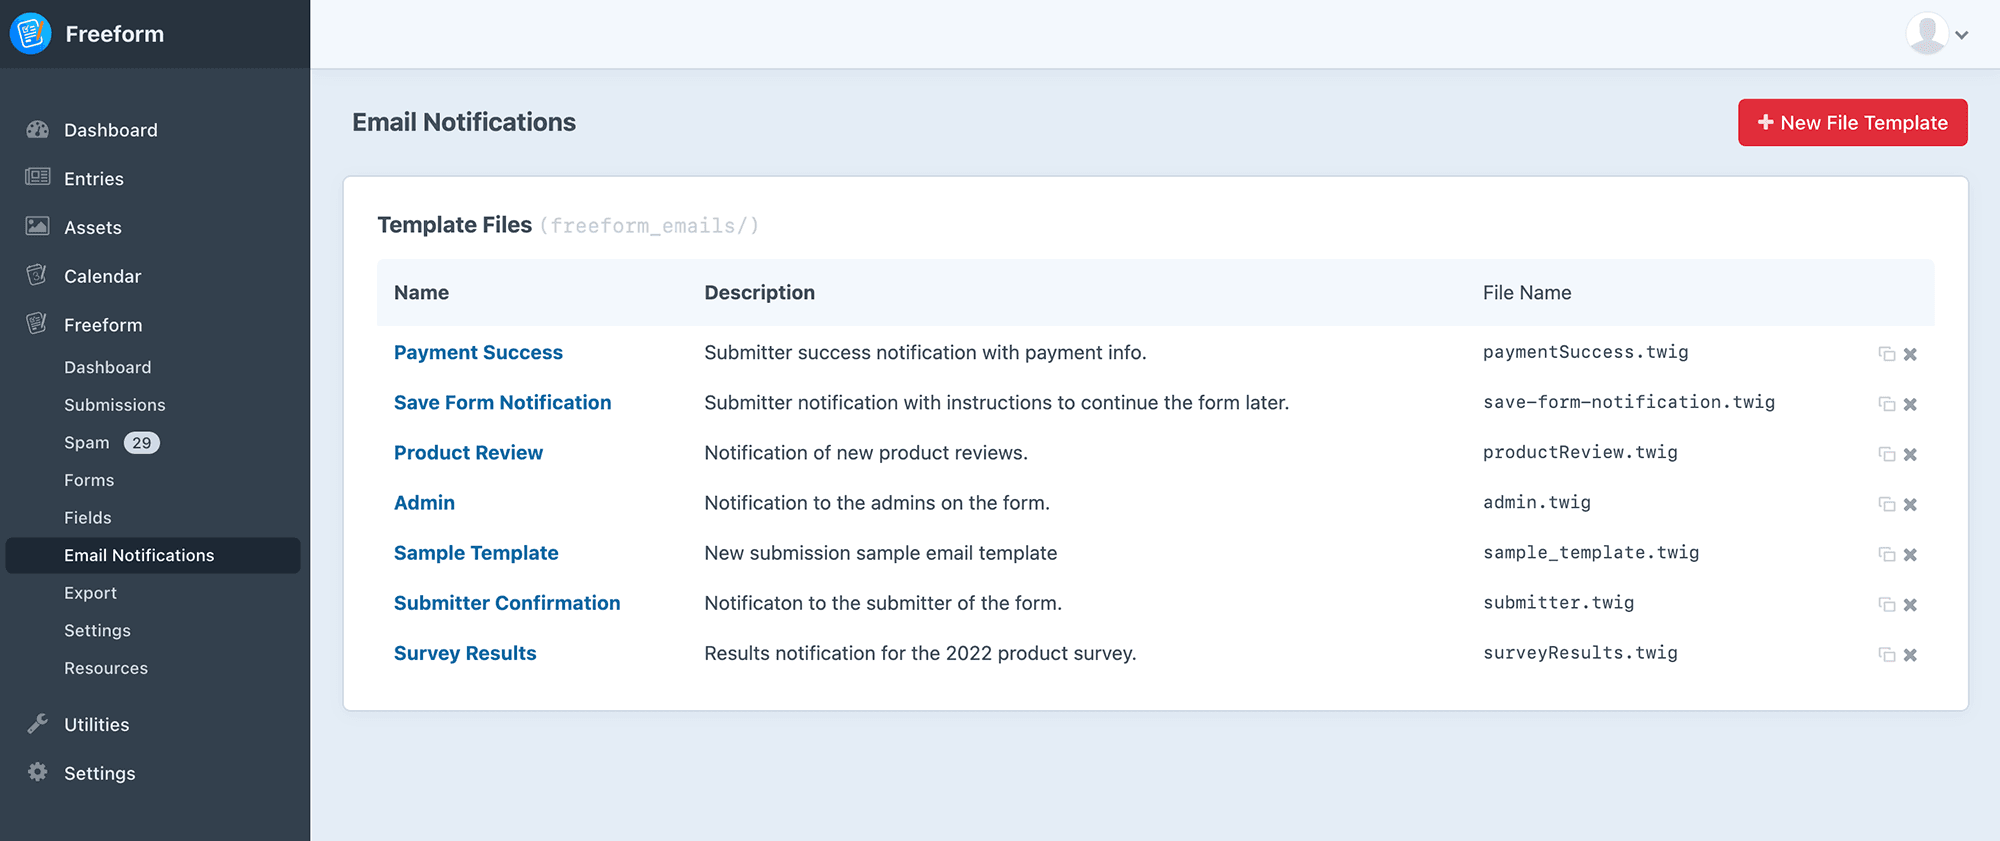
Managing Email Templates
Email notification templates can be managed either from the Freeform control panel or manually adding/editing template files directly. Be sure to specify the path to where these template files are stored in order for Freeform to find them. Please see the Directory Path setting under Settings -> Email Templates).
If adding a brand new email notification template inside the form builder, Freeform will respect the Default Email Notification Creation Method setting and contain basic default content that should be checked and updated once finished building your form.
Template Options
When editing templates directly inside the control panel, Freeform will automatically handle the structure of the template file. If you're creating/editing template files directly, there should be a heading comment block of code for all configuration options that might look something like this:
{# subject: New submission from your {{ form.name }} form #}
{# fromEmail: {{ craft.app.systemSettings.getSettings('email').fromEmail }} #}
{# fromName: {{ craft.app.systemSettings.getSettings('email').fromName }} #}
{# replyToEmail: {{ craft.app.systemSettings.getSettings('email').fromEmail }} #}
{# replyToName: #}
{# cc: ring@my-precio.us #}
{# bcc: #}
{# includeAttachments: true #}
{# presetAssets: 42,67 #}
{# description: A description of what this template does. #}
2
3
4
5
6
7
8
9
10
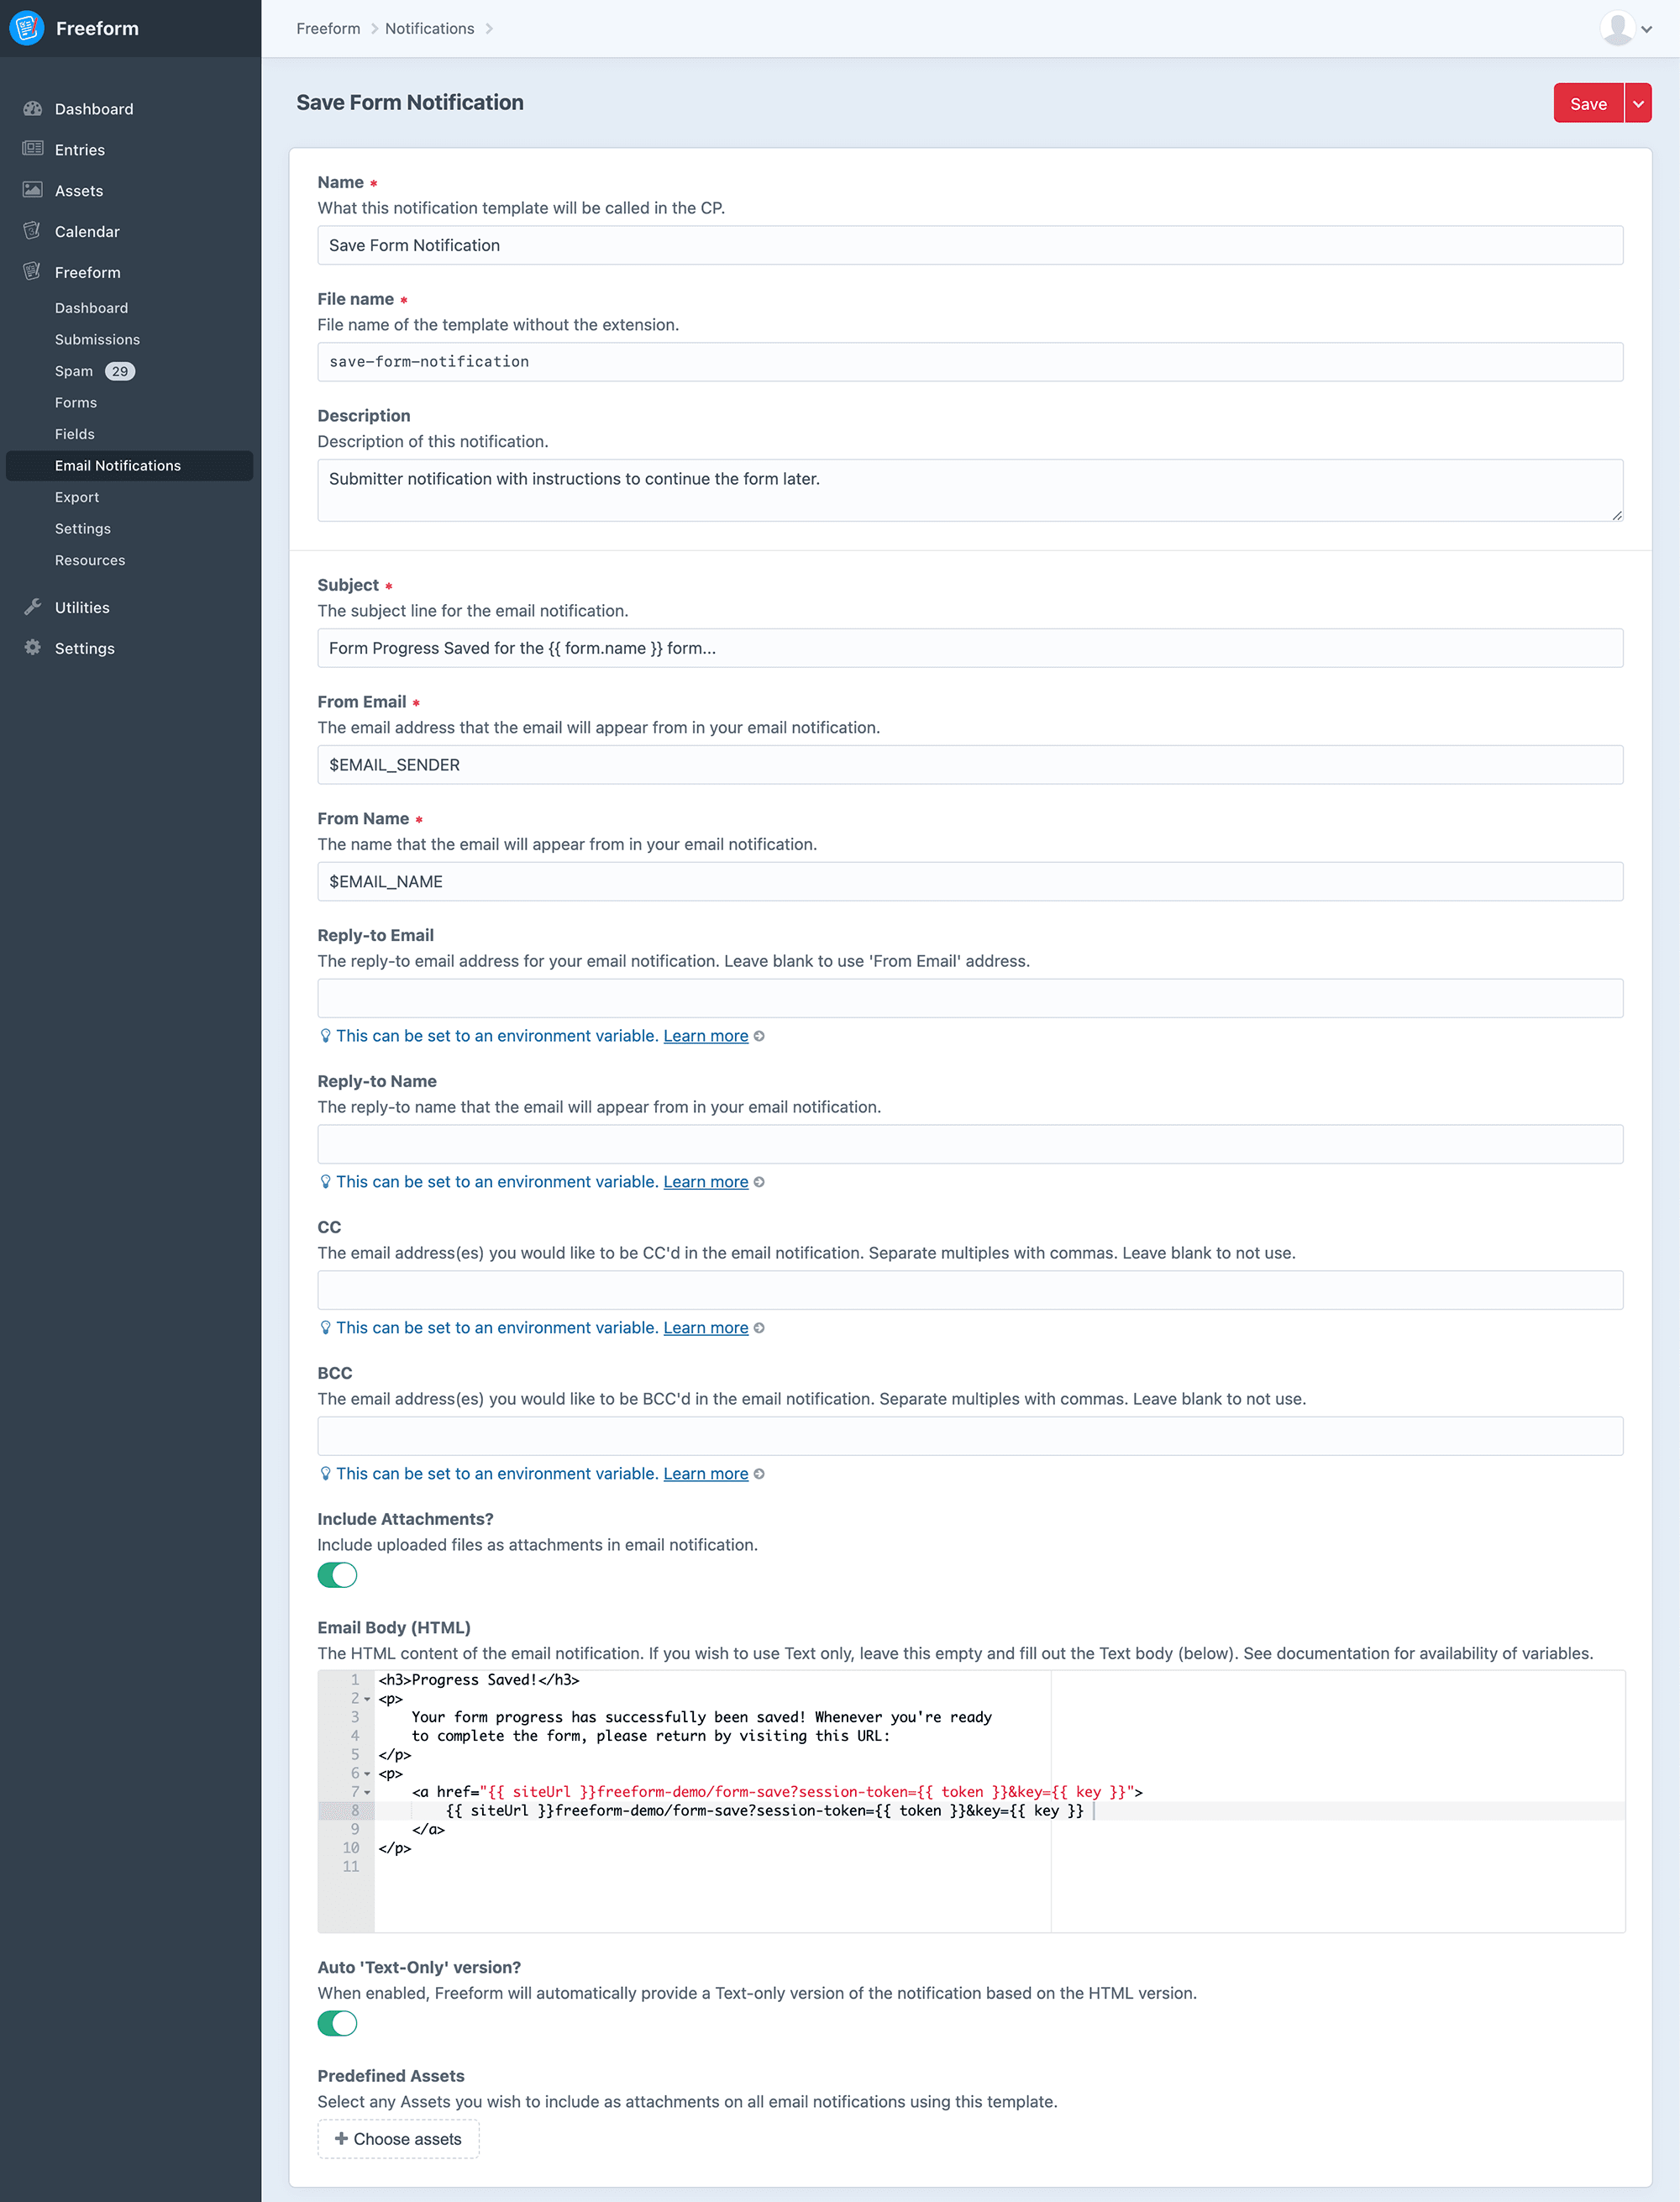
Email Notification templates may contain the following options:
- Name - a common name for the notification template to identify it easier.
- Handle - the unique identifier for the notification template, used when in your regular templates when specifying a notification template.
- Description - a description for the notification template to help identify what it's used for, etc.
- Subject - the subject line for the email notification.
- May include any Freeform field variables (
fieldName) as well asform.name.
- May include any Freeform field variables (
- From Email - the email address the email notification will appear from.
- May include any Freeform field variable (
fieldName).- NOTE: Using a dynamic approach with variables like above could have your emails marked as spam. It would be better to use something general here and set these in the Reply-to Email and Reply-to Name settings instead.
TIP
If you are using SMTP or a service that uses SMTP (like Sendgrid, etc), please make sure that the email address you have configured in the From Email setting for the email notification exactly matches what you have set in the Craft Email Settings area. If you wish to use the submitters email address as the "From" email, use the Reply-to Email setting instead.
- May include any Freeform field variable (
- From Name - the email address the email notification will appear from.
- May include any Freeform field variables (
fieldName), e.g.{{ firstName }} {{ lastName }}1- NOTE: Using a dynamic approach with variables like above could have your emails marked as spam. It would be better to use something general here and set these in the Reply-to Email and Reply-to Name settings instead.
- May include any Freeform field variables (
- Reply-to Email - the email address the email notification will have set for Reply-to.
- May include any Freeform field variable (
fieldName). - Leave blank to use the From Email value.
- May include any Freeform field variable (
- Reply-to Name 3.9+ - the name of the email/sender the email notification will have set for Reply-to.
- May include any Freeform field variable (
fieldName). - Leave blank to use the From Name value.
- May include any Freeform field variable (
- CC - the email address the email notification will also send to as CC.
- May include any Freeform field variable (
fieldName). - Separate multiples with a comma.
- Leave blank to not use CC.
- May include any Freeform field variable (
- BCC - the email address the email notification will also send to as BCC.
- May include any Freeform field variable (
fieldName). - Separate multiples with a comma.
- Leave blank to not use BCC.
- May include any Freeform field variable (
- Include Attachments - include uploaded files as attachments in email notification.
- Predefined Assets Pro - select any Assets you wish to include as attachments on all email notifications using this template.
- Useful if you wish to include a PDF ticket or instructions document to submitter email notifictions, etc.
- Auto 'Text-Only' version? 3.10+ - when enabled, Freeform will automatically provide a Text-only version of the notification based on the HTML version. If disabled, a Text-Only Body setting will display for manually handling this.
- Email Body (HTML) - the HTML body of the email notification to be sent.
- A Plain Text email notification option is also available.
- To use HTML only, leave the Plain Text field empty. To use Plain Text only, leave the HTML field empty. To use HTML with a Plain Text fallback, use both.
- May include any Freeform field variable (
fieldName) as well asform.name,form.id,form.handleanddateCreated.- Available field options:
fieldName.label- displays the label (name) of the field.fieldNameorfieldName.value- displays the data submitted.- Example:
Apples - Array of data example:
Apples, Oranges
- Example:
fieldName.instructions- displays the instructions for the field.fieldName.handle- displays the handle of the field.fieldName.placeholder- displays the placeholder of the field.
- Available field options:
- May also use
allFieldsorallFieldsAndBlocksvariables to automate parsing of fields.allFieldsAndBlocksworks likeallFields, but includes HTML and Rich Text blocks.- To benefit from inclusion of HTML and Rich Text blocks correctly rendering HTML, you'll need to use a conditional inside the loop and add the
|rawfilter tofield.value. See example below.
- To benefit from inclusion of HTML and Rich Text blocks correctly rendering HTML, you'll need to use a conditional inside the loop and add the
- Available options:
field.label- displays the label (name) of the field.field.valueAsString- displays the option label(s) submitted.- Example:
Apples - Array of data example:
Apples, Oranges
- Example:
field.getValueAsString(false)- displays the option value(s) submitted.- Example:
apples - Array of data example:
apples, oranges - Avoid using
field.value, as it may not be a string and could trigger an error.
- Example:
field.instructions- displays the instructions for the field.field.handle- displays the handle of the field.field.placeholder- displays the placeholder of the field.
- To parse only fields with data, you can use:
{% for field in allFields if field.valueAsString %}1 - Excludes File Upload fields. To render these manually, see example here.
- Excludes Email Marketing (mailing list checkbox) selection. To render manually, see example here.
- Excludes Signature fields. To render manually, use:
<img src="{{ submission.myFieldHandle.value }}" alt="Signature" />1
- You may iterate over submission values from the Submission object (as long as you're storing submitted data)
- If using the Element Connections feature, you may use the
elementobject to display data from the newly created Craft Element such as ID, title, username, etc.- For example (but not limited to):
element.idwill return the ID of the newly created Elementelement.titlewill return the title of the newly created Craft Entryelement.usernamewill return the username of the newly created Craft User
- If you have more than 1 element connection for the form, you can use either:
{% for item in element %}
{{ element[0].id }}, {{ element[1].id }}, etc
1
2
- For example (but not limited to):
- A Plain Text email notification option is also available.
- Email Body (Text) - the Plain Text body of the email notification to be sent.
- All of the variables listed above for Email Body (HTML) are available here as well.
- To use HTML only, leave the Plain Text field empty. To use Plain Text only, leave the HTML field empty. To use HTML with a Plain Text fallback, use both.
- When making templates directly (outside of the control panel), simply wrap an additional set of email body contents with
{# text #} {# /text #}in your notification template. See example below.
Examples
Basic Automated Email Body
Below is a basic automated example for the Email Body setting:
<p>The following submission came in on {{ dateCreated|date('l, F j, Y \\a\\t g:ia') }}.</p>
<p>Here are the details:</p>
<ul>
{% for field in allFields %}
	<li>{{ field.label }}: {{ field.valueAsString }}</li>
{% endfor %}
</ul>
2
3
4
5
6
7
Manual Email Body
Below is a manually built example for the Email Body setting:
<p>The following submission came in on {{ dateCreated|date('l, F j, Y \\a\\t g:ia') }}.</p>
<p>Here are the details:</p>
<ul>
	<li>Name: {{ firstName }} {{ lastName }}</li>
	<li>Email: {{ email }}</li>
	<li>Home Phone: {{ homePhone }}</li>
	{% if cellPhone|length %}
		<li>Cell Phone: {{ cellPhone }}</li>
	{% endif %}
	<li>
		Services interested in:
		<ul>
		{% for value in interestedIn.value %}
			<li>{{ value }}</li>
		{% endfor %}
		</ul>
	</li>
	<li>
		Message:<br />
		{{ message|nl2br }}
	</li>
</ul>
2
3
4
5
6
7
8
9
10
11
12
13
14
15
16
17
18
19
20
21
22
Basic Notification Template File
Below is what a basic template might look like when editing notification template files directly (outside of the CP):
{# subject: New submission from your {{ form.name }} form #}
{# fromEmail: {{ craft.app.systemSettings.getSettings('email').fromEmail }} #}
{# fromName: {{ craft.app.systemSettings.getSettings('email').fromName }} #}
{# replyToEmail: {{ craft.app.systemSettings.getSettings('email').fromEmail }} #}
{# includeAttachments: true #}
{# templateName: Name of My Template #}
{# description: A description of what this template does. #}

<p>The following submission came in on {{ dateCreated|date('l, F j, Y \\a\\t g:ia') }}.</p>

<ul>
  {% for field in allFields %}
    <li>{{ field.label }}: {{ field.valueAsString }}</li>
  {% endfor %}
</ul>
2
3
4
5
6
7
8
9
10
11
12
13
14
15
Include a Text-only version
When wanting to add a text-only version of the Email Body when editing notification template files directly (outside of the CP), wrap an additional set of email body contents with {# text #} {# /text #}:
{# subject: New submission from your {{ form.name }} form #}
{# fromEmail: {{ craft.app.systemSettings.getSettings('email').fromEmail }} #}
{# fromName: {{ craft.app.systemSettings.getSettings('email').fromName }} #}
{# replyToEmail: {{ craft.app.systemSettings.getSettings('email').fromEmail }} #}
{# includeAttachments: true #}
{# description: A description of what this template does. #}

<p>The following submission came in on {{ dateCreated|date('l, F j, Y \\a\\t g:ia') }}.</p>

<ul>
  {% for field in allFields %}
    <li>{{ field.label }}: {{ field.valueAsString }}</li>
  {% endfor %}
</ul>

{# text #}
Submitted on: {{ dateCreated|date('l, F j, Y \\a\\t g:ia') }}

{{ submission.title }}

{% for field in allFields %}
    - {{ field.label }}: {{ field.valueAsString }}
{% endfor %}
{# /text #}
2
3
4
5
6
7
8
9
10
11
12
13
14
15
16
17
18
19
20
21
22
23
24
Only Parse Fields with Data
To only parse fields that include data submitted with them, you would add the following conditional:
<p>The following submission came in on {{ dateCreated|date('l, F j, Y \\a\\t g:ia') }}.</p>
<p>Here are the details:</p>
<ul>
{% for field in allFields if field.valueAsString %}
  <li>{{ field.label }}: {{ field.valueAsString }}</li>
{% endfor %}
</ul>
2
3
4
5
6
7
Include HTML and Rich Text Blocks
If you wish to include HTML and Rich Text blocks in the output, use the allFieldsAndBlocks variable instead of allFields. You'll need to perform the additional step of using a conditional to sniff out these fields and apply the |raw filter:
<p>The following submission came in on {{ dateCreated|date('l, F j, Y \\a\\t g:ia') }}.</p>
<p>Here are the details:</p>
{% for field in allFieldsAndBlocks %}
   {% if field.type == "html" or field.type == "rich_text" %}
      {{ field.value|raw }}
   {% else %}
       <p>{{ field.label }}: {{ field.valueAsString }}</p>
   {% endif %}
{% endfor %}
2
3
4
5
6
7
8
9
Using Submission object
You may also have your notification email template code iterate over submission values from the Submission object (as long as you're storing submitted data) like this:
{% if submission is not null %}
  <h4>{{ submission.id }}: {{ submission.title }}</h4>
  <ul>
  {% for field in submission.fieldMetadata %}
    <li>{{ field.label }}: {{ attribute(submission, field.handle) }}</li>
  {% endfor %}
  </ul>
{% endif %}
2
3
4
5
6
7
8
Using Layouts
You may also use another template to set a layout for your email notification templates, making it easier to set consistent headings, footers and styles globally across all of your Email Notification templates. Like anywhere else, just make use of {% extends "some/template" %}.
Create a layout template anywhere in your Craft Templates directory (e.g. _layout/email-notifications):
WARNING
Please note that any additional template files (e.g. _layout.twig, _footer.html, etc) must NOT be stored inside of the Email Notification Templates directory, as Freeform expects that every file in here is a complete email notification template and will choke on any additional files.
<html>
<head>
  <title>Global Layout</title>
</head>
<body>

<h1>Global Layout</h1>
<div>
  {% block content %}{% endblock %}
</div>

</body>
</html>
2
3
4
5
6
7
8
9
10
11
12
13
And then in your Freeform email notification template, something like:
{% extends "_layout/email-notifications" %}

{% block content %}

  <p>Submitted on: {{ dateCreated|date('l, F j, Y \\a\\t g:ia') }}</p>
  <ul>
    {% for field in allFields %}
      <li>{{ field.label }}: {{ field.valueAsString }}</li>
    {% endfor %}
  </ul>

{% endblock %}
2
3
4
5
6
7
8
9
10
11
12
Including File Upload Data
File Upload field data is excluded from automated rendering in allFields variable. You may of course include files as attachments, but if you wish to include an uploaded image rendered into the notification or just show a URL link to the file uploaded, you can do that by retrieving the Asset ID from the Submission object, and then using the Assets function:
<p>The following submission came in on {{ dateCreated|date('l, F j, Y \\a\\t g:ia') }}.</p>
<p>Here are the details:</p>
<ul>
{% for field in allFields %}
  <li>{{ field.label }}: {{ field.valueAsString }}</li>
{% endfor %}
</ul>

{% set assetId = submission.uploadFieldHandle.value %}
Here's the uploaded file URL(s):
<ul>
  {% for asset in craft.assets.id(assetId).all %}
    <li>{{ asset.url }}</li>
  {% endfor %}
</ul>
2
3
4
5
6
7
8
9
10
11
12
13
14
15
Including Email Marketing Selection Data
Email Marketing checkbox selections are excluded from automated rendering in allFields variable. Since they are special fields and not part of the regular fields, this data isn't available in the control panel or Submission object, etc. However, you can access the user's selection via the Form object (and specify the hash available in the Handle area of the property editor for the Email Marketing field inside the Form Builder). The example below will render as 1 if the user checked the checkbox:
{{ form.get("BmLxw1ONn").value }}
This could be used as a conditional like this:
{% if form.get("BmLxw1ONn").value == 1 %}
  Opted into mailing list.
{% else %}
  Did NOT Opt into mailing list.
{% endif %}
2
3
4
5
Passing Freeform data to another Template Function
If you need to pass a Freeform field value (such as an ID) into another Craft function like craft.entries or craft.users in email notification templates or elsewhere, be sure to specify the Freeform field as myFreeformFieldHandle.value. So for example:
{{ craft.users.id(myFFfieldHandle.value).one().name }}
OR
{% set item = craft.entries.section('section').id(myFFfieldHandle.value).one %}
Show textarea line breaks in Email Notifications
Textarea data is stored in the database as newlines, which obviously don't parse as line breaks when trying to display in email notifications or on front end with Submissions object. To make this happen, use the nl2br Twig filter, which can be done in a variety of ways:
{{ coverLetter|nl2br }}

{{ coverLetter|nl2br|raw }}

{% set letter = coverLetter|nl2br %}
{{ letter|raw }}
2
3
4
5
6
Show all Admin Recipients that received the Email Notification
If you wish to show a list of all receipients of the email notification specified in the Admin Notification area of the form builder, you can do so with this:
{{ form.adminNotificationProperties.recipients|replace({'\n': ', '}) }}
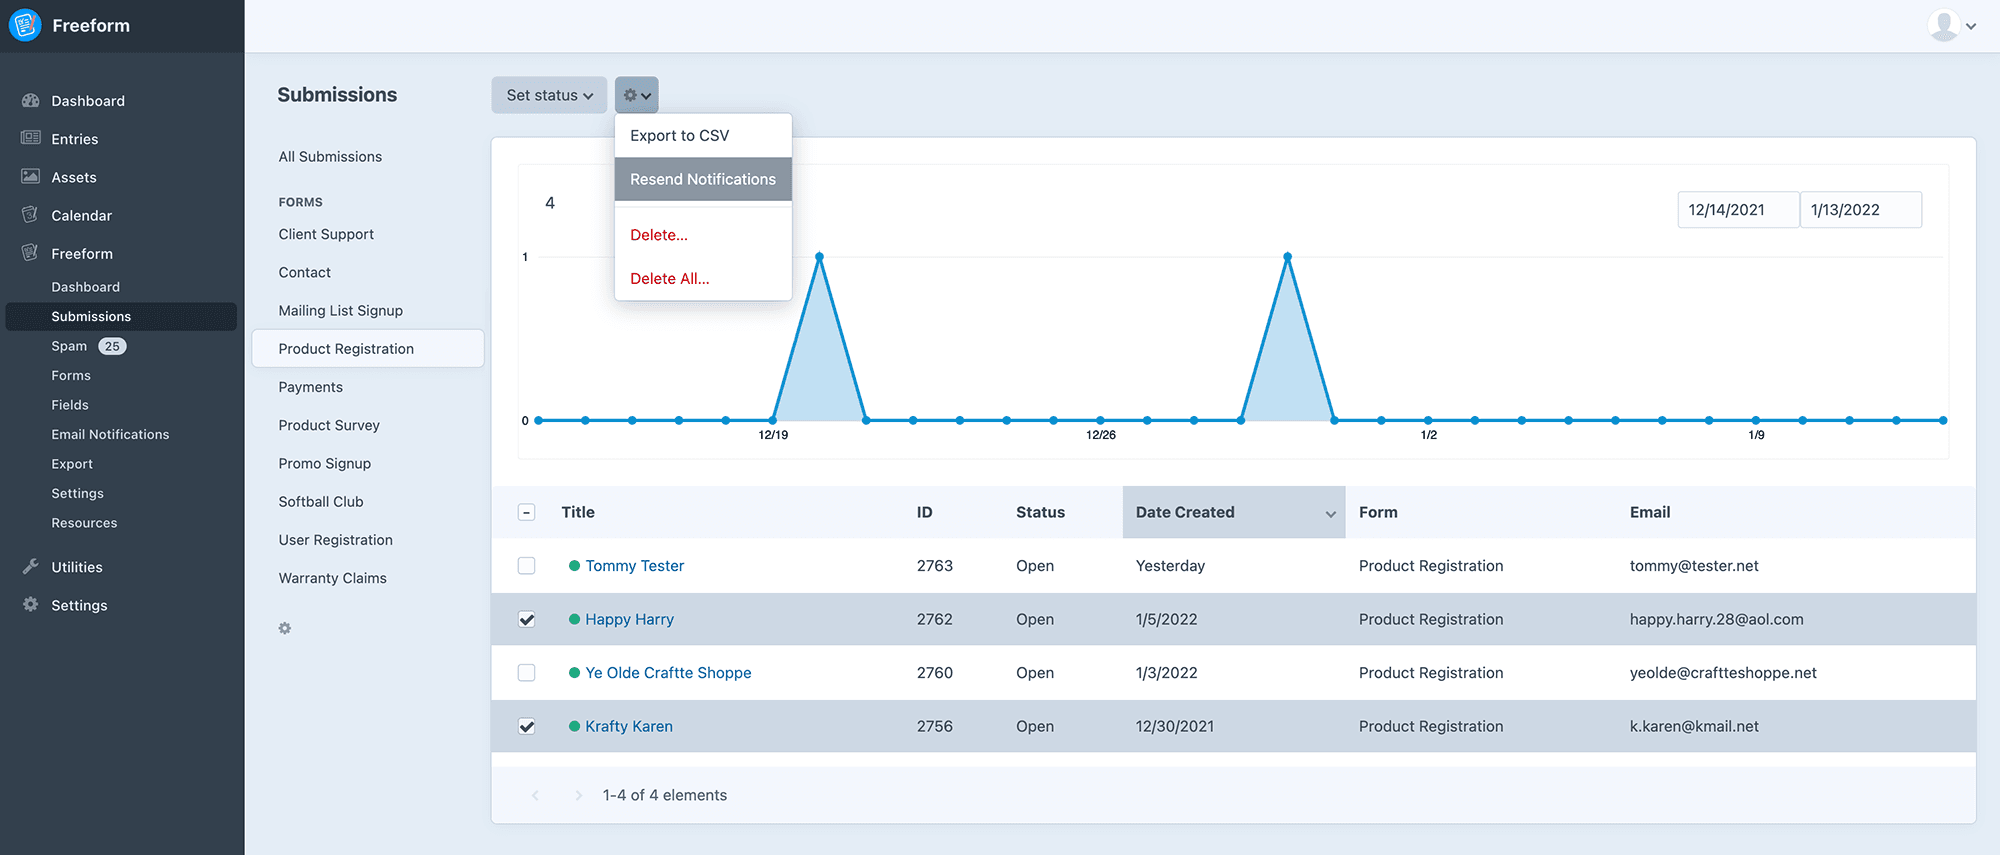
Resending Email Notifications Pro
If you ever run into any issues where email notifications did not send correctly (whether it be that there was an issue with Freeform, your templates, your email server, etc), Freeform allows you to effortlessly have email notifications resent. Simply select the affected submissions from the CP Submissions list page, and then click the cog (gears) icon at top left and select Resend Notifications. Freeform will then resend the email notifications for you.
Send Additional Notification Pro 3.13.2+
If you ever need to send additional notifications to other email addresses for any reason at any time, you can use the Send Additional Notification feature. This is an email notification that is independant from other notifications, so it may use a different email notification template and contain different wording or data, etc.
Simply select the applicable submission(s) from the CP Submissions list page, and then click the cog (gears) icon at top left and select Send Additional Notification. Freeform will then present you with a modal that allows you to select an email notification template and specify email address(es) to notify.