Settings
Freeform includes several settings that allow you to customize your form management experience. To adjust your settings, click the Settings menu item while in the Freeform add-on, or go to CP > Add-Ons > Freeform > Settings.
License
License Key
This isn't a required field, but it allows you to keep track of your licenses easier. Simply enter the Freeform license key you received here.
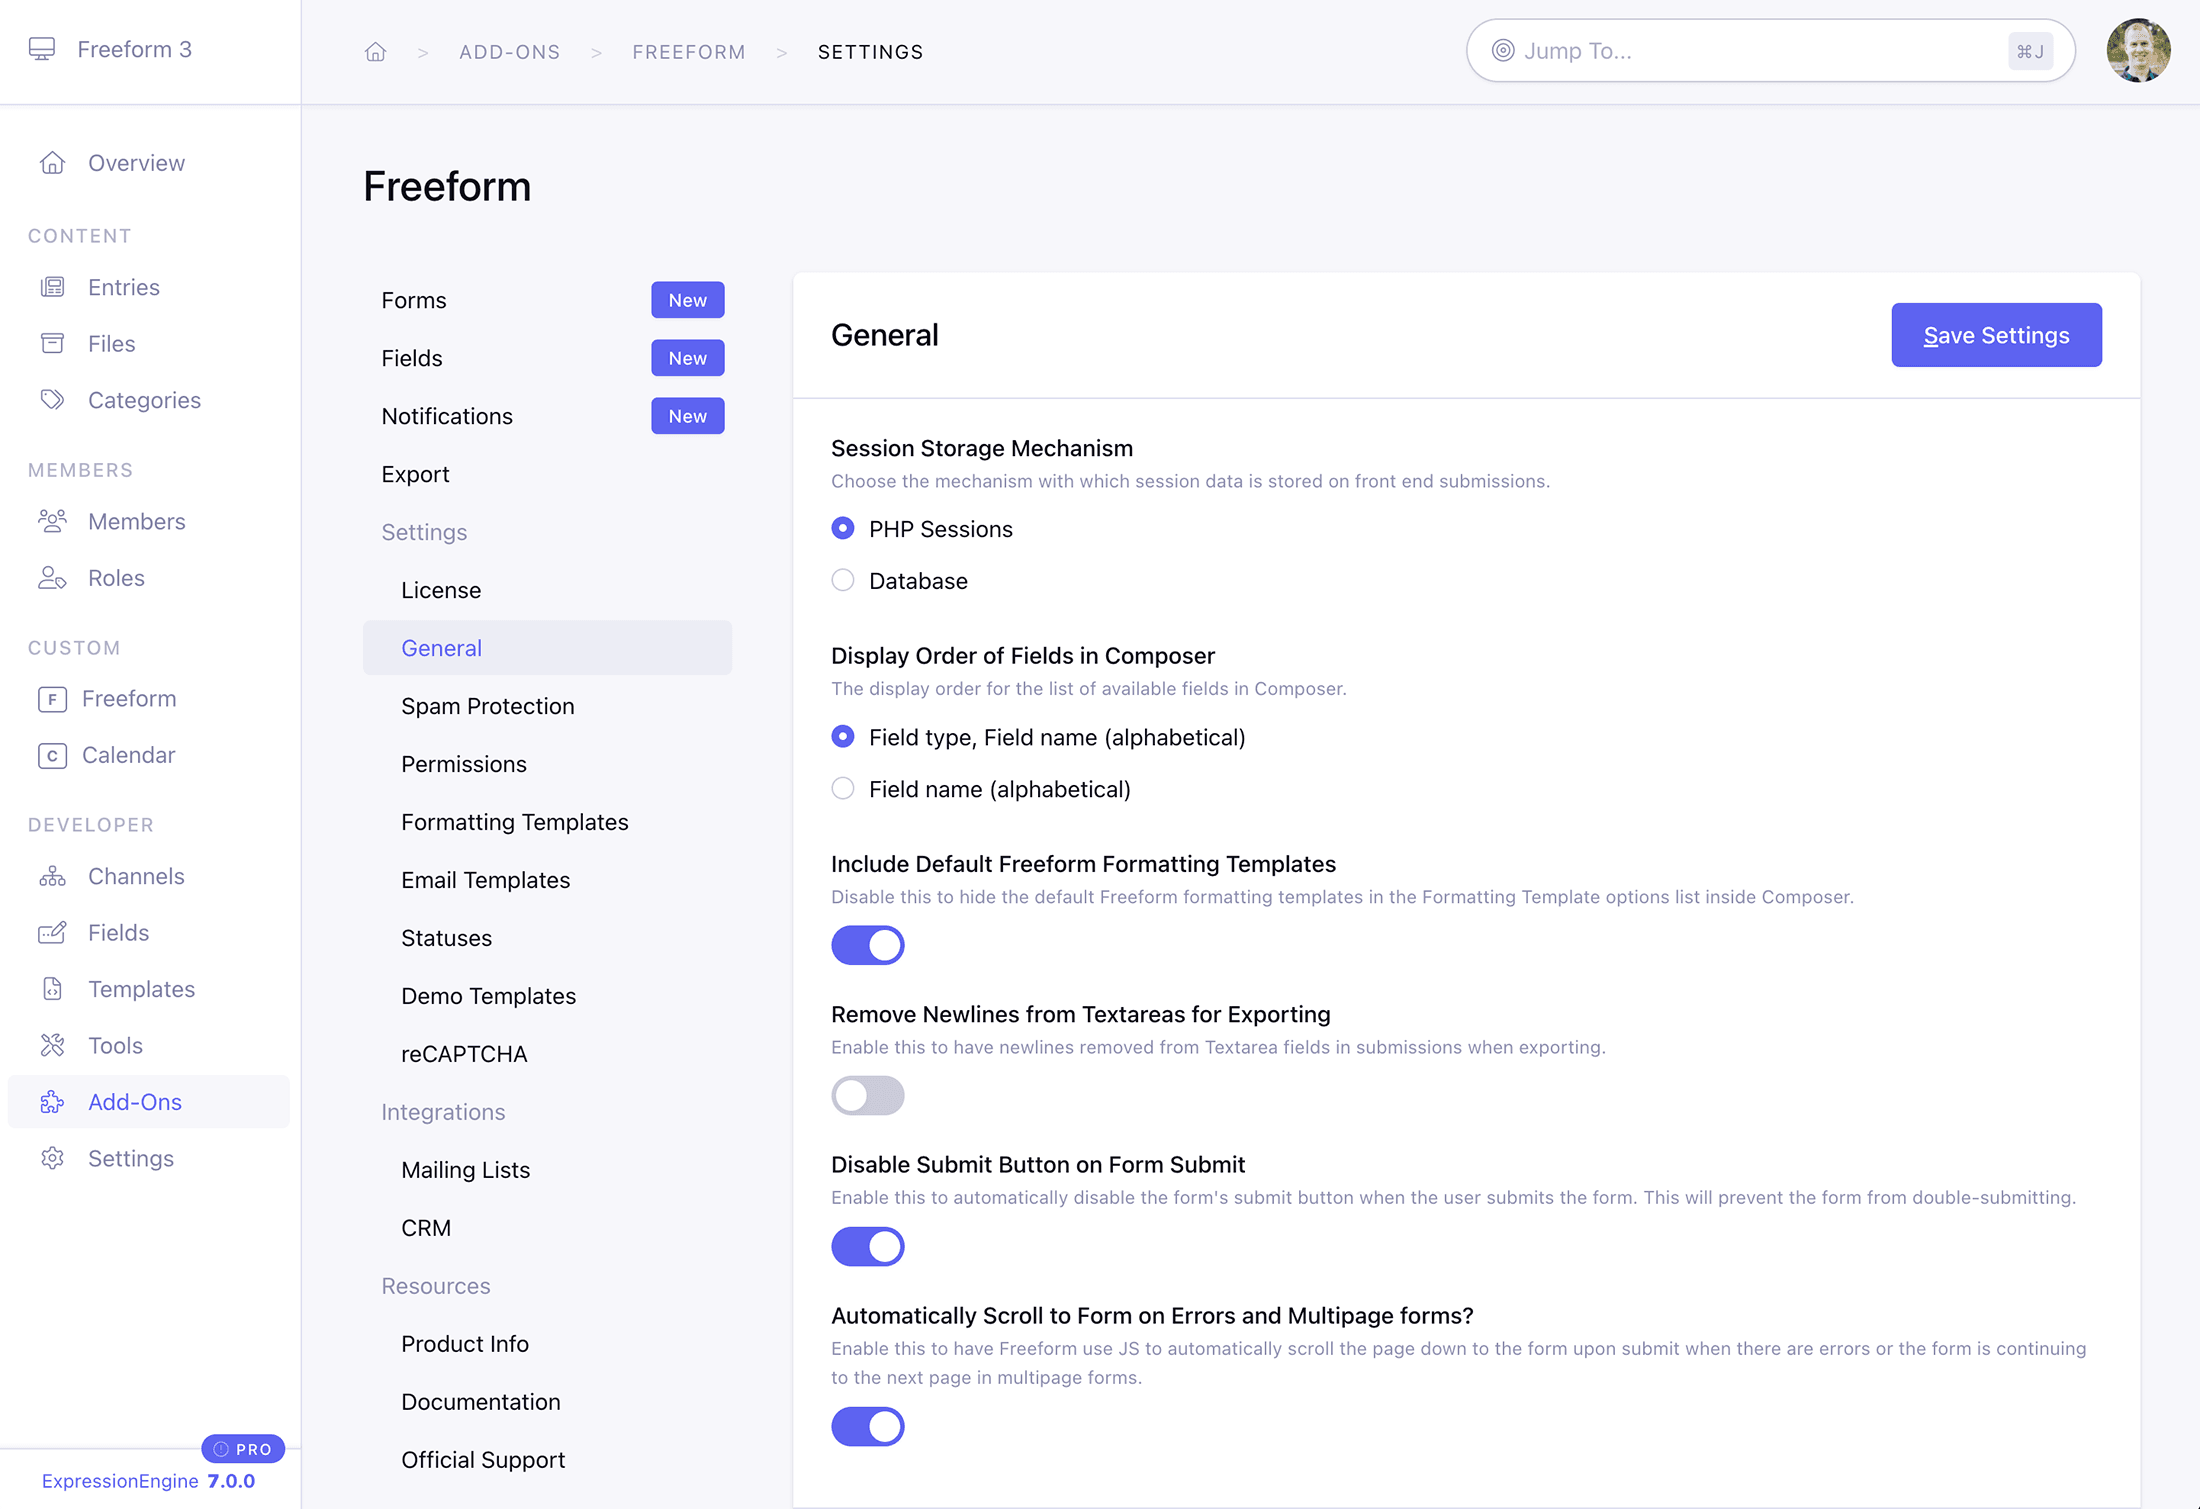
General
Session Storage Mechanism
Choose the mechanism with which session data is stored on front end submissions:
- PHP Sessions (default)
- Database
Display Order of Fields in Composer
This setting allows you to set the display order for the list of available fields in Composer.
Include Default Freeform Formatting Templates
Disable this to hide the default Freeform formatting templates in the Formatting Template options list inside Composer.
Remove Newlines from Textareas for Exporting
Enable this to have newlines removed from Textarea fields in submissions when exporting.
Disable Submit Button on Form Submit?
Enable this to automatically disable the form's submit button when the user submits the form. This will prevent the form from double-submitting.
Automatically Scroll to Form on Errors and Multipage forms?
Enable this to have Freeform use JS to automatically scroll the page down to the form upon submit when there are errors or the form is continuing to the next page in multipage forms.
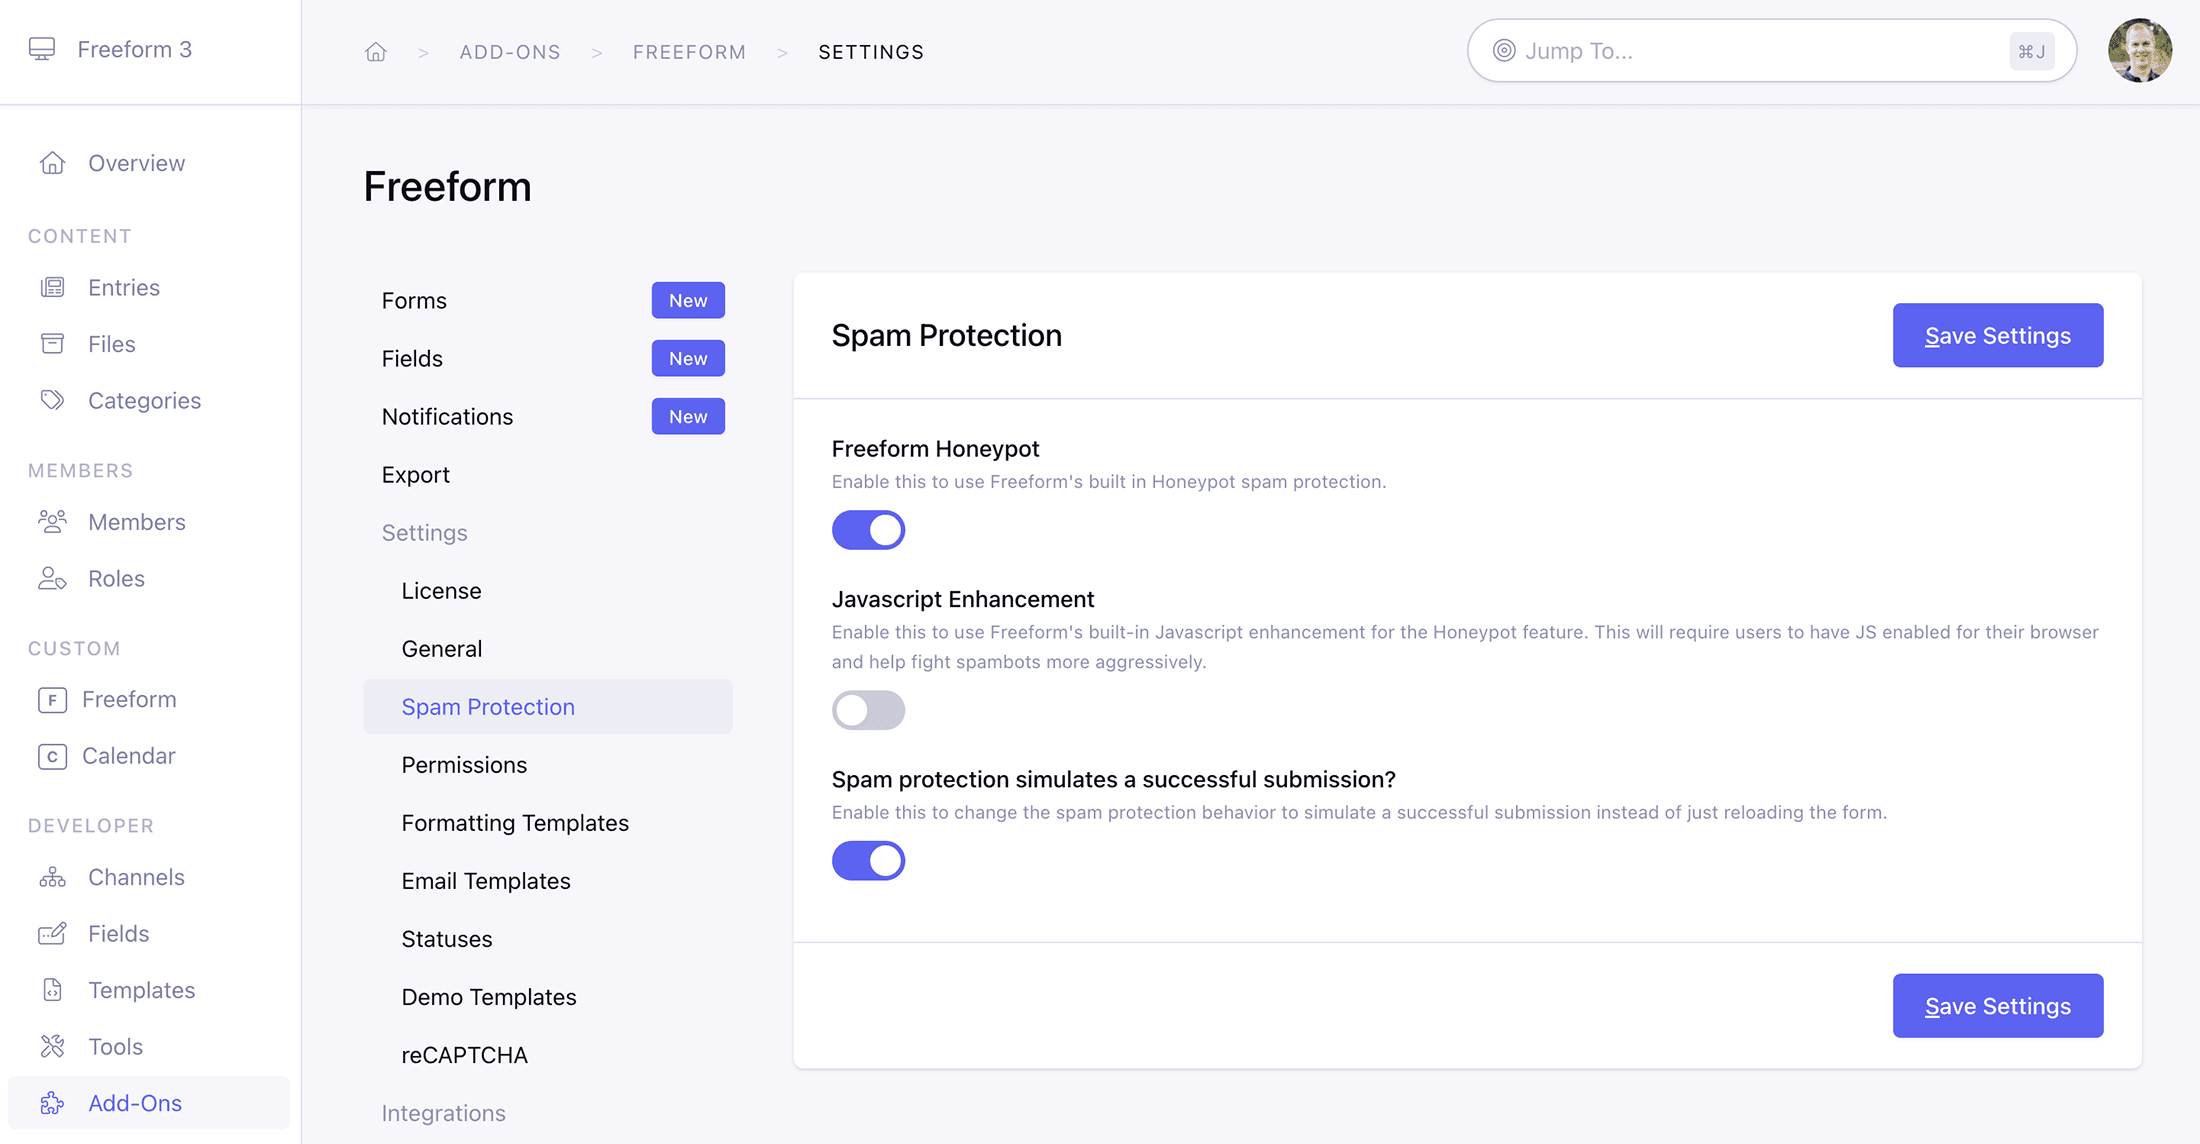
Spam Protection
Freeform Honeypot
Freeform includes its own Javascript-based honeypot spam protection. This is enabled by default, but can be disabled here.
For more information, visit the Spam Protection documentation.
Spam protection simulates a successful submission?
Enable this to change the spam protection behavior to simulate a successful submission instead of just reloading the form.
Permissions
Freeform includes member group Permission controls to allow or deny access to various pages and parts of the Freeform control panel. Simply visit the Freeform permissions page (Freeform > Settings > Permissions) to grant/edit/remove permissions to Freeform. Super Admins ALWAYS have full access.
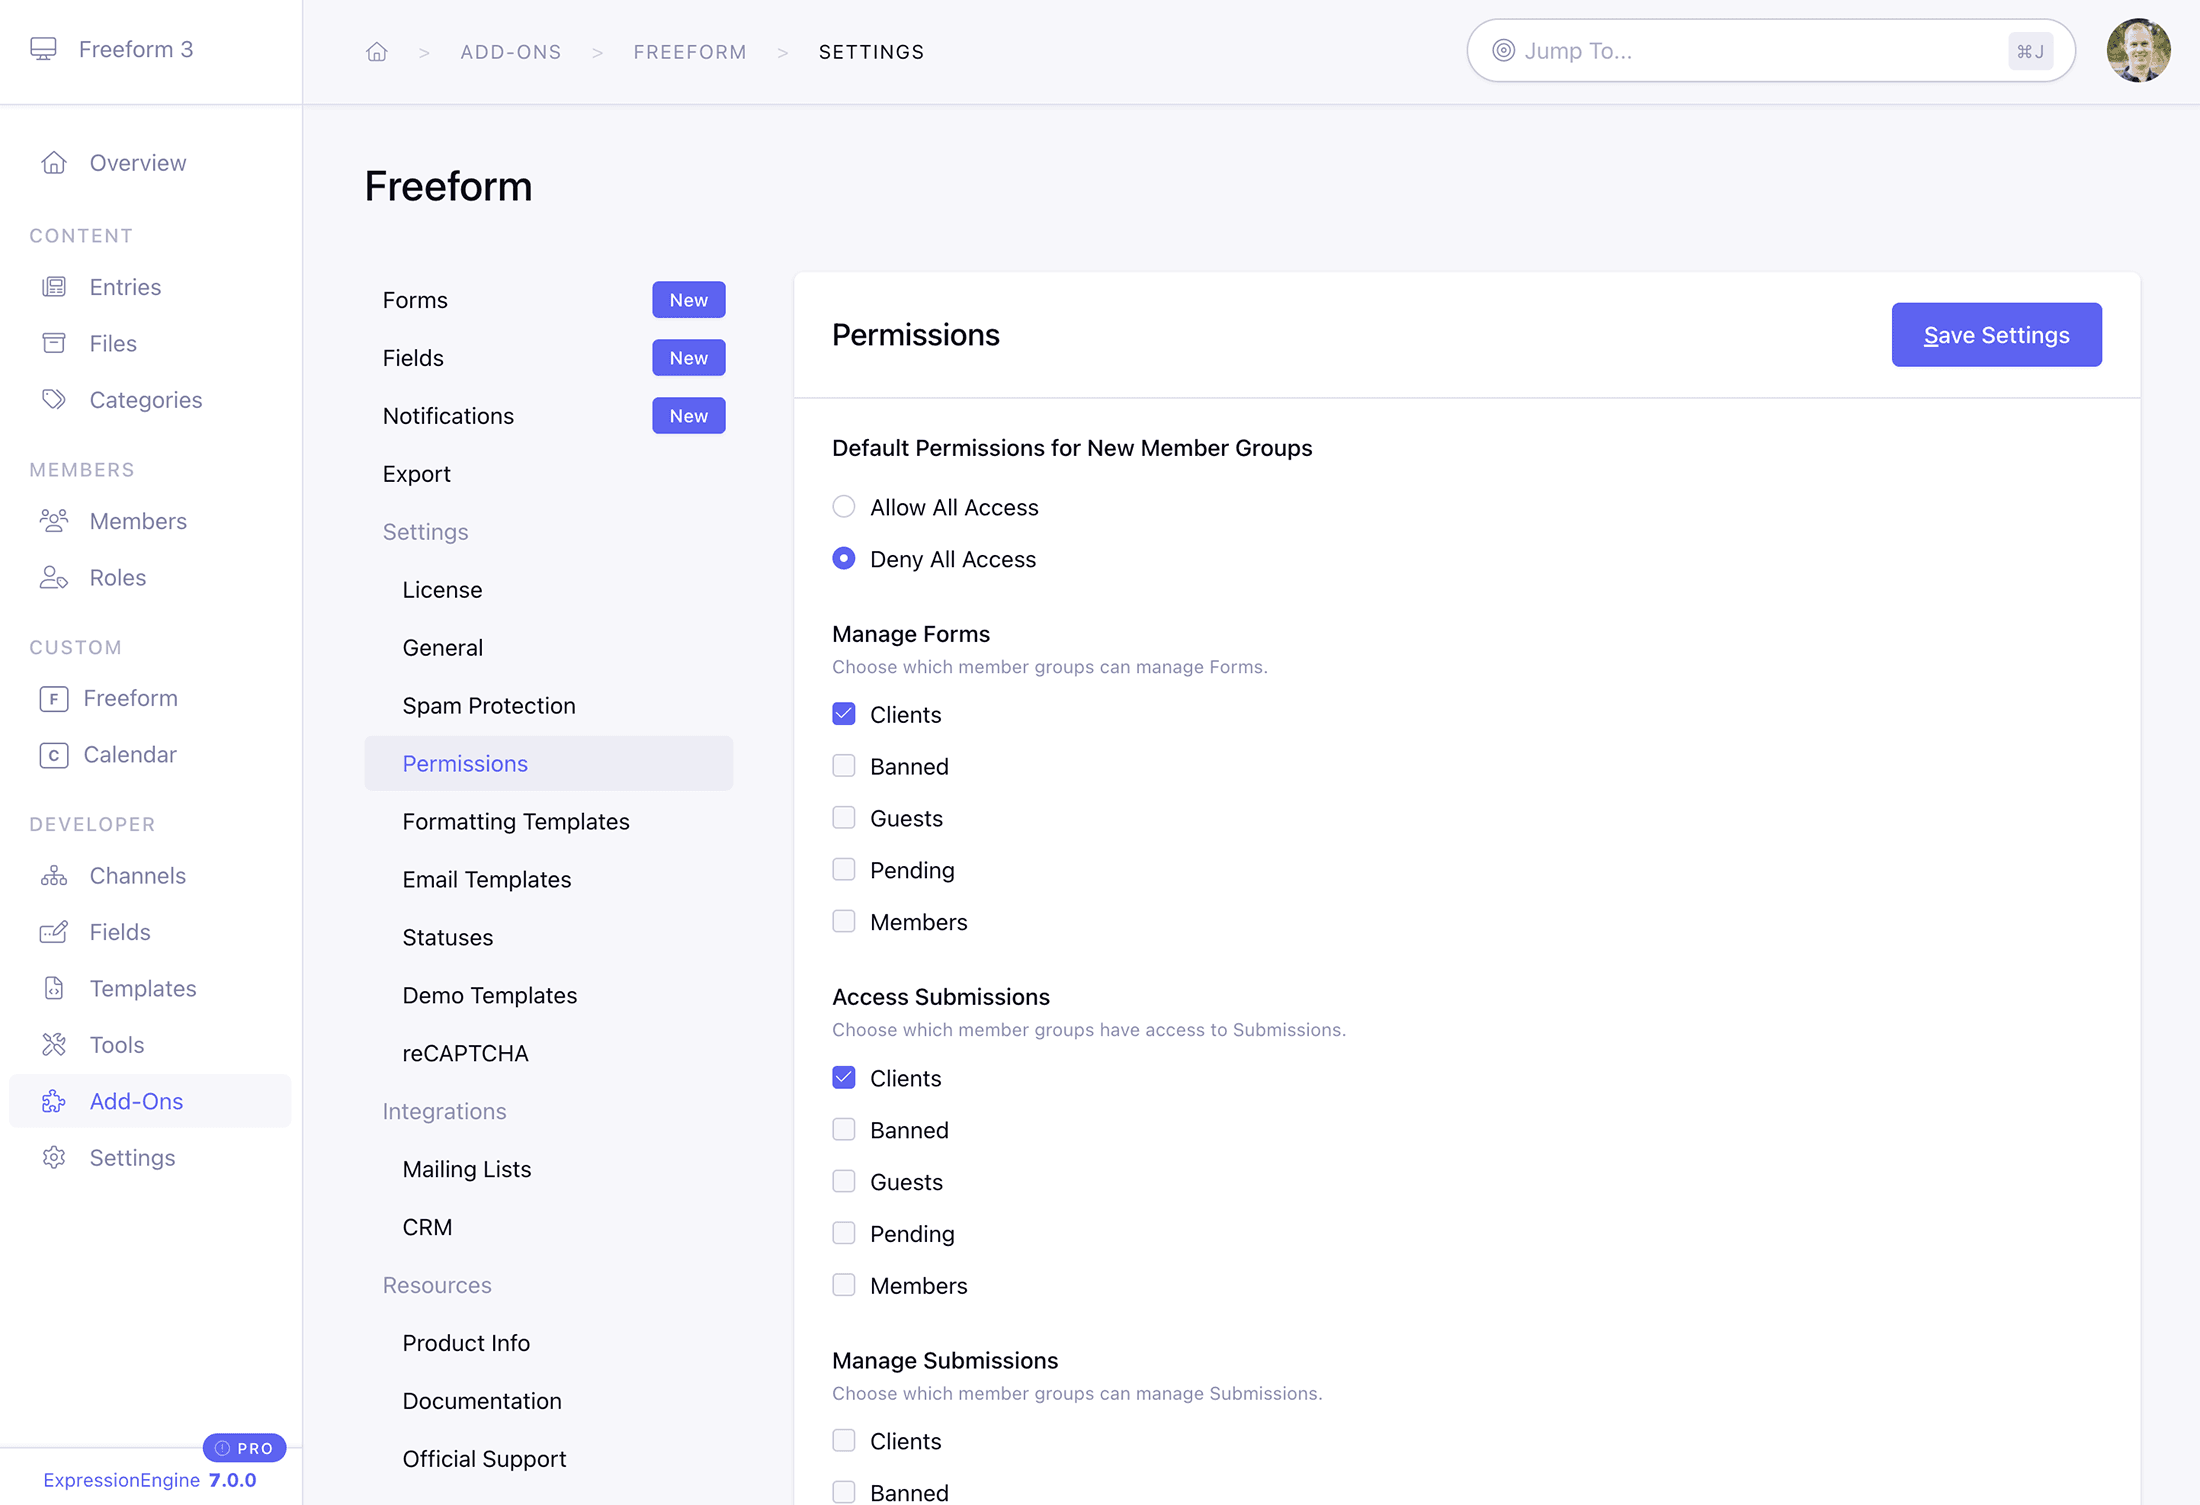
- Default Permissions for New Member Groups
- Select whether newly created member groups should automatically be allowed or denied access to Freeform's permissions (member groups created later on).
- Manage Forms - can create, edit or delete forms. All members will have access to view list of forms.
- Access Submissions - access to the Submissions list page.
- Manage Submissions - can view, edit or delete any or all submissions.
- Access Fields - access to the Fields list page and ability to create, edit or delete fields.
- Access Export - access to the Export Profiles list page and running of exports.
- Access Settings - can access and update various settings areas for Freeform, including Email Notification Templates, Formatting Templates, Statuses, etc.
- Access Integrations - can access and create, edit or delete API integrations.
- Access Resources - show or hide the Resource links in the left Freeform nav.
- Access Logs - access to the Freeform error logs.
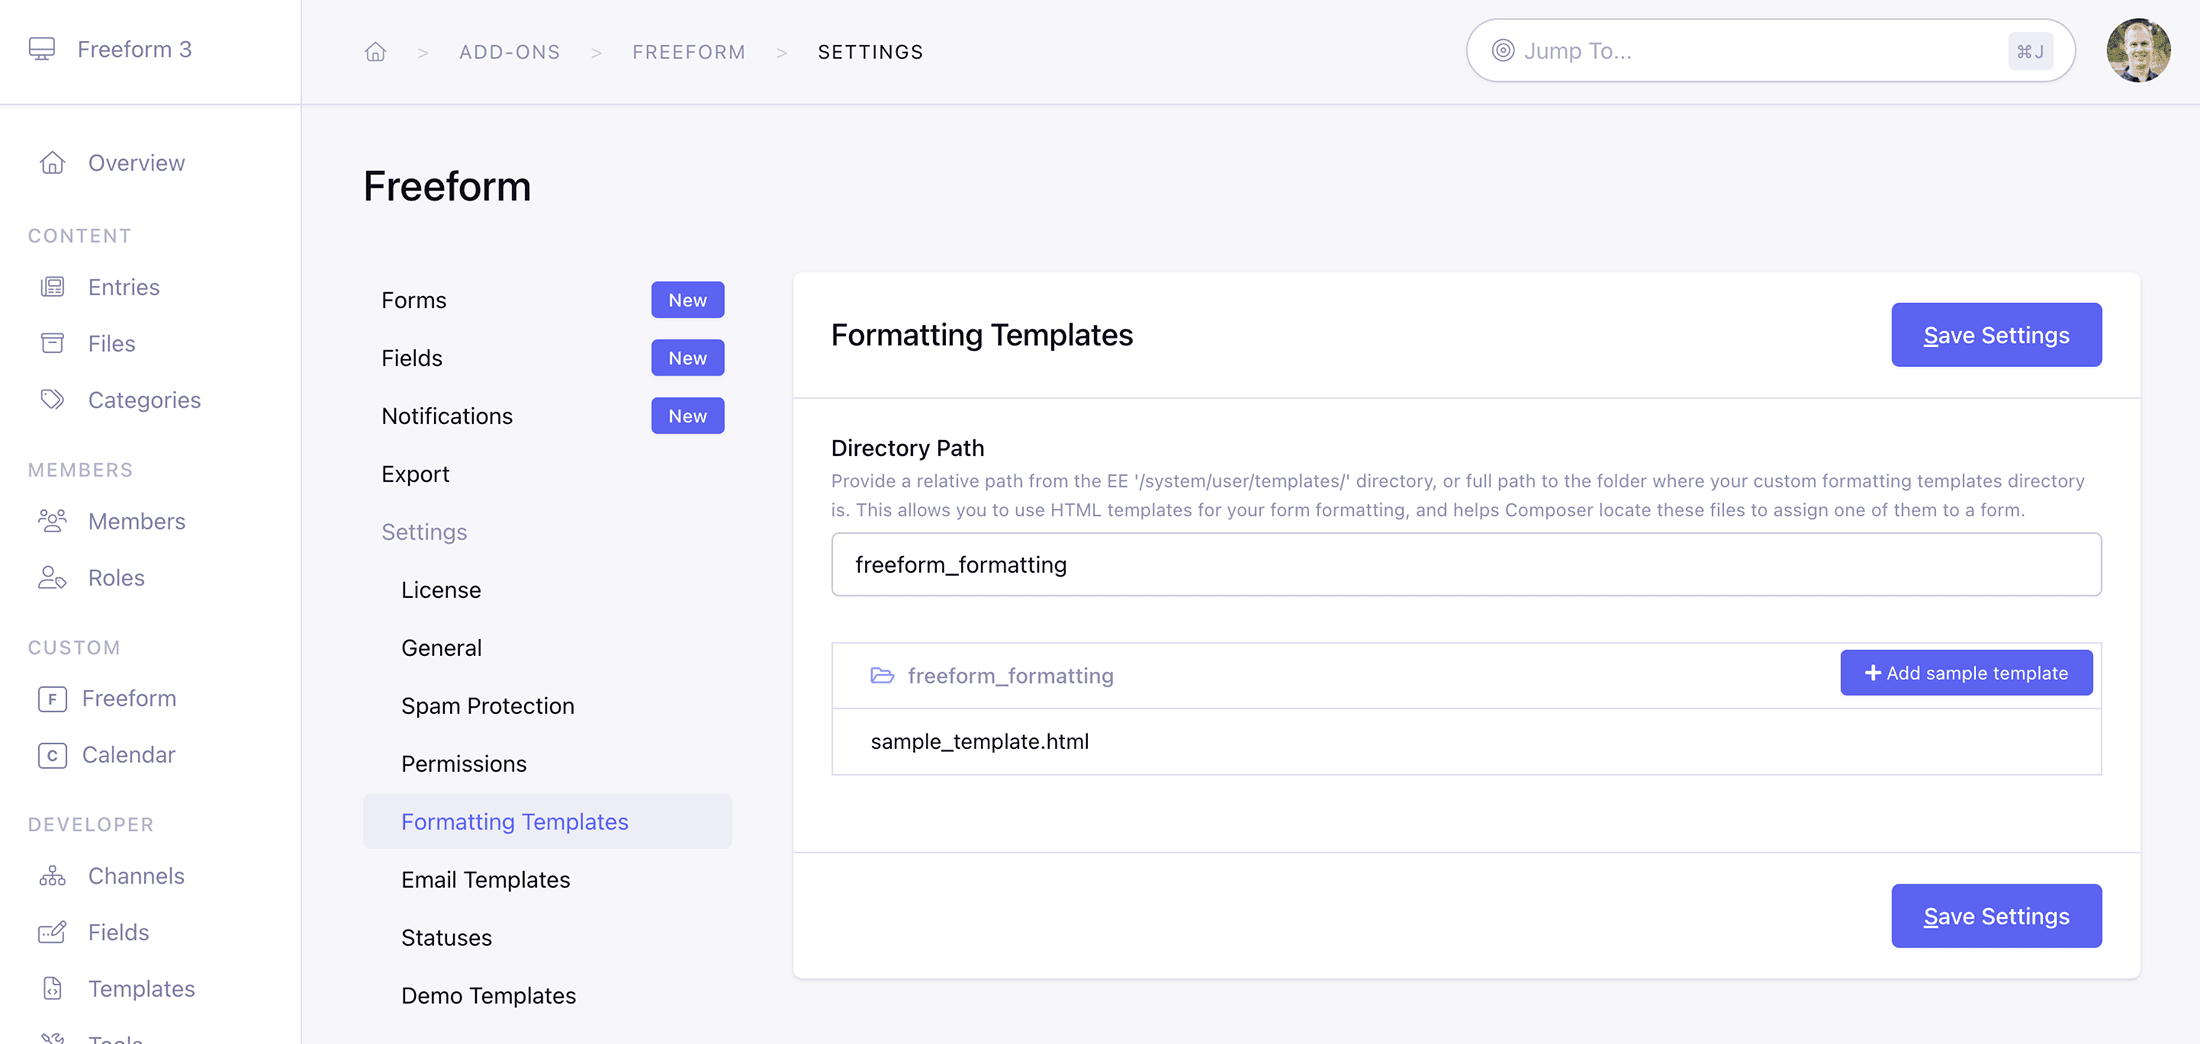
Formatting Templates
Directory Path
When using custom formatting templates for your forms, you'll need to specify where your HTML templates are stored.
Provide a relative path from the EE /system/user/templates/ directory, or full path to the folder where your custom formatting templates directory is. Examples:
/home/username/www/public_html/freeform-formatting/home/username/www/system/user/templates/freeform-formattingfreeform-formatting/
DANGER
You should NOT attempt to use the EE Template Group and Template system and include paths like /home/username/www/system/user/templates/default_site/freeform-formatting or /home/username/www/system/user/templates/default_site/freeform-formatting.group
To add a starter example template, click the "Add a sample template" button, and then edit the template after.
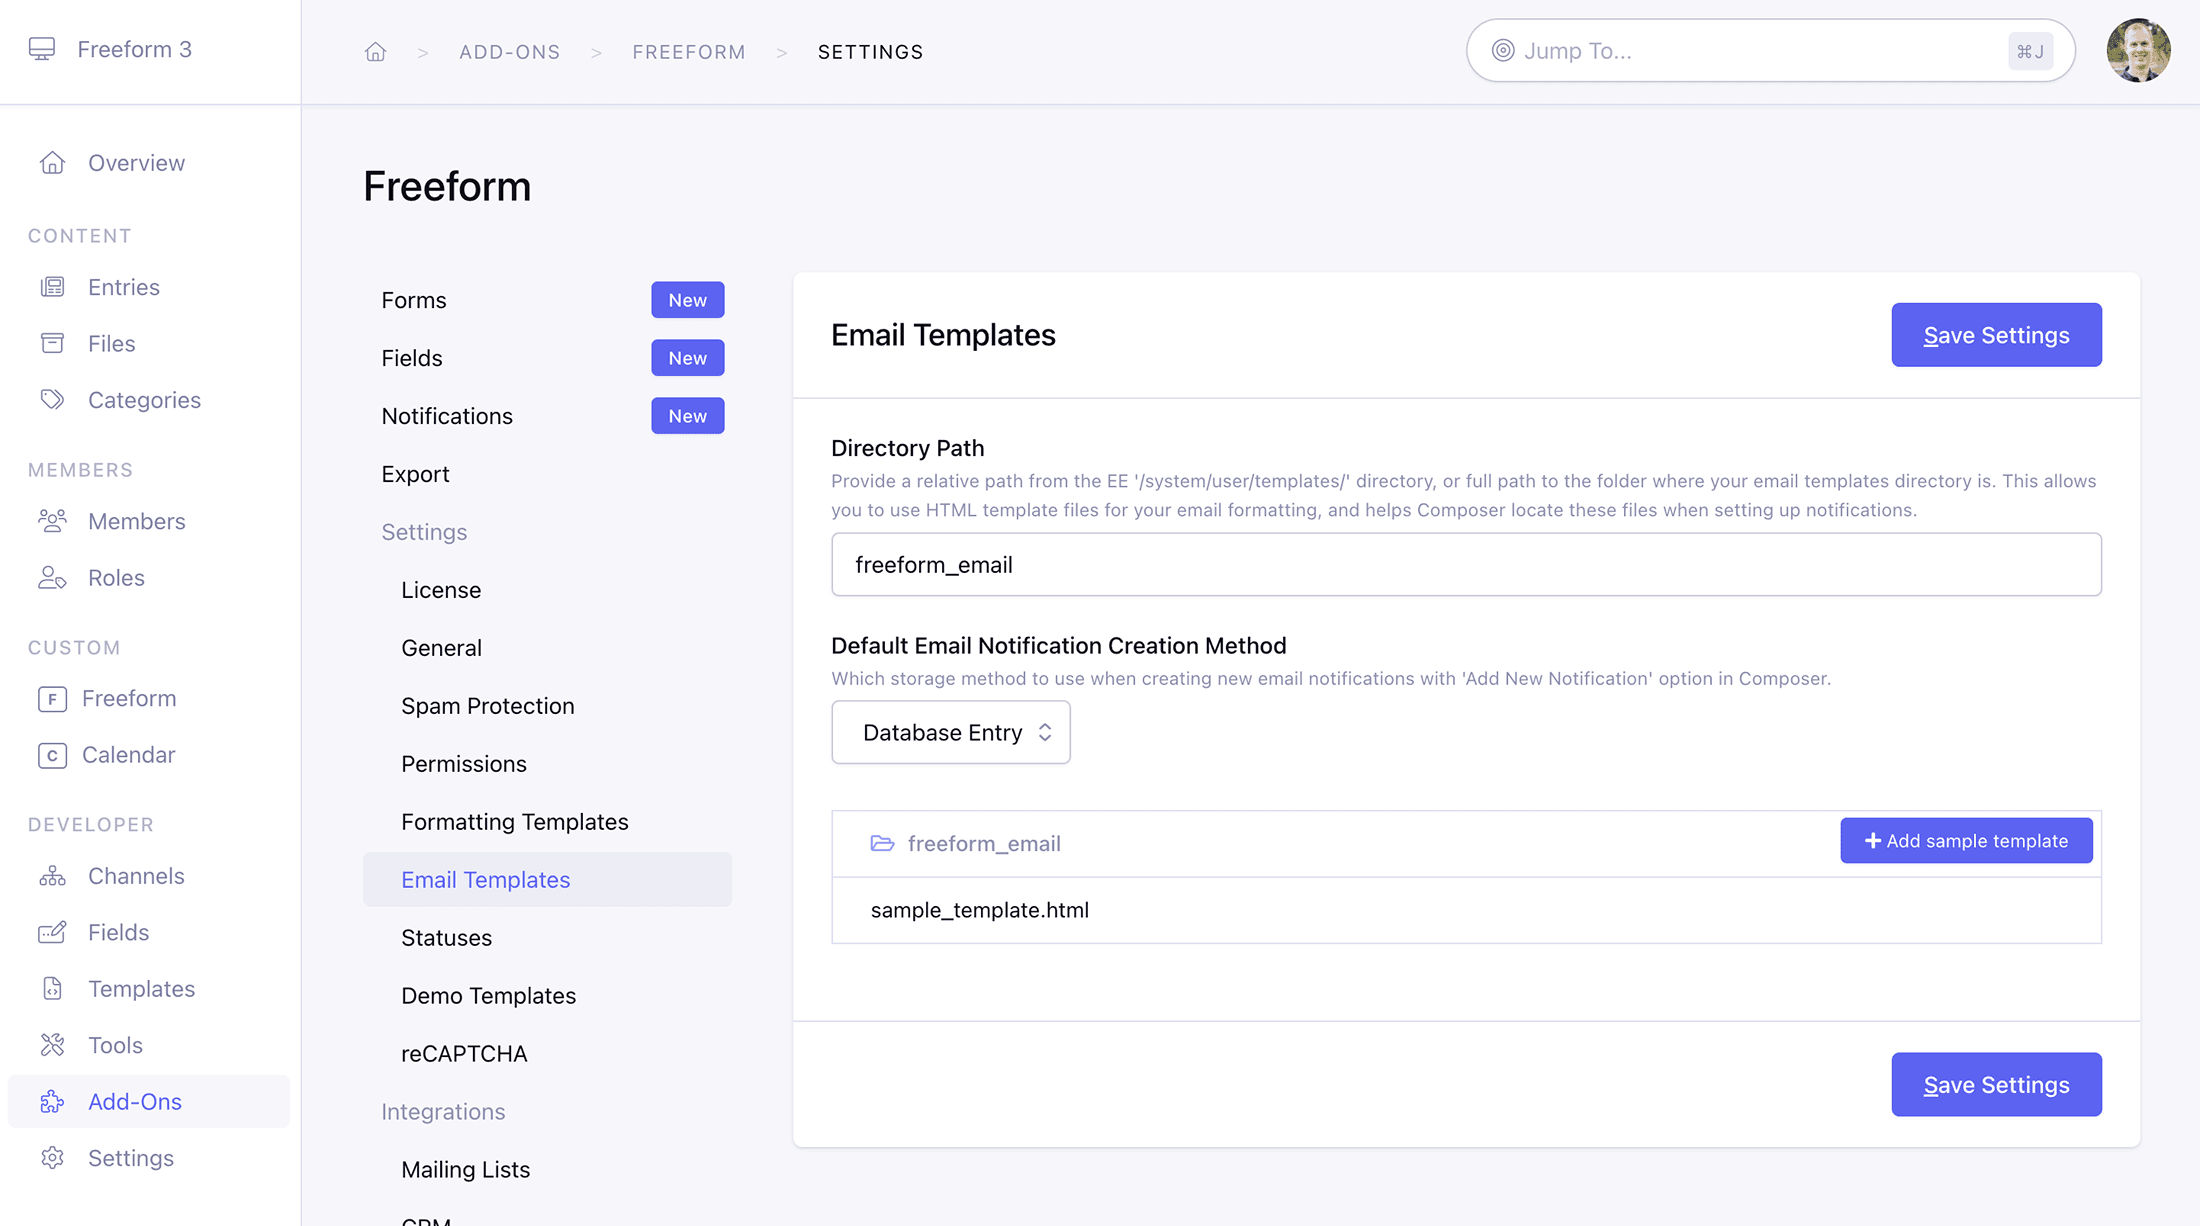
Email Templates
TIP
This area is for users that wish to use HTML template files for email notifications. See Email Notifications documentation for more information about implementation.
Directory Path
Provide a relative path from the EE /system/user/templates/ directory, or full path to the folder where your Freeform email notifications templates directory is. Examples:
/home/username/www/public_html/freeform-emails/home/username/www/system/user/templates/freeform-emailsfreeform-emails/
DANGER
You should NOT attempt to use the EE Template Group and Template system and include paths like /home/username/www/system/user/templates/default_site/freeform-emails or /home/username/www/system/user/templates/default_site/freeform-emails.group
To add a starter example template, click the "Add a sample template" button, and then edit the template after.
Default Email Notification Creation Method
Select which storage method to use when creating new email notifications with Add New Notification option in Composer.
- Database Entry - Use CP-based database template editor.
- Template File - Use HTML template files.
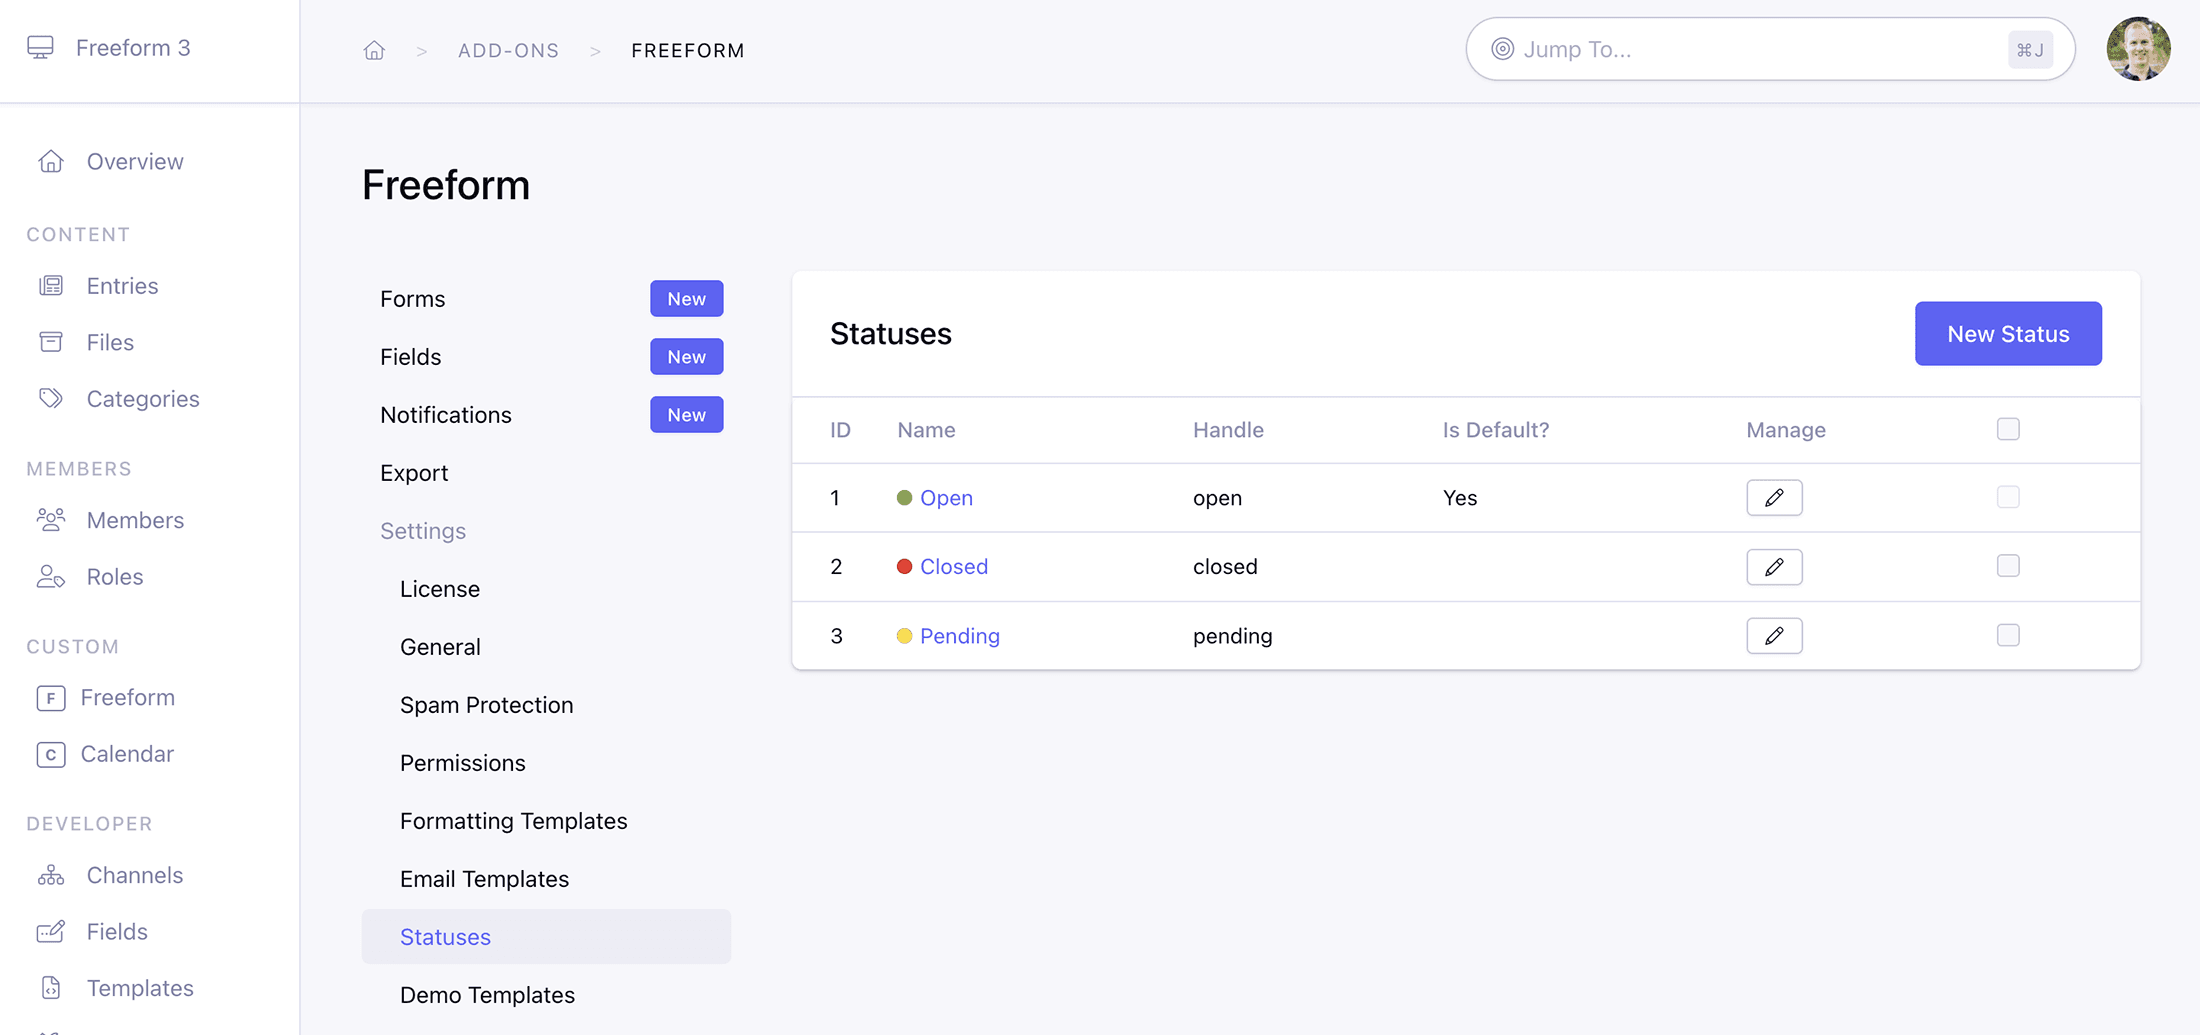
Statuses
This area allows you to manage and create new statuses for your forms. You can set the default status to be set for all forms here.

Demo Templates
Allows you to install the Demo Templates to get Freeform up and running on the front end with just a couple clicks!
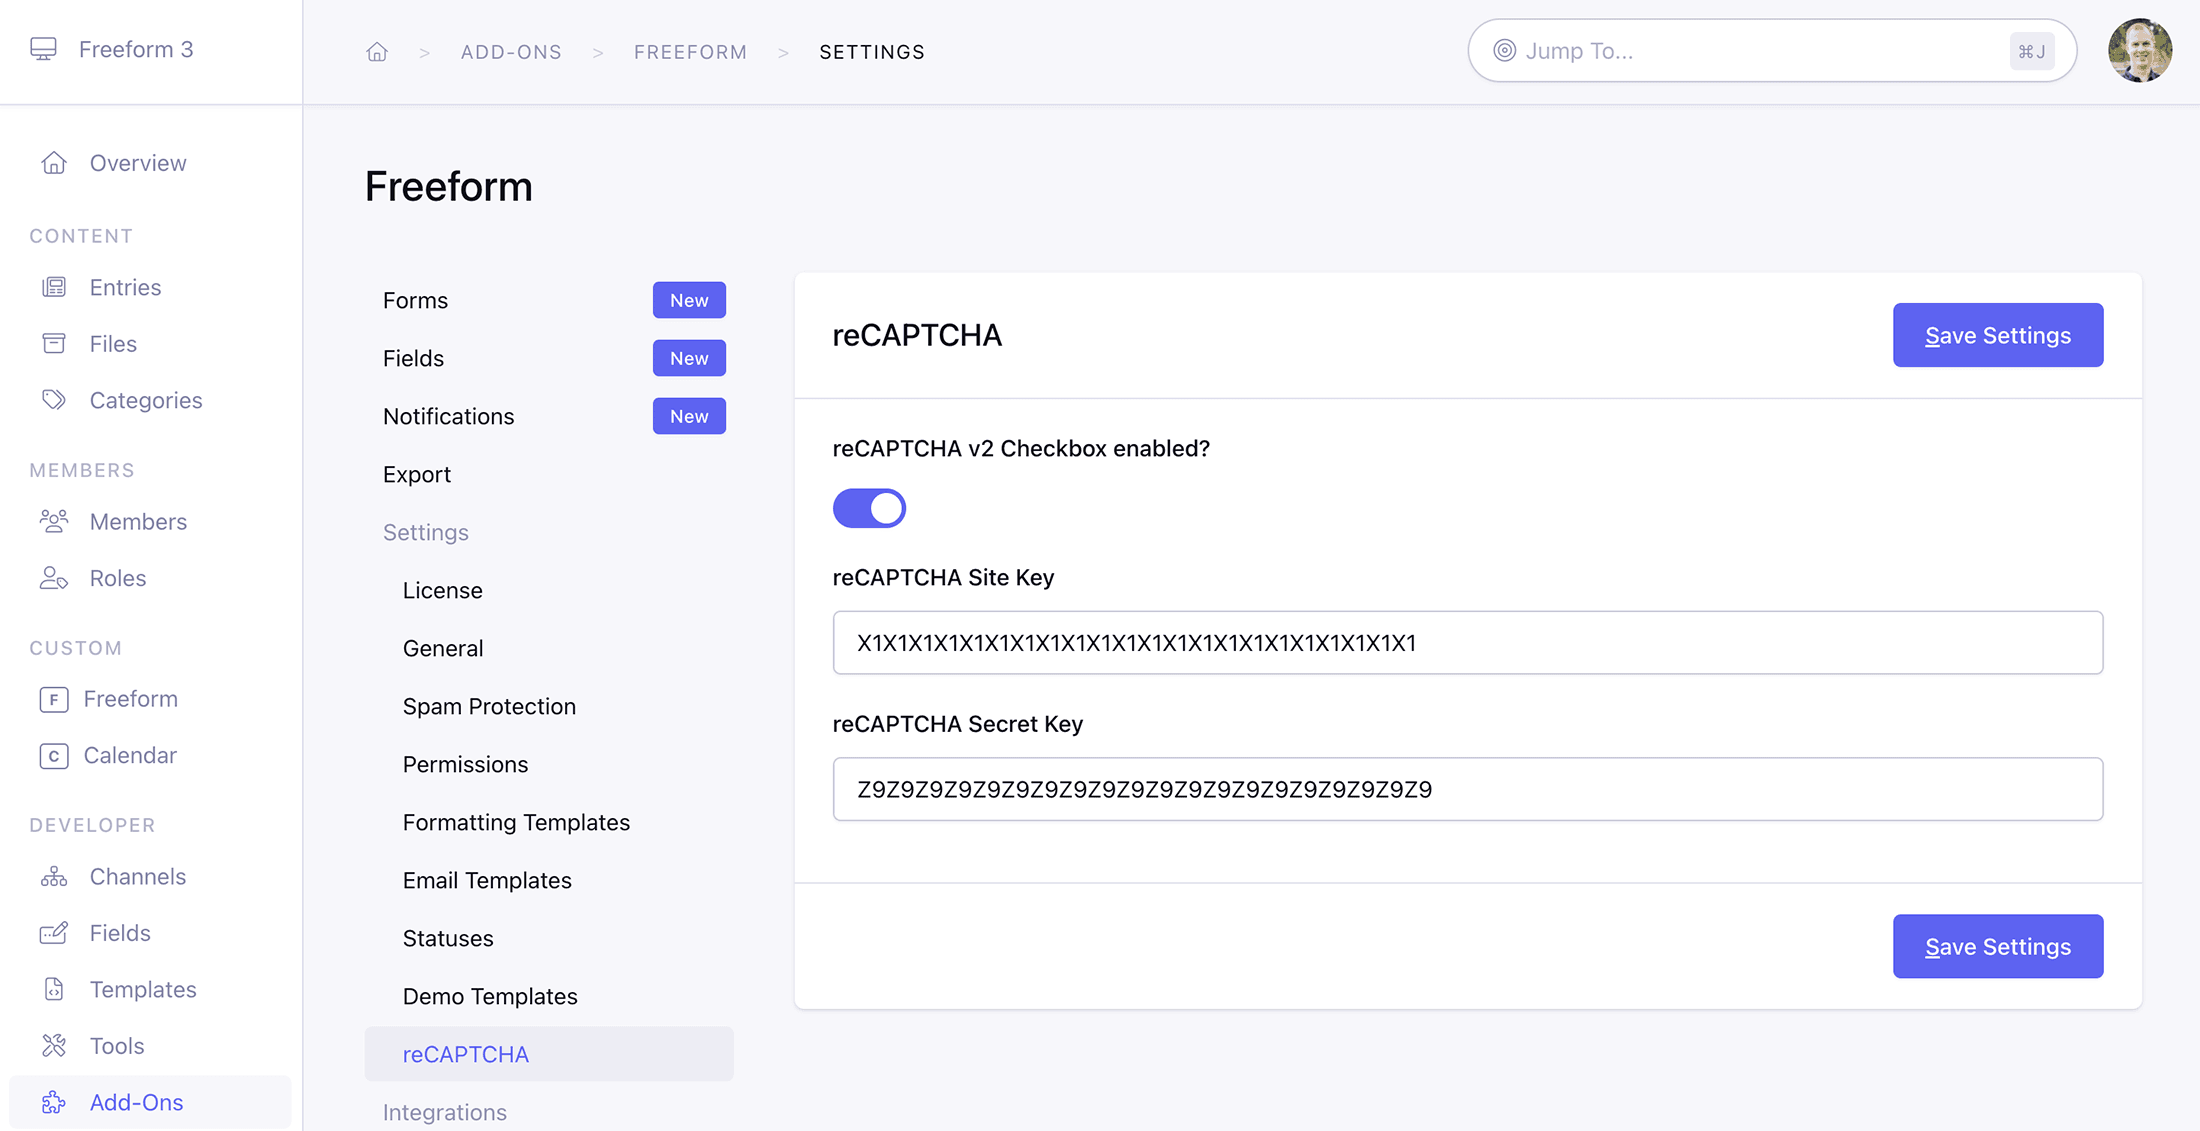
reCAPTCHA
Enable reCAPTCHA
Enable this setting and fill in the reCAPTCHA Site Key and Secret Key to enable reCAPTCHA v2 Checkbox for Freeform. Then, to add reCAPTCHA v2 Checkbox to your forms, open up and edit each form and drag over the reCAPTCHA special field anywhere you like into your form layout.
Visit Google reCAPTCHA site to register your site and get your Site Key and Secret Key.