Installing & Updating
Requirements
Solspace Calendar 2.x is compatible with EE3 with mostly the same minimum requirements as listed on the ExpressionEngine Requirements page:
- ExpressionEngine 3.5.x
- PHP 5.3.10 or newer
- MySQL 5.1 or newer
- Windows and macOS browsers:
- Chrome 21 or newer
- Firefox 28 or newer
- Safari 9.0 or newer
- Internet Explorer 11 or newer
- Microsoft Edge
Installing Instructions
- Unzip the download package:
- Select the EE version you're installing Calendar for (ee4 for EE 4.x/5.x or ee3 for EE 3.x).
- Within that EE version directory, copy the calendar folder into your sites ./system/user/addons/ directory.
- Within the themes folder of that EE version directory, copy the calendar folder into your site's ./themes/user/ directory.
- Go to the Add-Ons area (under Developer navigation tab), scroll to down to the Third Party Add-Ons section, and find Calendar in the list, and click Install.
- Setup and configuring:
- Before you start using Calendar, you’ll need to create Calendar field(s), calendars, and set some preferences in the Preferences area of the Control Panel.
- If you wish to install the demo templates, click on the Demo Templates navigation item inside the Control Panel area.
Updating Instructions
If you're upgrading from Calendar 1.x on ExpressionEngine 2.x, it's recommended that you upload the new Calendar files to your new ExpressionEngine 3.x site directory just before running the EE2 -> EE3 upgrade. Please see Calendar 1.x to 2.x Upgrade Guide before considering upgrading.
Calendar has its own Update Service built in, which means that every time there's an update available, an Updates Available nav item will show up in the Calendar add-on area of the EE control panel. You can then review the changelog there, or view it here.
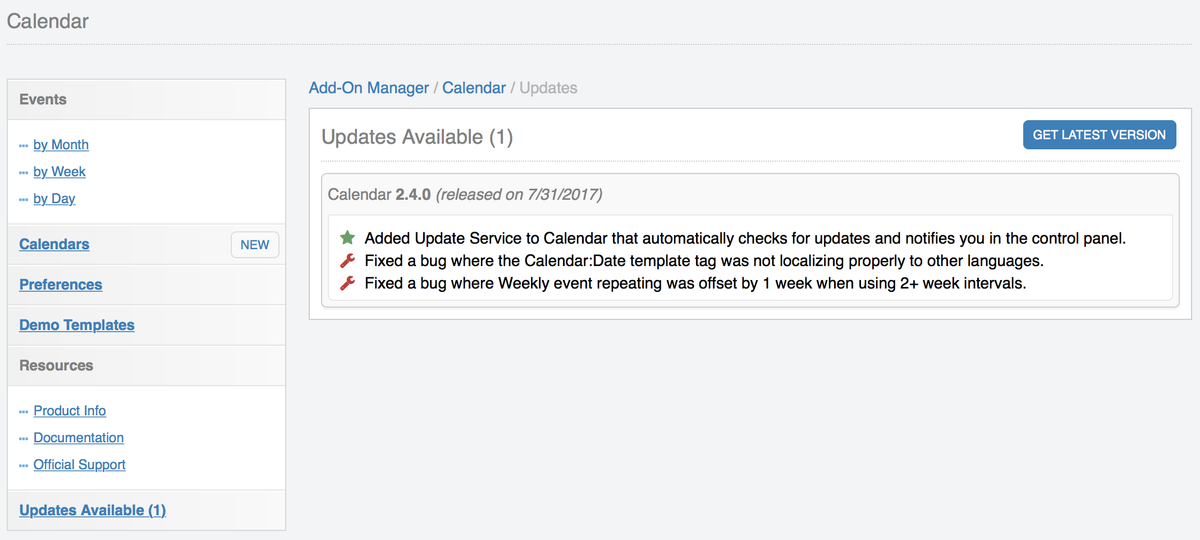
To download the update, simply click the Get Latest Version button, and you'll be taken to your account area on the Solspace site where you can log in and download the updated package for Calendar. Then follow the steps below:
- Within your EE site's ./system/user/addons/ and ./themes/user/ directories, delete the calendar folders.
- Unzip the download package:
- Select the EE version you're updating Calendar for (ee4 for EE 4.x/5.x or ee3 for EE 3.x).
- Within that EE version directory, copy the calendar folder into your sites ./system/user/addons/ directory.
- Within the themes folder of that EE version directory, copy the calendar folder into your site's ./themes/user/ directory.
- Go to the Add-Ons area (under Developer navigation tab), scroll to down to the Third Party Add-Ons section, and find Calendar in the list, and click the Update button.
- Upgrading from Calendar 1.x (if applicable):
- Go to the Migration page in the Calendar control panel, and run the Calendar 1.x Migration utility.
- Review the Calendar 1.x to 2.x Upgrade Guide and update your templates as necessary.
Quick Setup
Follow the steps below to quickly get Solspace Calendar setup in minutes.
- Customize and configure Solspace Calendar settings by visiting the Settings page (Developer > Add-Ons > Calendar > Settings).