


Custom Field Types New in 5.0+
With Freeform 5 comes the power of creating fully custom field types. The field type class is the one that holds all of the properties and their descriptors. You can now add a custom field type by listening to the field register event and attaching your field type to it.
Setup Guide
The creation of a custom field type in Freeform will require using a custom Craft module. This guide assumes you already have that knowledge. If not, please check out the guide we have.
User Guide:
View the guide on how to build a custom module.
The field type must implement FieldInterface. For convenience, you can extend the AbstractField class, which takes care of storing and displaying the ID, handle, etc. It also takes care of creating the label, handle, instructions, required and attributes properties that are readily available in the Freeform builder.
To create a field type which essentially does nothing except render in the front end, you would do this:
<?php

namespace modules\Fields;

use Solspace\Freeform\Attributes\Field\Type;
use Solspace\Freeform\Fields\AbstractField;

#[Type(
    name: 'Custom Field Name',
    typeShorthand: 'custom',

    // This is an SVG file of the icon of this field
    iconPath: __DIR__.'/custom-field.svg',

    // This is an EJS template that is going to preview the field in the Builder
    previewTemplatePath: __DIR__.'/custom-field.ejs',
)]
class CustomField extends AbstractField
{
    // Define the field type that can later be used to filter out these specific fields
    public function getType(): string
    {
        return 'custom';
    }

    protected function getInputHtml(): string
    {
        // Get the attributes accumulated from the Builder and Twig variables
        // Clone them because we'll be adding some on top
        // and we should not touch the original object
        $attributes = $this->getAttributes()->getInput()->clone();

        $attributes
            ->setIfEmpty('name', $this->getHandle())
            ->replace('type', 'custom-type')
            ->setIfEmpty('placeholder', 'This is my custom field')
            ->setIfEmpty('value', $this->getValue())
        ;

        return '<input'.$attributes.' />';

        // As an example, if there were no other attributes set to the field
        // it would render as
        // <input name="myCustomFieldHandle" type="custom-type" placeholder="This is my custom field" value="" />
    }
}
2
3
4
5
6
7
8
9
10
11
12
13
14
15
16
17
18
19
20
21
22
23
24
25
26
27
28
29
30
31
32
33
34
35
36
37
38
39
40
41
42
43
44
45
46
To register the newly created field type in our custom module or plugin, listen to the FieldTypesProvider::EVENT_REGISTER_FIELD_TYPES event.
<?php

namespace modules;

use modules\Fields\CustomField;
use Solspace\Freeform\Bundles\Fields\Types\FieldTypesProvider;
use Solspace\Freeform\Bundles\Fields\Types\RegisterFieldTypesEvent;
use yii\base\Event;

class Module extends \yii\base\Module
{
    public function init()
    {
        parent::init();

        Event::on(
            FieldTypesProvider::class,
            FieldTypesProvider::EVENT_REGISTER_FIELD_TYPES,
            function (RegisterFieldTypesEvent $event) {
                $event->addType(CustomField::class);
            }
        );
    }
}
2
3
4
5
6
7
8
9
10
11
12
13
14
15
16
17
18
19
20
21
22
23
24
Of course, you will want extra properties for your field to allow for some customization. Let's convert it to a Google Maps field, which will let you display an <iframe> with an address preselected.
Let's go ahead and change the field's naming to Display Address to better reflect what it does. Add a map icon and an EJS template file with the correct name (We will populate the EJS template later. For now, leave it empty).
We will need an input field for entering the API key from Google Maps, as well as a textarea field for entering the address we wish to display. For example's sake, we'll enter the API credentials in the field rather than make an integration that supports this.
So let's add an input for entering the API key of your Google Maps account and the textarea, too. We will also change the input render to render the <iframe> with the properties that we added.
<?php

namespace modules\Fields;

use Solspace\Freeform\Attributes\Field\Type;
use Solspace\Freeform\Fields\AbstractField;
use Solspace\Freeform\Attributes\Property\Validators\Required;

#[Type(
    name: 'Display Address',
    typeShorthand: 'displayAddress',
    iconPath: __DIR__.'/display-address-field.svg',
    previewTemplatePath: __DIR__.'/display-address-field.ejs',
)]
class DisplayAddressField extends AbstractField
{
    // Define the API key property
    // Set the input label
    // Add instructions to help understand what this is about
    // Add a placeholder for more clarity

    #[Required]
    #[Text(
        label: 'Google Maps API Key',
        instructions: 'Enter your Google Maps API key here',
        placeholder: 'AIzaSy*************************uPHMu8E',
    )]
    protected string $apiKey = '';

    // Define the Address property
    // Set it to TextArea type
    // the label will be generated automatically from the property name in this case
    // so we don't need to specify it

    #[TextArea(
        instructions: 'Enter the full address you would wish to display in the map box',
        placeholder: '123 Main St, Anytown, USA',
        rows: 3,
    )]
    protected string $address = '';

    public function getType(): string
    {
        return 'displayAddress';
    }

    protected function getInputHtml(): string
    {
        $attributes = $this->getAttributes()->getInput()->clone();

        $attributes
            ->set('width', 600)
            ->set('height', 450)
            ->set('style', 'border:0')
            ->set('loading', 'lazy')
            ->set('allowfullscreen', true)
            ->set('referrerpolicy', 'no-referrer-when-downgrade')
            ->set('src', 'https://www.google.com/maps/embed/v1/place?key=' . $this->apiKey . '&q=' . $this->address);

        return '<iframe' . $attributes . '></iframe>';
    }
}
2
3
4
5
6
7
8
9
10
11
12
13
14
15
16
17
18
19
20
21
22
23
24
25
26
27
28
29
30
31
32
33
34
35
36
37
38
39
40
41
42
43
44
45
46
47
48
49
50
51
52
53
54
55
56
57
58
59
60
61
62
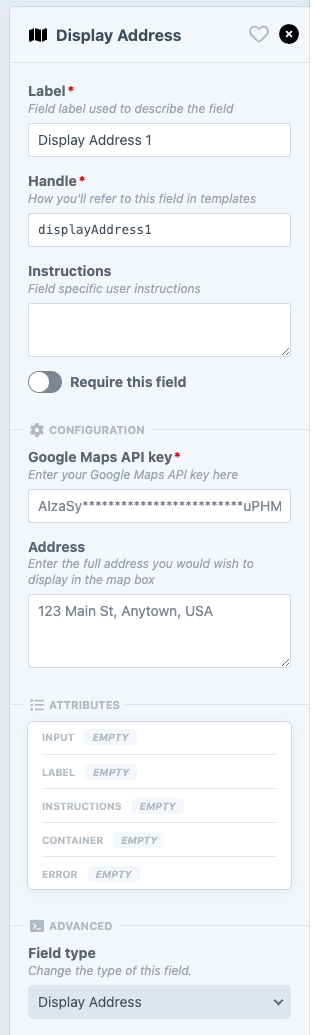
When we add the field to the form and click on it to reveal the Property Editor, we will see the standard controls for the field as well as our newly added Google Maps API Key and Address fields.
Let's enter our API key in there and specify an address that should be displayed. Then, let's open the form in the front end. We recommend using the Demo Templates to get started as quickly as possible.
For this example, we will use the Louvre Museum in France.
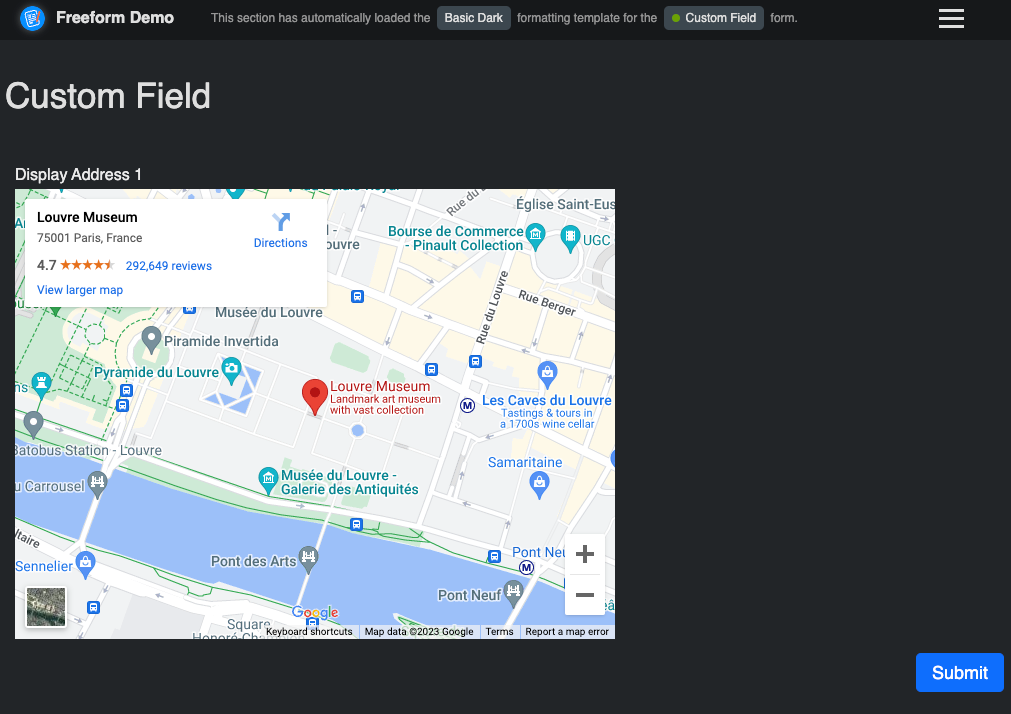
When we open up the front end, we will see the museum selected and located in the map box. The <iframe> uses our specified API key and address to display it.
Additionally, we would like to add more properties for customizing the <iframe>, such as width, height, etc. Many more property types are available for you to use, and different ways of interacting between the properties, transforming the values, etc. But for a simple example of how this works - this is it. The field does not collect any data in this example. For a more complex version, we would have an input area, which would let the user enter their own address, and we would update the map based on the address entered and would collect the address upon form submission.
Right now, our field in the builder shows nothing, but we would like to preview the map. Let's open up the display-address-field.ejs file and update the template.
<iframe
  width="100%"
  height="300"
  style="border: 0"
  loading="lazy"
  allowfullscreen
  src="https://www.google.com/maps/embed/v1/place?key=<%= apiKey %>&q=<%= address %>"
></iframe>
2
3
4
5
6
7
8
In the EJS templates, we get access to all of the current field's properties. We are interested in the apiKey and address properties.
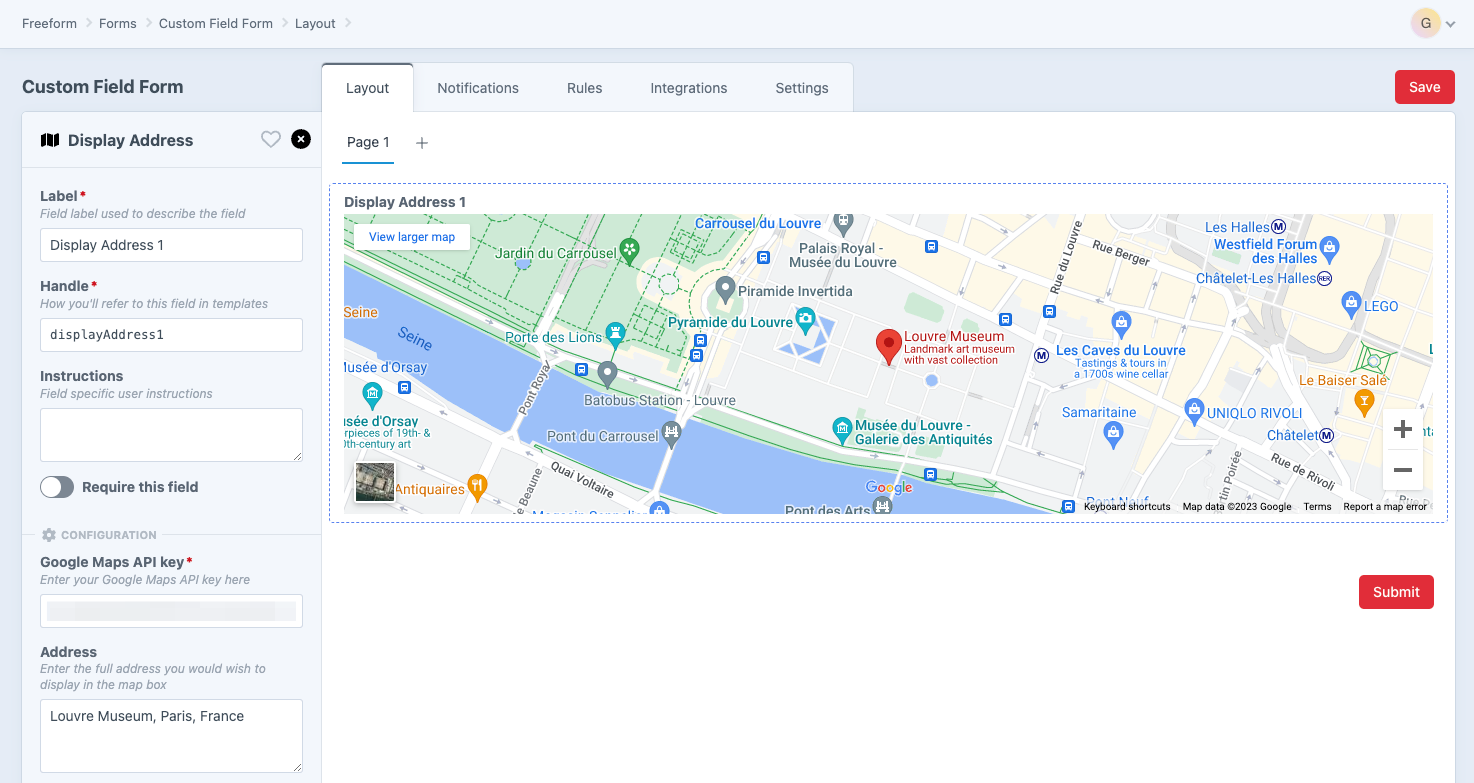
When we open the builder, we will see the map and the address we entered as a map element. We will see the map update whenever we change the address or API key. The field preview template re-renders each time a property value is changed, so keep that in mind.
Available Property Types
Currently, these are the available property types you can add to your fields in the builder:
#[Boolean]- display a Lightswitch field.#[Checkboxes]- display a list of checkboxes.#[CodeEditor]- display a code editor with specific syntax highlighting.#[ColorPicker]- display a color picker.#[DatePicker]- display a date picker.#[DynamicSelect]- display a dropdown that populates values from an endpoint, capable of also reading other properties to pass to the endpoint#[Field]- display a dropdown of all the currently available form fields. The fields displayed can be filtered by their implementations.#[FieldMapping]- display a mapping between anything and the currently available form fields. Used extensively in CRM integrations. Fetched via endpoint.#[Hidden]- having a property be available for other fields, but not displaying it in the builder.#[Integer]- numeric input field.#[MinMax]- a two-input combo for setting min and max numeric values.#[NotificationTemplate]- a dropdown letting you select a notification template.#[Recipients]- an input that lets the user specify one or more email recipients.#[Select]- a dropdown with predetermined values.#[TabularData]- lets the user edit tabular data, which is configured by the attribute.#[Text]- an input field.#[TextArea]- a textarea field.#[Wysiwyg]- a WYSIWYG editor.