Layout & Pages
Use Layout in the form builder to add fields and pages, then arrange the rows and columns of the form.
Fields
The left column lists all available fields and field types to use for the form. Simply drag and drop any of these fields into the field layout in the right column.
- Search - you can search in Favorite fields and other forms to reuse existing fields.
- Favorites - includes all fields that have been saved to favorites, allowing you to quickly set up forms with common fields.
- Field Types - displays all available field types for the form (will differ between editions of Freeform). These can then be added to forms indefinitely.
- Property Editor - when you click on any field in the Layout (right column), a property editor will slide into the left column.
- To close the property editor, it can be done one of three ways:
- Press the
esckey on your keyboard - Click the
xat the top right - Click anywhere else on the page
- Press the
- To close the property editor, it can be done one of three ways:
- Bulk Insert OptionsNew in 5.5+ - paste in large lists of options into a textarea for options-based field types such as Checkboxes and Dropdowns.
- Separator - specify a separator (if applicable) used to separate the option label and value when using custom values for option labels. Options are: Pipe, Comma, Semicolon, Arrow and Space.
- Append Values - whether the options you're adding should add to the existing options configured or replace them.
- Bulk Editor - enter bulk values separated by new lines. If using custom values for option labels, you can provide a label and a value separated by a separator. For example, if you used
|you would write:Label|valueand set the Separator setting to Pipe.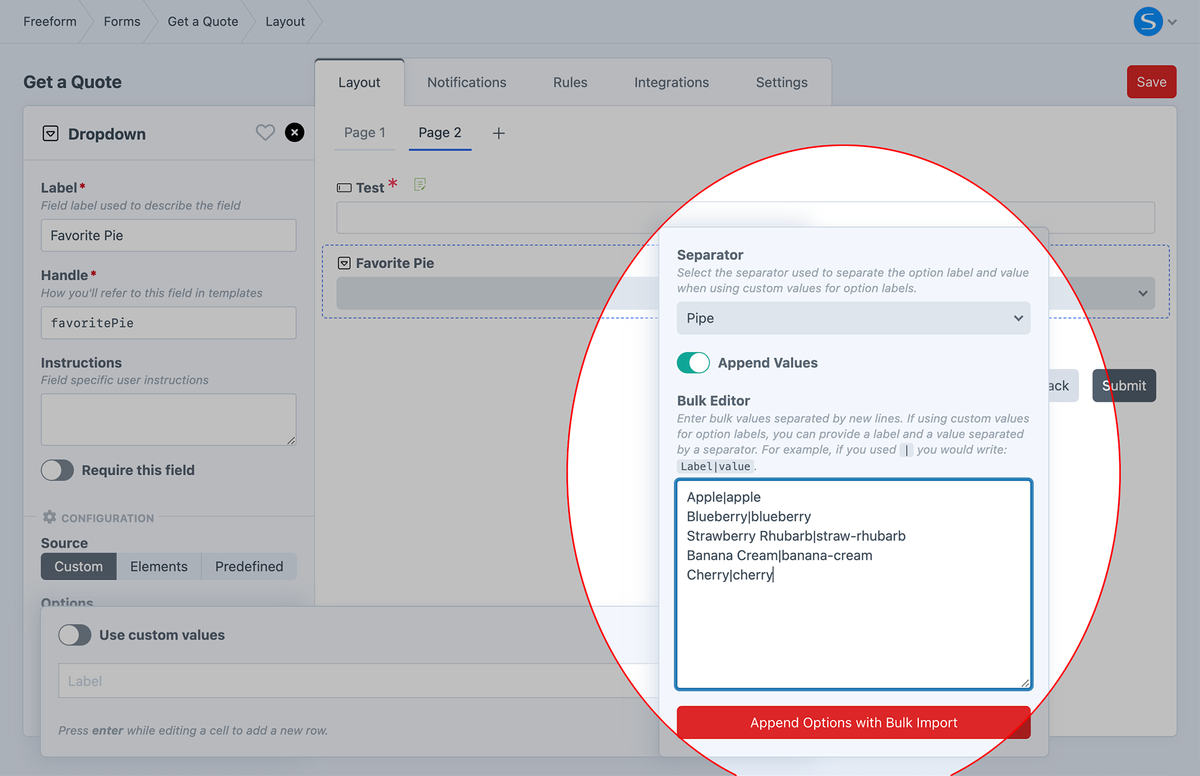
- Attributes Editor - add any attributes for the field and its container here, e.g.
data-my-attribute,id, etc.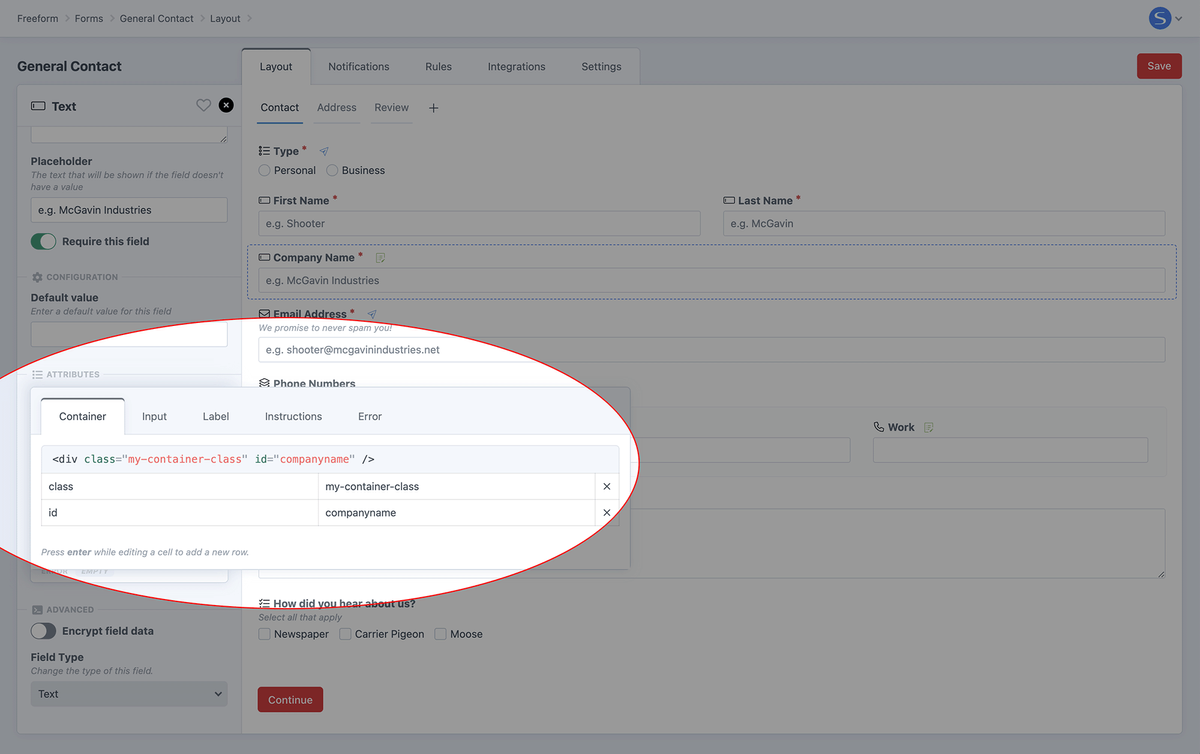
Content EditorsImproved in 5.17+
HTML, Rich Text, Cards, and Table fields show a preview in the property editor. Open the preview to edit the content in a native Craft slideout with more room to work. Choose Finish & Close to keep your changes in the form builder, or Cancel to discard the changes made during that editing session. Save the form to persist your changes.
The bulk options editor also opens in a slideout, where you can prepare labels and values before applying them to the field.
Layout Preview
The right column is where you position the form fields for the form. To see the saved form rendered with its formatting template, use the separate Preview tab.
- Page Tabs - if you need to build a multi-page form, you can add and rename page tabs here.
- Pages can be renamed, re-arranged, and deleted.
- If you wish to move a field from one page to another, you can drag and drop the field onto the page tab of the page it should be moved to.
- Preview - this is where you will actively see a layout preview of what your form will look like (roughly - ultimately the form styling and appearance is up to your formatting template).
- Fields can be dragged and dropped from the left column anywhere into the Layout (right column).
- Freeform will automatically build rows and columns when you insert and rearrange fields.
- To configure fields, simply click on them and the property editor will slide into the left column.
- To remove a field from the layout, hover over the field and click the delete icon (trash) to the right.
- To duplicate a field in the form's layout, hover over the field and click the clone icon (pages) to the right. New in 5.14+
Undo & RedoNew in 5.17+
Use the Undo and Redo buttons beside Save to step backward or forward through changes to your form's layout, fields, settings, rules, notifications, and integrations.
- Undo:
⌘Zon Mac orCtrl+Zon Windows. - Redo:
⌘Shift+Zon Mac orCtrl+Shift+Z/Ctrl+Yon Windows.
While typing in an input, these shortcuts use the input's normal undo/redo behavior. Builder history clears after successfully saving or reloading the form.

Multi-Page FormsLitePro
Multi-page forms submit each page through POST. Use the page tabs above the layout to organize the form:
Add a page tab and give it a name. Pages can also be renamed or deleted from the layout.
Drag the page tabs to change their order.
To move a field to another page, drag it onto that page's tab. It appears at the top of the destination page; drag it into its final position there.
Important Notes
- Each page is submitted through
POST. - There is no unique URI segment per page at this time.
- Users cannot jump ahead to different pages, only forward and backward (if enabled) 1 page.
- Multi-page forms work with the built-in AJAX feature.
- Editing existing submissions via the front end in multi-page AJAX forms will currently not work correctly.
- To let users stop and return later, use Save & Continue Later. Without it, progress depends on the active form context. Legacy session or database context can expire; see Freeform Session Context.
- If an earlier page contains file upload field(s), files will actually be uploaded before the form is officially submitted.
- Unfinalized uploaded files are eligible for cleanup after 3 hours by default. This is controlled by Time to Wait Before Purging Assets, independently of the form context.
- If you require a longer period of time, we recommend using the File Upload Drag & Drop field and the Save & Continue Later feature.
Manual Submit Buttons in Multi-page Forms
When manually building submit buttons in multi-page forms, please refer to the Submit buttons guide for available options.