Connecting Integrations
Use the form's Integrations tab to enable connections and map fields for that form. Only connections already configured in Freeform Settings appear here.
Enable an Integration for a Form
Configure and save the connection in Freeform → Settings → Integrations. See the integration directory for service-specific instructions.
Open the form's Integrations tab and select the configured connection in the left column.
Turn on Use integration for this form, then configure the available settings, field mappings, and conditions in the right column. Save the form.
Captchas
Enable the configured reCAPTCHA, hCaptcha, or Cloudflare Turnstile connection for the form, then review its available settings.
Please see the Spam Protection documentation guide for more information about this feature.
CRM & Email MarketingPro
Select the configured connection and enable it for the form using the steps above. Available settings and field mappings differ between integrations.
If a previously mapped field has been deleted, its dropdown will be yellow and display Mapped field no longer exists. Select another field to restore the mapping, or choose Do not map this field to clear it.
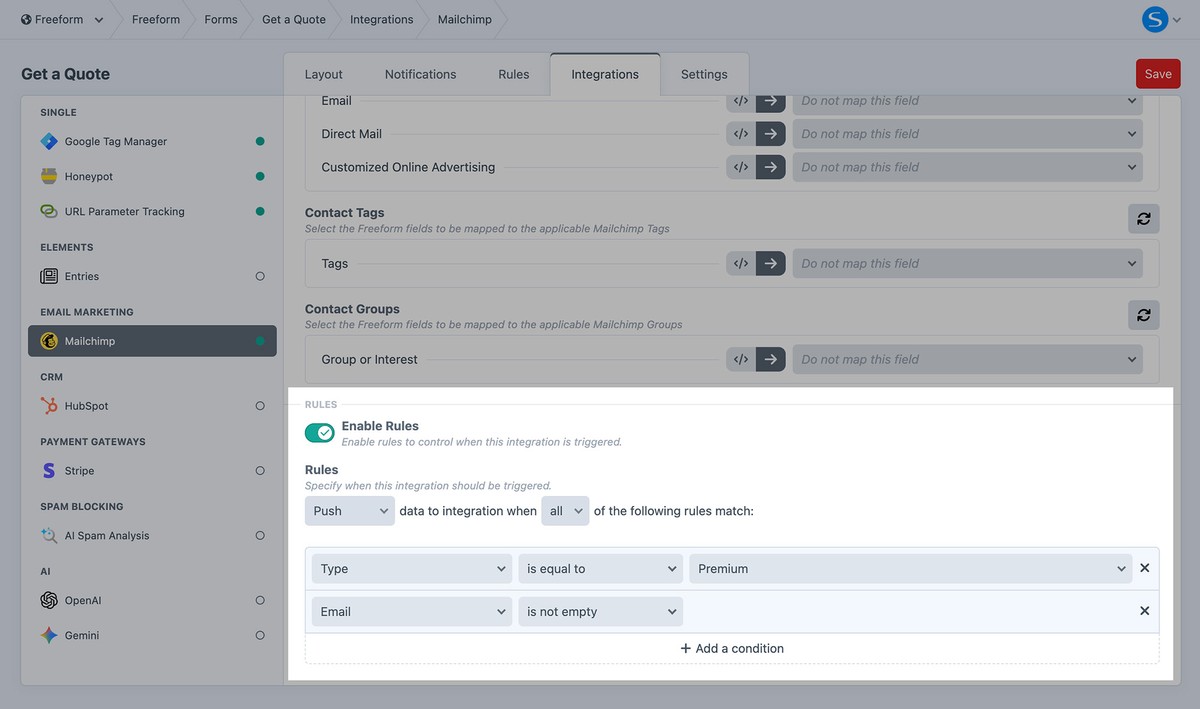
Conditional RulesNew in 5.12+
Add conditional logic to your CRM and Email Marketing integrations to control when submission data is sent. Create rules based on other field values (e.g., send only if Subscribe is checked or if Country is US).
PaymentsPro
If the Stripe Payments integration is available, click on it in the left column. Once loaded in the right column, toggle the Use integration for this form switch ON and proceed to configuring settings and field mapping as necessary. You will also need to add a Stripe Payments special field to the form layout.
See the Stripe Payments guide for complete setup.
Mollie is also available. It redirects the submitter to a Mollie-hosted payment page and does not require a Mollie field in the form layout.
ElementsPro
This feature allows you to connect and map Freeform submission data to other Craft Elements such as Craft Entries and Craft Users. The possibilities are endless when you consider that it essentially allows you to easily create complex user registration forms or accept guest submitted content that maps to Craft entries for further management by site admins for publishing... or whatever else you can dream up!
Select the configured Element connection and enable it for the form using the steps above, then configure its settings and field mappings.
Please see the Elements documentation for more information about this feature.
Conditional RulesNew in 5.12+
Add conditional logic to your Element integrations to control when submission data is sent. Create rules based on other field values (e.g., send only if Subscribe is checked or if Country is US).
Google Tag ManagerLitePro
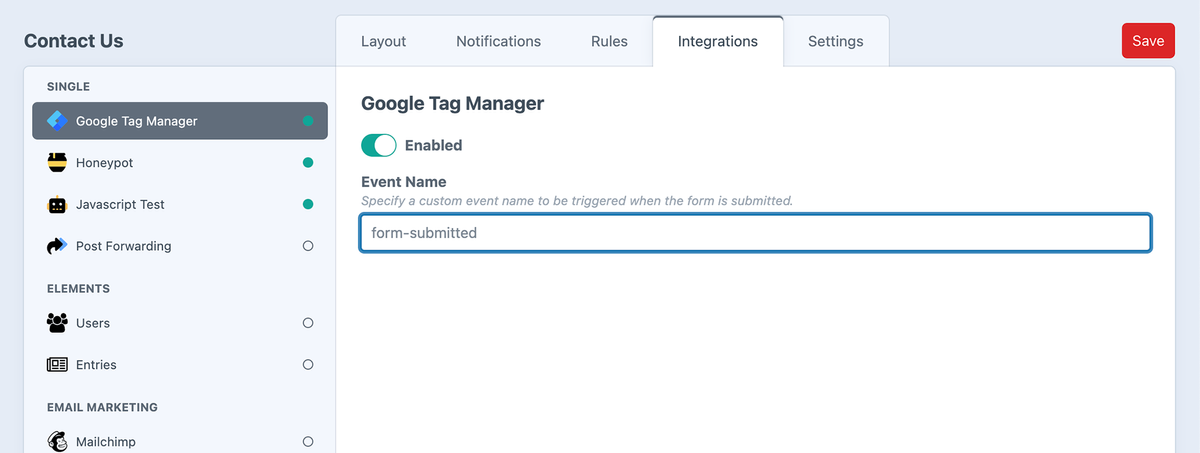
This allows you to enable Google Tag Manager to push successful form submission events to the data layer (when AJAX is enabled).
- Event Name - specify a custom event name that you wish to assign to a successful form submission.
- GTM Account ID - add this to the main integration settings if you want Google Tag Manager scripts added to your page by Freeform. Leave blank if you are adding your own GTM scripts.
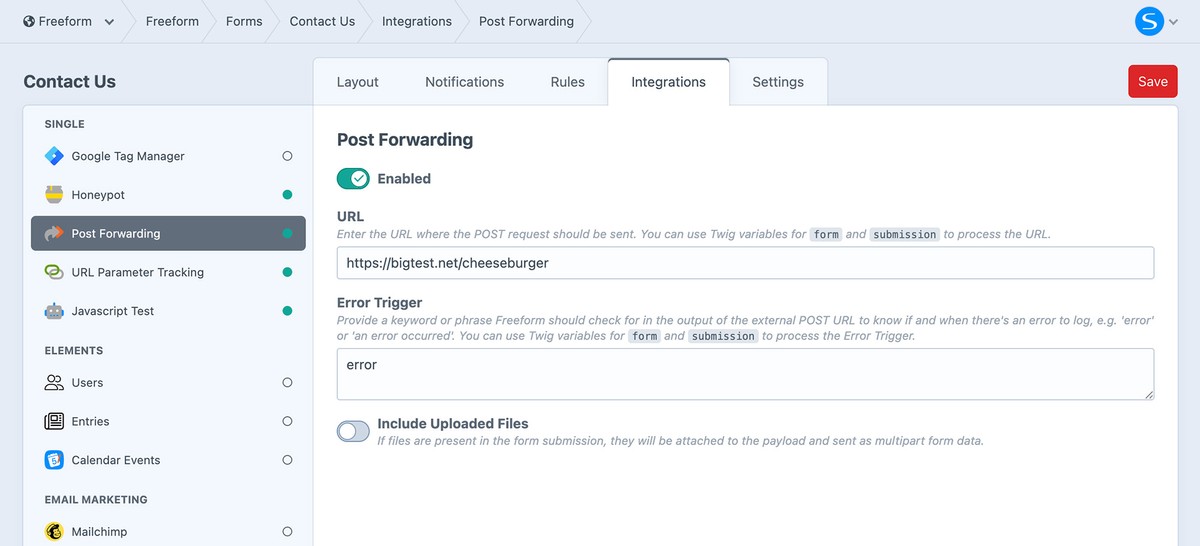
POST ForwardingPro
This allows your forms to automatically submit an extra POST to pass off submission data to an external API URL upon successful submit and validation of a form. This option is available for simpler and/or limited integrations as an alternative to our traditional Email Marketing and CRM integrations.
- URL - if you need to have the POST data of this form submitted to an external API, provide that custom URL here.
- Error Trigger - provide a keyword or phrase Freeform should check for in the output of the external POST URL to know if and when there's an error to log, e.g.
errororan error occurred. - Include Uploaded Files - if files are present in the form submission, they will be attached to the payload and sent as multipart form data.
Please see the POST Forwarding documentation for more information about this feature.