Guided SetupNew in 5.17.2+
Guided setup walks you through creating a form without an AI integration. Choose a purpose, adjust the suggested fields, and configure the form before saving it. The resulting form uses the same builder and fields as other Freeform forms.
Open Freeform → Forms → Add new form → Guided setup. If your site only enables guided setup, Add new form opens it directly. Administrators can choose the available creation methods in General Settings.
Setup Steps
| Step | What to configure |
|---|---|
| Purpose | Choose a starting point such as Contact, Quote request, Application, Event registration, or Feedback. Other provides a flexible starting point. |
| Details | Set the form name, description, default submission status, and color. Expand Advanced to review the form handle and, when site-aware forms are enabled, the sites assigned to the form. |
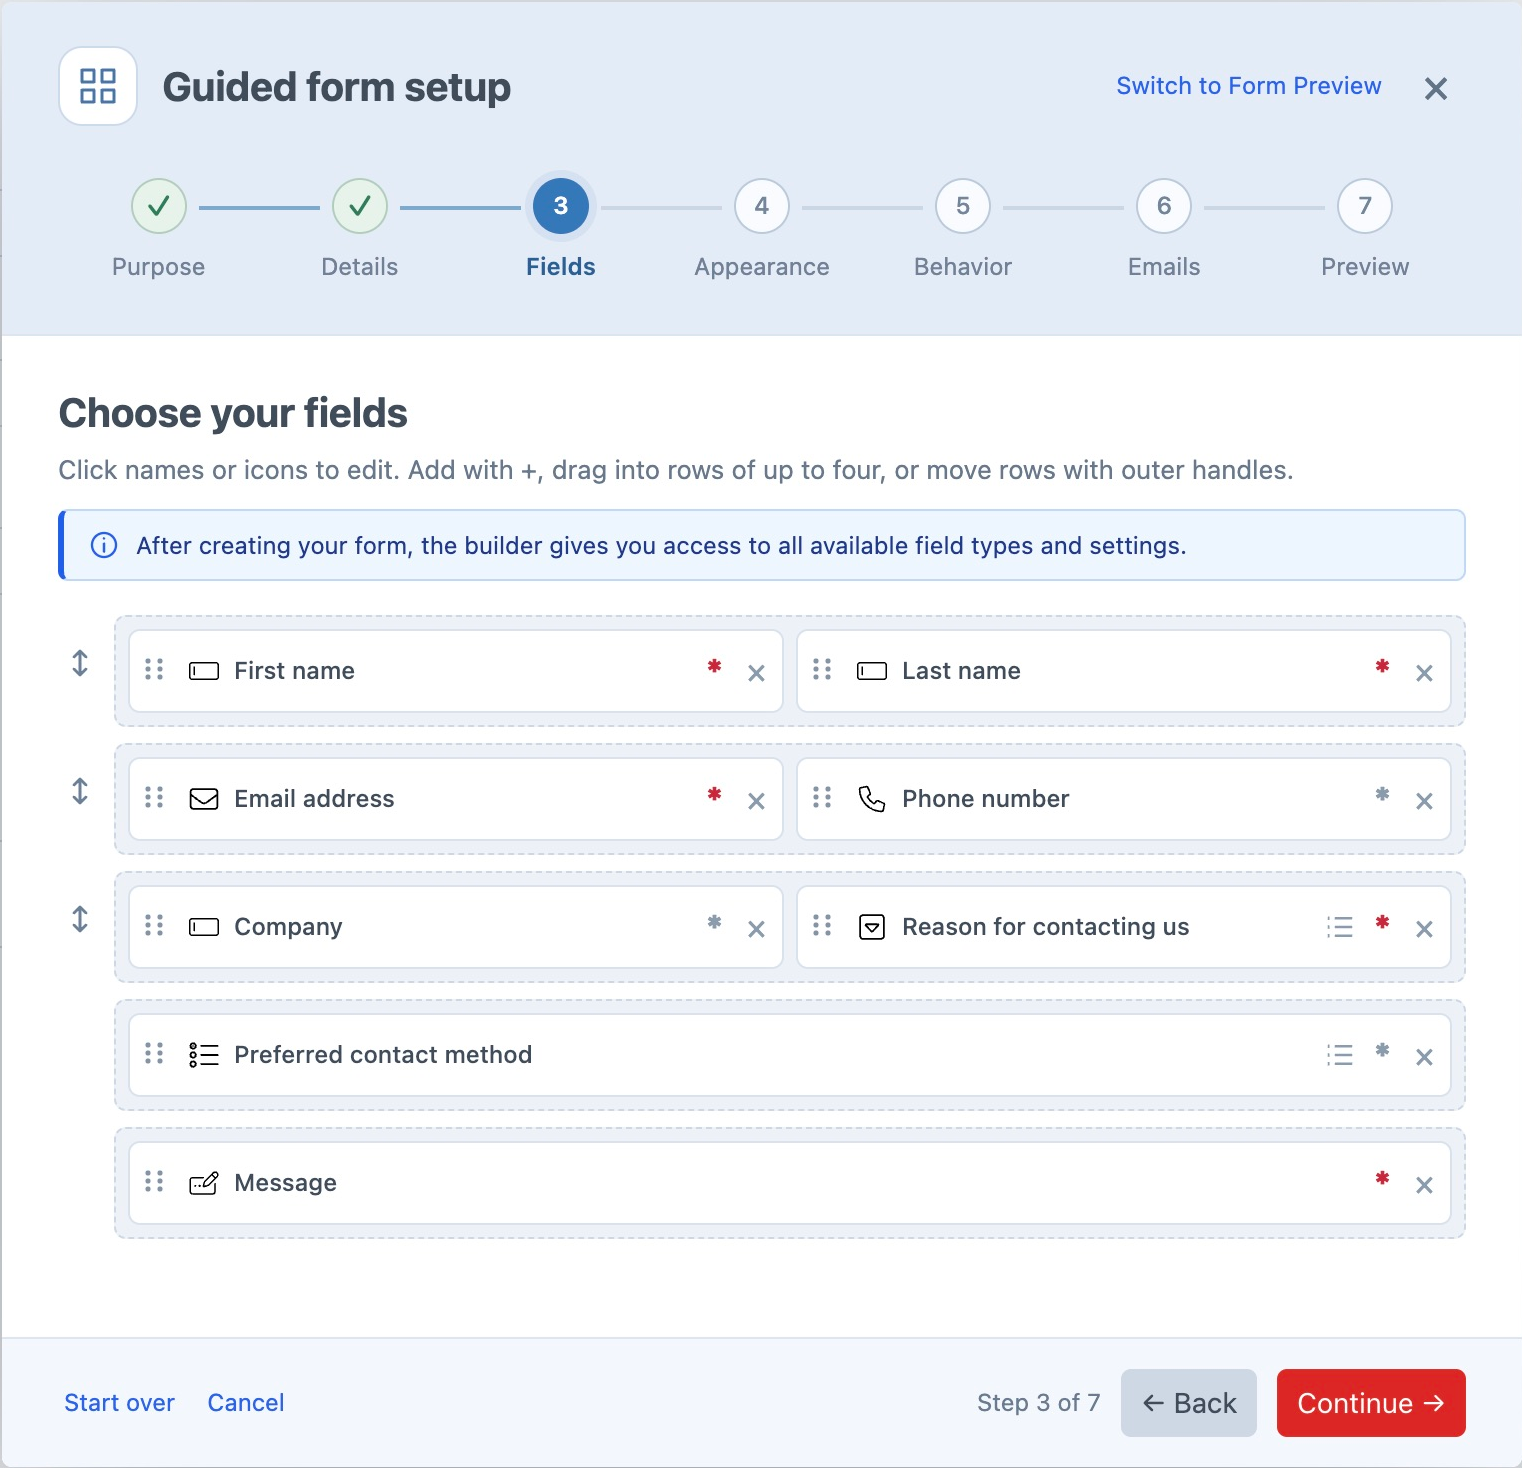
| Fields | Rename fields, change their types, mark them required, edit choices, and arrange rows. Add or remove fields to suit the form. |
| Appearance | Choose the formatting template used when the form is embedded on your site. |
| Behavior | Set what happens after submission, success and error messages, and whether submissions are stored in Freeform. |
| Emails | Optionally notify your team or send the visitor a confirmation. |
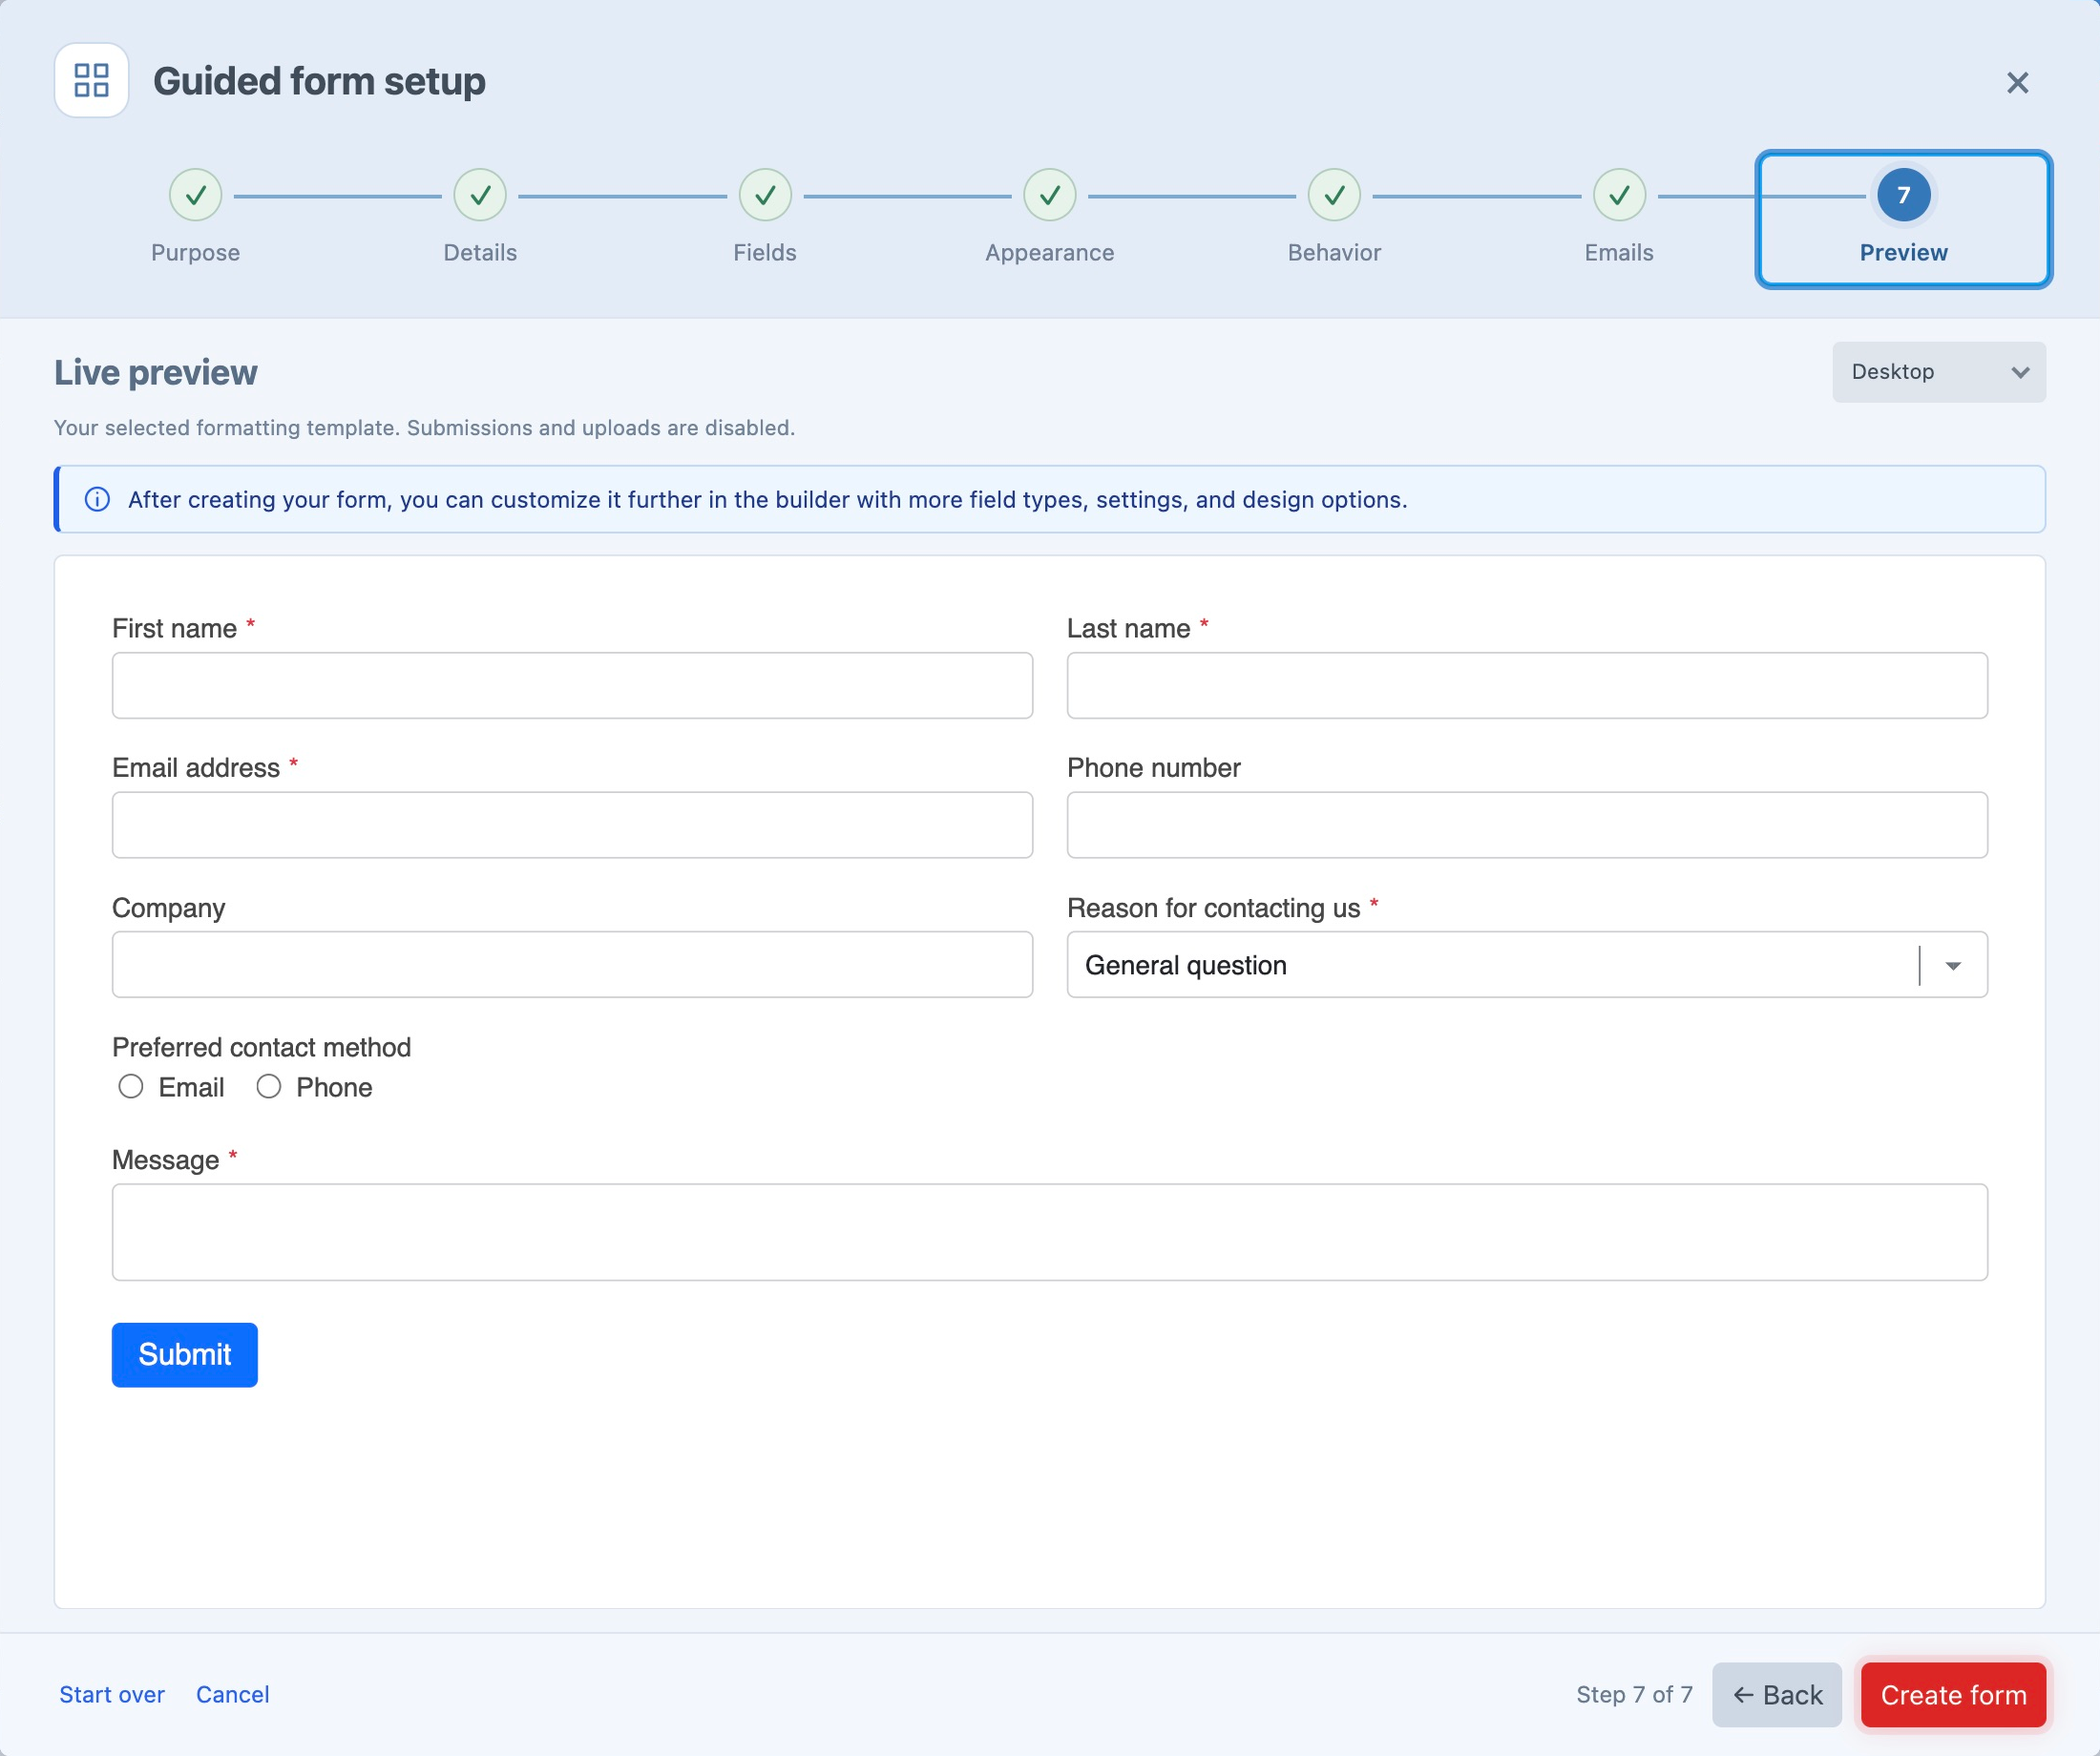
| Preview | Check the rendered form at Desktop, Tablet, or Phone size before choosing Create form. |
Use Continue and Back to move between steps. Completed steps can also be reopened from the step bar. Where available, Switch to Form Preview lets you inspect the form while configuring it. Preview submissions and uploads are disabled.
Nothing is saved until you choose Create form. Cancel leaves setup without creating a form; Start over resets the draft.
Adjusting Fields
The selected purpose supplies an editable set of suggested fields. In Fields:
- Click a field name to rename it, or its type icon to choose another available field type.
- Toggle the required control beside a field to change whether visitors must complete it.
- Open Edit choices on a choice field and enter one choice per line.
- Use the + controls to insert another field. Drag fields together to make rows of up to four columns, or use the outer row handles to move a whole row.
- For keyboard reordering, focus a field's move handle and use Up/Down to reorder or Left/Right to join an adjacent row. Shift+Up moves it into its own row.
The available field types and settings follow your Freeform edition and the user's Limited Users restrictions. File fields also require an available upload location. After creation, the full Layout editor provides additional field types and settings.
Email Notifications
Enable Notify my team and provide the recipient address, or enable Send the visitor a confirmation and select an Email field from the form. A visitor confirmation requires an Email field.
Depending on your permissions and notification template settings, you can create a new template or select an existing one. New templates use the site's default sender settings and include the submitted fields. Template creation follows the configured global or form-specific scope and storage settings.
No email is sent during setup. After creation, review the templates and recipients in Notifications, then submit the actual embedded form to test delivery.
Reviewing the Preview
The final step renders the selected formatting template. Use the device selector to check the layout before creating the form.
After Creation
Create form saves the form and opens it in the builder. Review any further settings, conditional rules, or integrations, then use Preview and the Embed Form guidance to prepare it for your site.