


Form Builder
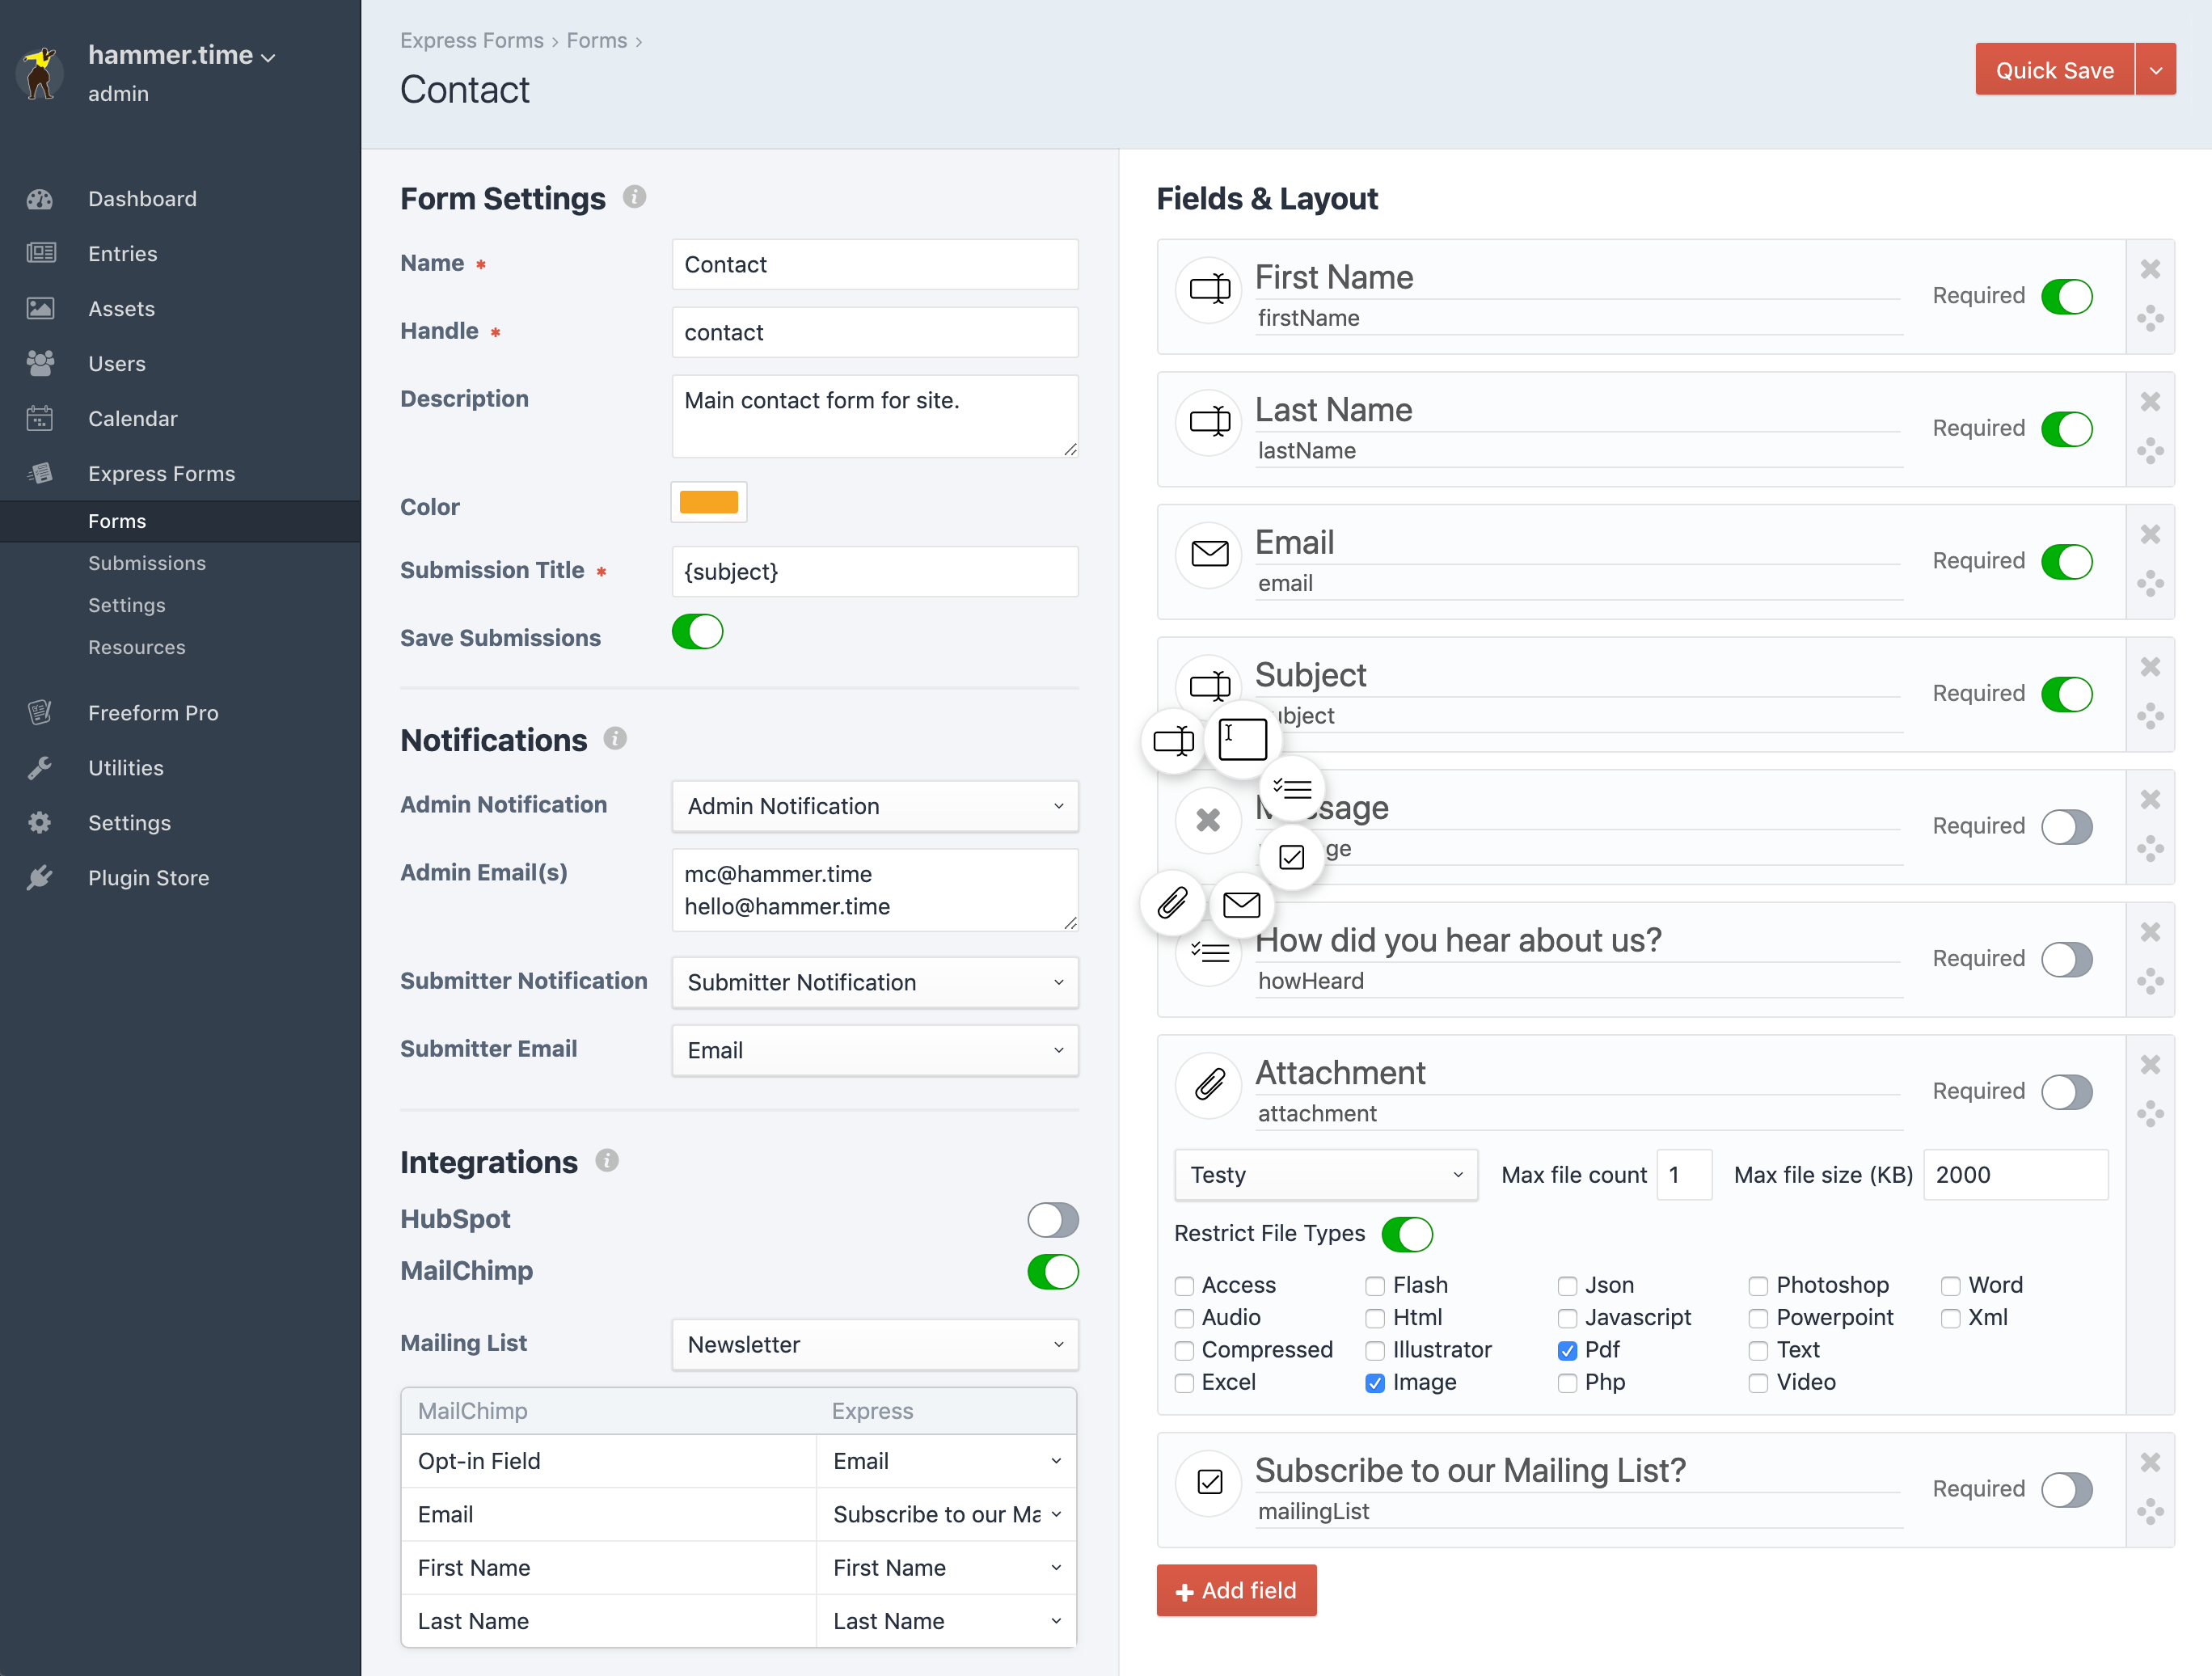
The heart of Express Forms is its intuitive Form Builder area, where everything is at your fingertips. Its simplistic approach is designed to stay out of your way but still be fun and intuitive to use. Everything you setup for your forms is done here. Email Notification Templates are managed elsewhere, but they are applied to the form here.
TIP
For a much more powerful form building tool, complete with multi-page forms and built-in convenience features, you may want to consider Freeform.
The Form Builder is split up into 2 columns containing 4 different sections:
Settings (left)
Form Settings
This area is where you set the basic settings for your form:
- Form Name - the name you see for form in the control panel, and also available for use in templates and email notification templates.
- Form Handle - used for calling the form inside a template.
- Form Description - an internal note explaining the purpose of the form, and also available for use in templates.
- Form Color - used for styling form card in CP as well as differentiating the form's submissions in graphs like widgets, etc. Also available for use in templates.
- Submission Title - the generated title for the submission, similar to Craft Entries, etc.
- Populate with field names like
{firstName} {lastName}or{{ dateCreated|date('l, F j, Y \\a\\t g:ia') }}, etc.
- Populate with field names like
- Save Submissions - specify if you want save submissions for this form to the database or not.
Email Notifications
This area allows you to manage email notifications for your form. See Email Notifications documentation for more information about creating and setting up email notification templates.
- Admin Notification - select the email notification template that should be used for Admin email notifications.
- Admin Email(s) - specify admin email address(es) to be notified. Separate multiples by line breaks only.
- Submitter Notification - select the email notification template that should be used for sending an email notification to the submitter of the form.
- Submitter Email - select the Email field in your form that will contain the email address of the submitter.
API Integrations Pro
With Express Forms Pro edition, you'll see options to connect your form to first party API integrations when you have at least 1 setup. See API Integrations documentation for more information.
- Enable the toggle next to the available integration.
- For mailing list integrations, you'll see a Mailing List field to select which mailing list should be used.
- You'll also see a field mapping table. Map in your Express Forms fields to the mailing list integration fields as necessary:
- Opt-in Field needs to target the checkbox or hidden field you wish to use.
- Email needs to target the Email field you wish to use.
- All other standard and custom mailing list fields should be available, but check with each individual one for limitations.
- You'll also see a field mapping table. Map in your Express Forms fields to the mailing list integration fields as necessary:
- For CRM integrations, you'll see a Resource field to select the resource type to map to (if applicable), as well as a field mapping table(s). Map in your Express Forms fields to the CRM integration fields as necessary.
Layout (right)
The layout column is where you add, position and configure fields for your form. Fields are displayed vertically as "cards". New forms will include a first field card ready to be defined. To add additional fields, click on the big Add Field button below. Fields can be drag and dropped to be reordered. Reordering of fields helps if you wish to automate form rendering and/or field values inside email notification templates.
Field cards display the following:
- Field type:
- Text (default)
- Email - text input that includes email validation and can be used for email notifications.
- Textarea
- Checkbox (single)
- Hidden
- Options - accounts for checkboxes, radios, select and multi-select.
- File
- Upload Location - select an Asset volume.
- Restrict allowed file types?
- When checked, shows a list of available file types to restrict uploading to.
- Max File Size - specify the default maximum file size, in KB. Defaults to empty, respecting Craft system settings.
- Limit - total number of files allowed, default
1.
- Label - the label of the field
- Handle - the handle for the field
- Required - toggle on to have field validated to contain data